
Insulating Old Wooden Houses in Cold Climates
You did everything right. You insulated the attic on your 1920s Colonial, maybe blew some cellulose in the walls, and the house is still cold in January while the back bedroom feels like a meat locker. Or you haven't touched it at all, because your neighbor insulated their old farmhouse and ended up with mold in the walls two winters later, and now you're spooked. Both of those are common, and neither one means your house is a lost cause.
Old wood-framed houses in Connecticut are their own animal. They were built to breathe, not to seal, and a Zone 5A winter finds every gap and punishes every shortcut. Insulating one is absolutely worth doing, but it comes with a specific set of challenges a generic "just add insulation" article never warns you about. Here's what actually makes these houses hard to insulate, how to spot which problems yours has, and where the line sits between a weekend job and a call to a pro.
Why Old Wooden Houses Fight Insulation
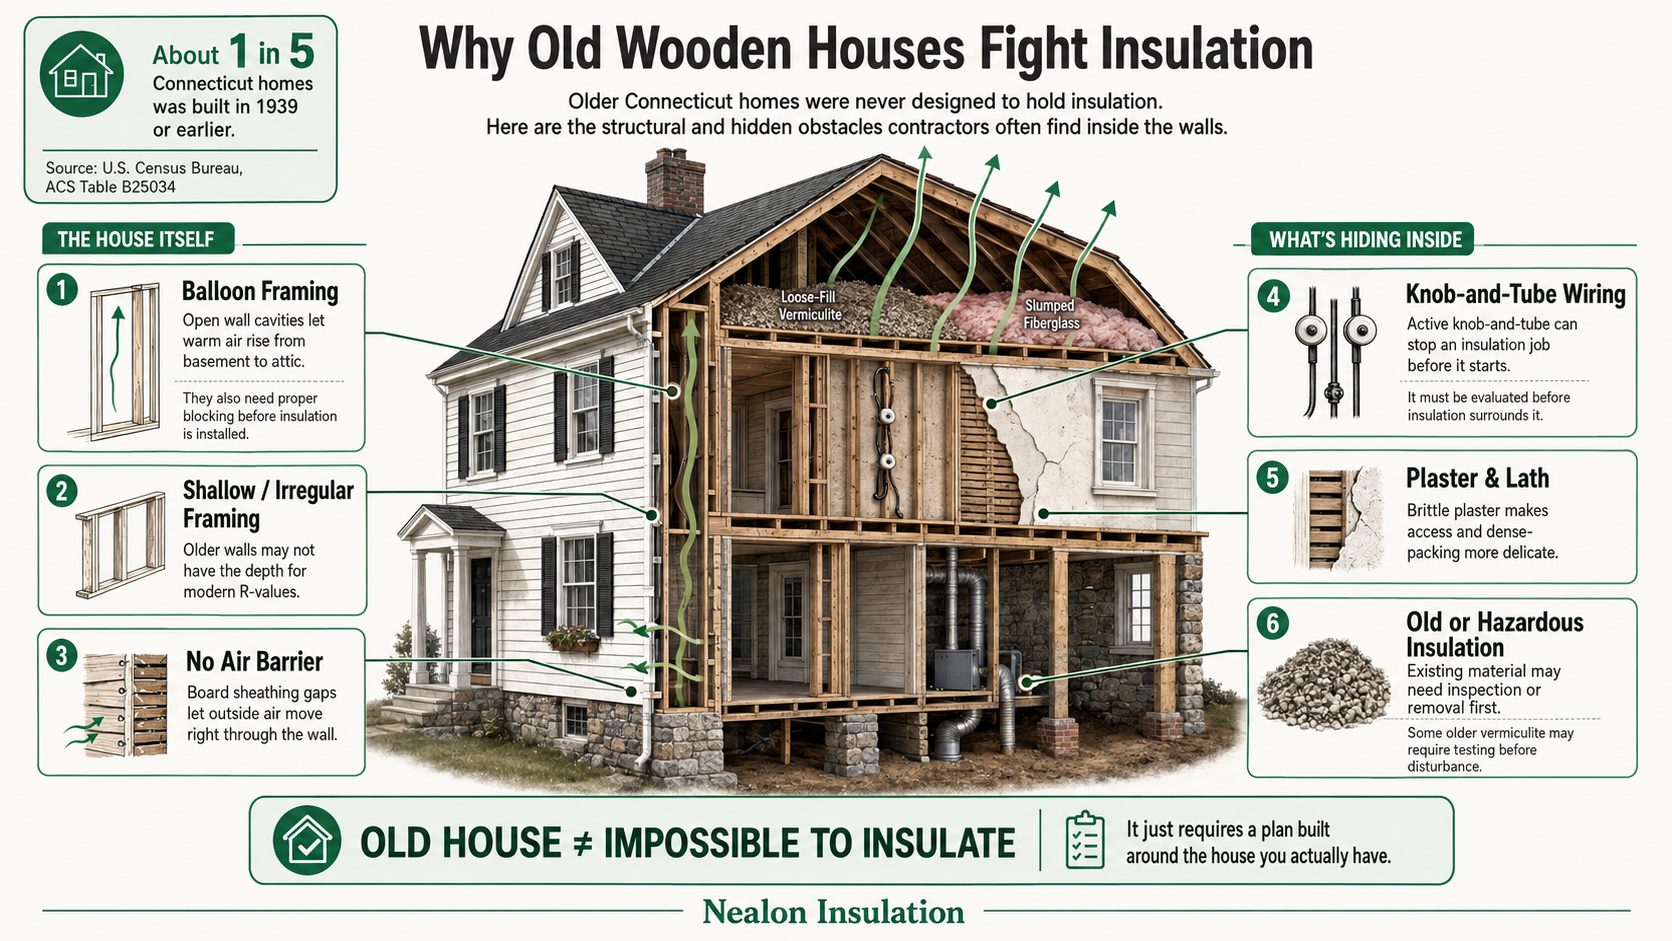
Old wooden houses resist insulation because they were never designed to hold it. Roughly one in five Connecticut homes was built in 1939 or earlier, and in the older river-valley and shoreline towns it climbs closer to one in four, compared with about one in nine homes nationwide (U.S. Census, ACS Table B25034). Connecticut also had no statewide building code until 1971, so a house older than that was almost never framed with insulation in mind. What you inherit instead is open framing cavities, no real air barrier, wiring run in ways no modern electrician would sign off on, and wall finishes that don't take kindly to a drill. Every one of those is a challenge you take on the day you decide to make the place comfortable.
The unique challenges of insulating homes along the Connecticut shoreline
The Structural Challenges
The way an old wooden house is framed creates the first round of problems.
Balloon Framing and Open Wall Cavities
Balloon framing runs the wall studs in one continuous piece from the sill plate all the way to the roofline, which leaves the wall cavities open from basement to attic. That open channel behaves like a chimney, pulling heated air straight up and out through the top of the house, the same stack effect that leaves your first floor cold and your attic strangely warm. It also means loose insulation blown into those bays can slump toward the bottom over time, leaving the top of the wall bare. And because balloon-framed cavities have no fire-blocking, they have to be sealed off before anyone packs them with insulation.
Shallow and Irregular Framing
Old framing rarely gives you the cavity depth a modern R-value needs. True-dimension lumber and hand-framed walls leave shallow or uneven cavities, so a wall you'd like at R-21 might physically hold only R-13 to R-15 of material. That's no reason to skip the job, but the achievable R-value in an old wall often falls below the R-13 to R-21 target for new Connecticut walls, and the plan has to account for the difference honestly.
Board Sheathing and No Air Barrier
Most old wooden houses have board sheathing, individual planks nailed across the studs, with gaps between every board and no house wrap behind the siding. Nothing stops outside air from washing straight through the wall. Insulation slows heat loss, but without air sealing, wind pushes right past it and steals most of the benefit. On an old house, air sealing isn't an upgrade, it's the thing that makes the insulation work at all.
How to insulate an old house without tearing down walls
The Hidden Obstacles Inside the Walls
Once you open up an old wall, the surprises start.
Knob-and-Tube Wiring
Knob-and-tube wiring is the single biggest reason an old-house insulation job stalls. This early wiring system was designed to shed its heat into open air, so burying it in insulation is a genuine fire risk, and most codes and insurers won't allow it. If your house still has active knob-and-tube in the walls or attic, it has to be evaluated and usually replaced before any insulation goes in. That's an electrician's job, not a DIY afternoon, and it's the first thing a good insulation contractor checks for.
Plaster and Lath
Plaster and lath walls turn access into the problem. To dense-pack an existing wall, a crew drills a row of holes and blows insulation into each cavity, but plaster is brittle and cracks if you look at it wrong, and the lath behind it eats into the cavity depth. The work is very doable, older homes are our specialty, but it takes patience, the right hole pattern, and clean patching afterward. Plaster-era homes also bring lead paint into the picture, which is why the drilling should be done by EPA Lead-Safe certified crews.
Old or Hazardous Existing Insulation
Old houses often already have something in the walls or attic, and not always something good. It might be deteriorated fiberglass that has slumped and lost its R-value, or worse, vermiculite that can contain asbestos. If you find grayish, pebble-like loose fill in the attic, stop and get it tested rather than disturbing it, and read up on Zonolite attic insulation and what CT homeowners should do. Removing and replacing failed or hazardous material is often step one, before any new insulation makes sense.
How to insulate an old house with plaster walls
The Cold-Climate Moisture Trap
The hardest challenge with an old wooden house isn't the wood or the wiring, it's the moisture. When you add insulation to a wall cavity, you keep the inside warm but you make the outer sheathing colder, because less heat is now leaking out to warm it. In a Connecticut winter, that cold sheathing can drop below the dew point, and moisture from the warm indoor air can condense right there inside the wall. Building Science Corporation's research is blunt about the mechanism: adding air-permeable insulation to a stud cavity lowers the sheathing temperature and raises the risk of condensation inside the wall. That is the "sealing in a problem" scenario, and it's exactly how a well-meaning job leads to rot or hidden mold a couple of winters later. The fix is not to skip insulation. It's to manage the air and vapor path so the wall can still dry, which is why managing moisture when insulating an older home matters as much as the insulation itself. On an old house, this is squarely pro territory.
How vapor barrier installation controls condensation in older walls
How to Tell Which Challenges Your House Has
You can identify most of these challenges yourself in an afternoon. Run this quick check before you call anyone:
- Look up from the basement. If you can see straight up into the wall cavities alongside the floor joists, you likely have balloon framing.
- Hunt for knob-and-tube. White ceramic knobs and tubes on the framing in the basement or attic, with wires running through porcelain, mean active knob-and-tube that needs an electrician's eyes.
- Tap your walls. A hard surface that resists a thumbtack is plaster and lath; drywall pushes in easily and sounds hollow.
- Feel around outlets on exterior walls on a windy day. Cold air leaking in signals gaps in the cavity and little to no air sealing.
- Pull an outlet cover with the power off. Peek at the cavity depth and any existing fill. Grayish, pebble-like material means stop and test for vermiculite.
- Measure your attic insulation. Less than about 6 inches puts you well under the R-49 target Connecticut attics should hit.
DIY vs. When to Call a Pro (and What It Costs)
Some of this you can handle yourself, and some of it you shouldn't touch. The air-sealing basics are fair game for a motivated homeowner, but the structural, wiring, and moisture challenges need a contractor with the right gear and certifications. Professional wall insulation installation on an old house usually means drill-and-fill dense-packed cellulose, which runs about $3.00 to $4.00 per square foot done from the inside, or $3.75 to $4.75 per square foot when it's done through the siding from outside. Those are ballparks before rebates. Energize CT can offset up to $2.00 per square foot or 75% of the project, capped at $10,000, and it starts with a Home Energy Solutions audit ($40 copay). Many contractors, us included, run a wall test ($150, credited to the job) to see what's really in the cavity before quoting.
Whatever you decide, do three things first: measure your attic insulation depth, photograph anything questionable (old wiring, existing insulation, damp spots or staining), and book an Energize CT Home Energy Solutions audit. Those three steps cost almost nothing and give whoever you call a real starting point.
Conclusion
Old wooden houses in Connecticut are harder to insulate than the brochures let on, but none of these challenges is a dealbreaker. Balloon framing, knob-and-tube, plaster walls, board sheathing, and the cold-climate moisture question are all solvable. They just have to be handled in the right order, by someone who has seen them before.
The real takeaway is that on an old house, sequence matters more than material. Deal with the wiring, the air sealing, and the moisture path first, and the insulation finally gets to do its job. Get that order right and a drafty 1920s house can be genuinely comfortable, without trading that comfort for a moisture problem down the road.
👉 Contact Nealon Insulation — if your old Connecticut house is fighting you on comfort, we've spent nearly 50 years insulating homes exactly like it.
Frequent Questions About Insulating Old Houses in Cold Climates
What's the best type of insulation for an old wooden house in a cold climate?
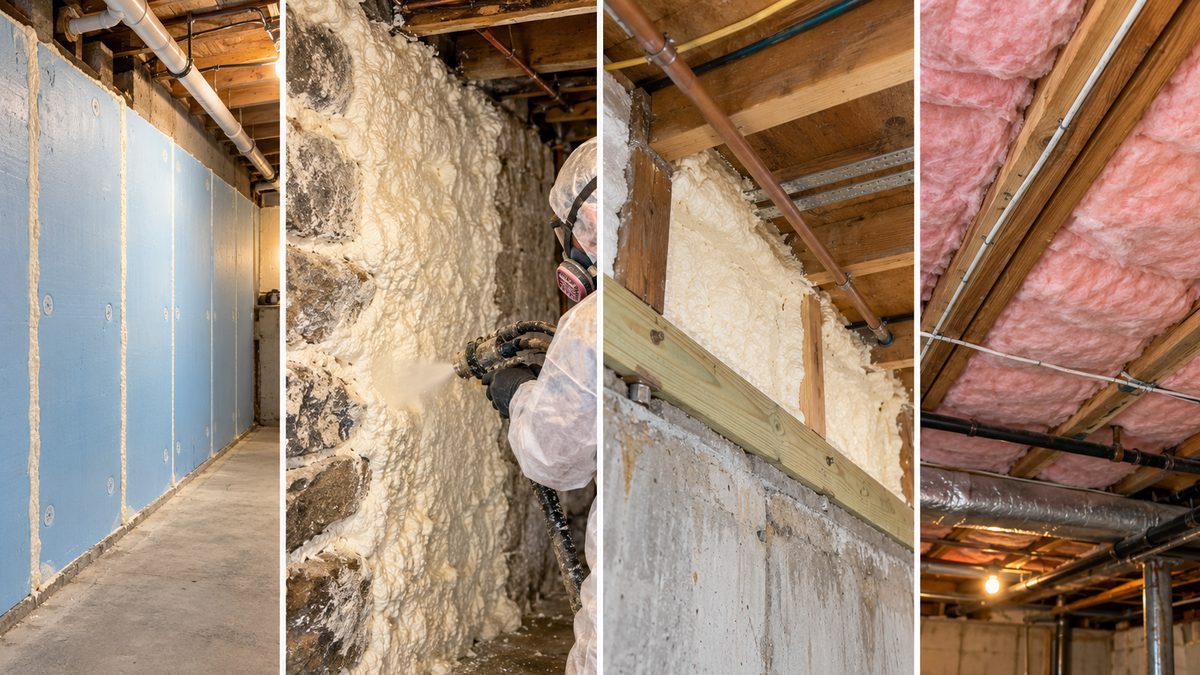
Dense-packed cellulose is the best fit for the closed walls of an old wooden house in a cold climate. Cellulose fills irregular cavities completely, resists air movement, and installs through small drilled holes without opening the wall. Closed-cell spray foam suits rim joists and roofline work, where it also adds air sealing and structural stiffness. The right material depends on the cavity and where it sits in the house, which a contractor confirms during the on-site assessment.
How long does it take to insulate an old house?
Most old-house insulation projects take 1 to 2 days once prep work is done. Prep like knob-and-tube replacement or vermiculite removal adds time and gets scheduled separately before insulation day. A whole-house dense-pack moves faster than homeowners expect, because drill-and-fill avoids demolition and rebuilding. Ask your contractor for a project timeline during the estimate so you can plan around it.
Will insulating my old house make it too airtight?
Insulating and air sealing an old house rarely makes it too airtight, though a tightened house needs controlled ventilation. Old houses leak so much air that sealing them moves the house toward healthy, not past it. When a home does end up sealed tightly, a contractor adds mechanical ventilation to manage fresh air and indoor moisture. A Home Energy Solutions audit checks whether your house needs added ventilation after air sealing.
Should I insulate the attic or the walls of my old house first?
Insulate the attic first in an old house, then move to the walls. Heat rises and escapes through the attic fastest, so attic insulation to R-49 delivers the biggest comfort and energy gain per dollar. Walls come next, usually through dense-pack, once the attic and air sealing are handled. A Home Energy Solutions audit ranks the upgrades by payback so the sequence fits your specific house.
Do old-house insulation projects qualify for Energize CT rebates?
Old-house insulation projects qualify for Energize CT rebates when a network contractor does the work and it meets program standards. Energize CT covers up to $2.00 per square foot or 75% of the project cost, capped at $10,000 per home, on qualifying attic, wall, and basement work. The rebate application is issued during a required Home Energy Solutions audit ($40 copay). Confirm eligibility with your contractor before the audit so the paperwork is ready.
Related Articles


Let's Work Together
Ready to transform your home into an energy-efficient haven? Schedule your free energy assessment today and experience the Nealon difference for yourself.