$50 OFF if Installed by June 30
Serving Clinton, Old Saybrook, Guilford, and surrounding shoreline communities

Home Comfort Insights from Connecticut's Insulation Experts

Professional insights, money-saving tips, and real solutions for Connecticut homeowners.

Nealon Insulation R Value Calculator
General Information

How Much R-Value Do I Need? Try Our R-Value Calculator

Find out exactly how much insulation your home needs—without the guesswork. Let’s get one thing straight: when it comes to keeping your home warm in the winter and cool in the summer, R-value matters. A lot. But most homeowners (and even a few contractors) don’t really know what R-value they need, where, or why.

How Much R-Value Do I Need? Try Our R-Value Calculator
Mike D
May 26, 2025
9
 mins read

Find out exactly how much insulation your home needs—without the guesswork.

Let’s get one thing straight: when it comes to keeping your home warm in the winter and cool in the summer, R-value matters. A lot. But most homeowners (and even a few contractors) don’t really know what R-value they need, where, or why.

That’s why we built a free, easy-to-use R-Value Calculator—to give you clear, code-backed recommendations based on where you live and what part of your home you’re insulating.

But before you jump in and start punching in numbers, let’s cover the basics so you actually know what you’re looking at. Here's what we'll cover in this article:

What Is R-Value, Anyway?

R-value is how we measure insulation’s resistance to heat flow. Think of it like SPF for your house—higher R-value = more protection. The better the R-value, the slower your heated (or cooled) air escapes through your walls, ceilings, and floors.

So when someone says “You’ve got R-13 in your walls,” they’re talking about how well that insulation holds the line between inside and outside temperatures.

Different insulation types have different R-values per inch:

  • Fiberglass batts: ~R-3.2 per inch
  • Cellulose: ~R-3.5–3.8 per inch
  • Spray foam (closed-cell): ~R-6.5 per inch

Why Does R-Value Matter?

Simple: it’s the difference between a home that stays comfy for cheap... and one that bleeds money every time the heat kicks on. Insufficient R-value leads to:

  • Drafty rooms
  • Sky-high utility bills
  • HVAC systems working overtime
  • Unhappy homeowners (maybe you?)

The Department of Energy and local building codes require specific R-values depending on where you live. But unless you’ve memorized the DOE’s climate zone map (we have, but we’re weird like that), figuring it out on your own is a pain.

A Quick Note on Climate Zones

The U.S. is divided into climate zones (Connecticut is mostly Zone 5), and those zones determine how much insulation your home needs.

United States climate zone map segments the country into dry, humid, hot and cold zones.

For example:

  • Zone 3 (warmer southern states) might only need R-30 in the attic.
  • Zone 5 (Connecticut) usually calls for R-49 to R-60 in the attic.
  • Zone 7 (northern tier)? You’re looking at R-60+ and tight air sealing.

You also need different R-values depending on whether you're insulating an attic, basement or wall. Garage's don't have unique R-Values. That's where things get tricky.

Enter: the R-value calculator.

R-Value Calculator

We built this tool to take the confusion out of calculating R-value. Just plug in:

  • Your state and county
  • The part of your home you want to insulate

...and boom—you’ll get the recommended minimum and maximum R-values based on your local code and climate.

✅ No digging through PDFs
✅ No guessing
✅ No wrong answers

Whether you’re upgrading attic insulation, finishing a basement, or insulating a new addition, this calculator gives you a clear starting point. From there, we can help you figure out the right material and get the job done.

Try Our R-Value Calculator

Use this R-value calculator to find out what your home really needs—and let’s make sure you’re not under-insulated, overpaying, or leaving comfort on the table.

R-Value Calculator

👉 Ready to increase your homes R value? Contact Nealon Insulation to get the job done right.

Cellulose Dry Pac Insulation
Contractors

The Cellulose Insulation Dry Pac System: A Guide for Contractors

For contractors looking for an efficient, high-performance insulation solution for new home construction and additions, the cellulose insulation dry pac system is an excellent choice. This method provides superior thermal performance, air sealing, and soundproofing while being cost-effective and eco-friendly.

The Cellulose Insulation Dry Pac System: A Guide for Contractors
Mike D
Feb 28, 2025
2
 mins read

If you’re a builder or contractor trying to hit high-performance targets without burning up the budget, it’s time to get familiar with the cellulose dry pac system.

This method isn’t new, but it’s been quietly outperforming batt insulation for decades. And if you’re building tight, energy-efficient homes—or you’re tired of callbacks from homeowners complaining about drafts and noise—you’ll want this in your playbook.

So What Is the Dry Pac System?

Short version: we staple up 6-mil poly, dense-pack cellulose behind it, and tape it off clean.
Long version: It’s a smarter way to insulate framed walls, locking in air sealing, soundproofing, and thermal performance all in one go.

Here’s how the install looks on site:

Step-by-Step for Contractors:

  1. Hang the Poly
    Staple and stitch 6-mil poly over the stud bays after framing. That poly’s your containment.
  2. Insert the Blowing Hose
    Cut a small slit in the poly. Feed the hose deep into the cavity. We’re not fluffing—this is dense-pack.
  3. Dense-Pack Cellulose
    Use an insulation blower to pack each cavity solid. No voids. No settling later. Just clean, consistent fill.
  4. Tape It Shut
    Once the cavity’s full, tape the slit. The poly stays intact and does its job as an air barrier.

Why This Beats Batts (Every. Single. Time.)

Higher R-Value Per Inch
Dense-pack cellulose gives you better thermal performance than fiberglass batts, hands down.

Built-in Air Sealing
Done right, this system slows air movement like a champ—no need for extra air-sealing steps inside the wall.

Soundproofing, Too
Your clients won’t hear what’s happening in the next room or outside. Big win for quality of life.

No Settling, No Gaps
Because it’s packed to the right density (3.5–4.0 lbs/cu ft), it won’t sag or settle over time.

Eco-Friendly & Code-Compliant
Made from recycled paper and treated with borate—safe, sustainable, and passes every code requirement you’ll run into.

Mold, Pest & Fire Resistant
The borate treatment keeps critters and mold out, and adds a layer of fire protection your inspectors will like.

When to Use the Dry Pac System

If you’re working on:

✔️ New builds that need airtight performance
✔️ Additions that need to meet modern code
✔️ Passive house or energy-efficient designs

…this is your system.

Why Nealon?

We’ve been insulating shoreline homes and working with builders like you for 48 years. Our team knows the dry pac system inside and out—and we get in, get it done, and get out of your way so you can keep your build on schedule.

👉 Ready to line up insulation that actually performs? Contact Nealon Insulation for a walkthrough or quote.

P.s. Calculate how much R-Value your home needs

Thank you! Your submission has been received!
Oops! Something went wrong while submitting the form.
Roof Insulation
Attic & Ceiling

What’s the Best Insulation Material for Your Roof?

If you’re asking about the best insulation for your roof, you’re already ahead of the game. Most heat loss in homes happens up top—through the attic, the rafters, and the roof deck. The right insulation up there makes a big difference in comfort, efficiency, and long-term costs. But as with most things in homebuilding, there’s no one-size-fits-all answer. It depends on your goals, your budget, and your home’s construction.

Mike D
Mike D
May 26, 2025
5
 mins read

If you’re asking about the best insulation for your roof, you’re already ahead of the game. Most heat loss in homes happens up top—through the attic, the rafters, and the roof deck. The right insulation up there makes a big difference in comfort, efficiency, and long-term costs. But as with most things in homebuilding, there’s no one-size-fits-all answer. It depends on your goals, your budget, and your home’s construction.

Let’s break down a few of the top contenders:

Fiberglass Batts

Best for: Budget-friendly attic floor insulation

Fiberglass is a classic for a reason. It’s affordable, widely available, and easy to install between attic floor joists. If you’re insulating an unfinished attic (meaning no HVAC or living space up there), fiberglass batts laid on the floor can be a great option. Just watch for gaps and compression—proper installation matters.

Blown-In Cellulose

Best for: Dense coverage with recycled content

Made from recycled paper and treated for fire resistance, blown-in cellulose is great for getting into every nook and cranny of your attic floor. It offers excellent coverage and performance, especially in irregularly shaped spaces. It also has solid R-value per inch and tends to be more airtight than fiberglass.

Spray Foam

Best for: Insulating the roof deck and creating a conditioned attic

If you have ductwork, HVAC equipment, or a finished attic up top, spray foam is hard to beat. It’s applied directly to the underside of the roof sheathing, creating a thermal and air barrier in one step. Closed-cell spray foam also adds some structural strength and moisture resistance. It’s the priciest option, but it can dramatically improve efficiency in the right home.

Rigid Foam Board

Best for: Tight spaces and high R-values

Rigid foam boards (like polyiso or XPS) offer high R-value per inch and are often used in cathedral ceilings or under roofing materials. They require careful sealing at the seams to prevent air leaks but can be a great solution where space is limited or where continuous insulation is needed.

So Which One Is Right for You?

Here’s a quick cheat sheet:

  • You’ve got an unfinished attic and a tight budget: Go with fiberglass batts or blown-in cellulose.
  • You want high performance and have HVAC equipment in the attic: Closed-cell spray foam is your best bet.
  • You have a cathedral ceiling or limited space: Consider rigid foam board for its high R-value in a thin profile.
  • You want eco-friendly materials: Blown-in cellulose wins for recycled content and low environmental impact.

Final Thought

Roof insulation isn’t a glamor topic, but it pays dividends every month on your energy bill. Picking the right material isn’t about what’s most expensive—it’s about what fits your house and how you live in it.

👉 Not sure what’s right for your roof? Contact us, and we’ll walk you through the options.

Reduce Your Carbon Footprint
General Information

Simple Ways to Shrink Your Home's Carbon Footprint

Let’s get real. You don’t have to go off-grid, install a windmill, or start making your own soap to do right by the planet. There are everyday ways to cut down your home's carbon footprint without turning your life upside down.

Mike D
Mike D
May 22, 2025
4
 mins read

Let’s get real. You don’t have to go off-grid, install a windmill, or start making your own soap to do right by the planet. There are everyday ways to cut down your home's carbon footprint without turning your life upside down.

Here are a few practical ideas to get started:

1. Ditch the Incandescents

If your home still has lightbulbs that heat up like stovetops, it’s time to upgrade. LED bulbs use up to 80% less energy and last a lot longer. They’re like the efficient little overachievers of the lighting world.

2. Be Smart (Thermostat-Wise)

Smart thermostats aren’t just a gimmick—they actually help. You can program them to run the heat or A/C only when you need it, saving you money and emissions in the process. Some even learn your habits and adjust automatically.

3. Wash Cold, Line Dry

Washing clothes in cold water gets the job done just fine 90% of the time. Combine that with skipping the dryer and using a clothesline (yes, they still exist) and you just cut down a big chunk of your home's energy use.

4. Use Power Strips (And Turn ‘Em Off)

Your TV, cable box, computer—they all sip electricity even when turned "off." Use smart power strips or just flip them off at the end of the day to stop the phantom drain. No seance required.

5. Choose Efficient Appliances

Replacing that 90s-era fridge? Look for Energy Star-rated appliances. They’re engineered to use less juice and still do the job right. Bonus: many come with rebates.

6. Cut Down on Meat (Sometimes)

No need to go full tofu, but swapping in one or two meatless meals a week can lower your household emissions. Beans and pasta never broke the bank.

7. Fix Drafts and Air Leaks

Those little gaps around windows, doors, and attic hatches are like leaky faucets for energy. Seal ‘em up and your HVAC system won’t have to work overtime.

8. Insulate the Right Way

Now let’s talk insulation—because this is the stuff people don’t think about until they’re freezing or sweating in their own homes.

Good insulation helps your home hold its temperature longer, which means less energy needed for heating and cooling. Less energy means fewer emissions. That cellulose we pack into walls, attics, and crawlspaces? It’s often made from recycled material and has a smaller footprint than most building products.

So yes—while we might be a little biased here at Nealon Insulation, tightening up your home is one of the smartest, most impactful ways to reduce your footprint long-term.

Does Insulating Different Parts of Your Home Disproportionately Lower Your Carbon Footprint?

Absolutely — and that’s the sneaky part most people miss.

When it comes to reducing your carbon footprint, not all insulation upgrades pull the same weight. Some areas of your home — especially the attic and rim joists — punch way above their weight in terms of impact.

Here’s how it plays out:

🏠 Attics: The MVP of Carbon Savings

The attic is your home’s escape hatch for heat. It might only be 15–20% of your home’s surface area, but it can account for up to 40% of total heat loss.

That means adding insulation up top (especially if you’re going from R-13 to R-49 or R-60) can drop your heating and cooling needs dramatically. More comfort, less fuel burned, fewer emissions — all from one upgrade.

🧊 Rim Joists & Crawlspaces: Small Area, Big Gains

Insulating your rim joists might only involve a few hundred board feet of spray foam — but it can seal one of the draftiest, leakiest parts of the house.

This is where convection and infiltration go wild, especially in older shoreline homes. Tightening these spots lowers HVAC run time and reduces your home’s air turnover rate, which directly cuts carbon output — disproportionately so, given how little area you’re insulating.

🧱 Walls: Important, But Slower Payback

Insulating your walls is absolutely worth doing — especially if they’re empty — but the carbon savings tend to scale with square footage. You get steady, moderate gains, not the dramatic drops you see from attic work or sealing air leaks in key spots.

🚗 Garages: Worth It If They Share Space

Garages don’t always seem like an energy issue — until you have a bedroom or bonus room above one that’s always freezing.

Insulating garage ceilings and shared walls helps reduce heat loss from living areas and keeps cold, drafty air from seeping into the house. It’s not a whole-home solution, but if you’re targeting comfort and efficiency zone by zone, insulating the garage can make a measurable difference — especially if it’s pulling heat away from the rest of the home.

Bottom line?

If you want the biggest carbon bang for your insulation buck, start with the attic and air sealing. You’ll see disproportionate energy savings, faster payback, and a serious drop in emissions — all without tearing your house apart.

Final Thought

You don’t need to be perfect to make progress. Just a few changes around the house can make a real difference—for your utility bills and for the planet.

👉 Want help making your home more energy efficient? Contact us and let’s talk insulation that works as hard as you do.

P.s. If you want to calculate the R-Value you will need for your home check our our R-Value calculator

Price of Insulation
General Information

How Much Is 1,000 Sq Ft of Insulation?

Let’s get straight to the point: insulating 1,000 square feet of space in your home can cost anywhere from $1,500 to over $5,000 depending on the material you choose and the quirks of your house. It’s like asking how much a car costs—you’ll get a different answer depending on whether you want the base model or the decked-out version with heated seats and a moonroof.

Mike D
Mike D
May 19, 2025
5
 mins read

Let’s get straight to the point: insulating 1,000 square feet of space in your home can cost anywhere from $1,500 to over $5,000 depending on the material you choose and the quirks of your house. It’s like asking how much a car costs—you’ll get a different answer depending on whether you want the base model or the decked-out version with heated seats and a moonroof.

We’ll break it down by type—fiberglass, cellulose, and spray foam—and explain what drives the price up (or down).

🧱 Fiberglass Insulation: The Basic, Budget-Friendly Option

Cost for 1,000 sq ft:

👉 Around $2,000 to $3,000

Fiberglass is like the plain bagel of insulation: dependable, affordable, and everywhere. It’s often used in new construction and attics where you have open access to joists. If you're not battling extreme drafts or moisture issues, this can be a solid, cost-effective choice.

What affects fiberglass pricing:

  • Open vs closed access (attic = easy, walls = more labor)
  • Batts vs blown-in
  • Labor needs—is it a clean install or a crawlspace contortionist job?

🌾 Cellulose Insulation: The Comfort Workhorse

Cost for 1,000 sq ft:

👉 Around $2,000 to $4,000

Cellulose insulation is what we specialize in here at Nealon. It's dense, fire-resistant, pest-resistant, and made from recycled materials. It performs great in older homes, especially for filling wall cavities without tearing your house apart.

Why the price varies:

  • Dense-packing walls vs attic blow-in (walls take more time and skill)
  • Access issues—we may need to drill, patch, or work around tough angles
  • Depth of insulation—more R-value means more material

🧊 Spray Foam Insulation: The High-Performance MVP

Cost for 1,000 sq ft:

👉 Around $3,000 to $5,000+

Spray foam is the insulation equivalent of a triple-espresso: powerful, airtight, and overachieving. It both insulates and air seals in one shot. But it’s more expensive upfront, and not always necessary in every application.

What bumps up the price:

  • Open-cell vs closed-cell (closed-cell is more expensive and higher R-value)
  • Ventilation concerns—you may need mechanical ventilation if you're sealing super tight
  • Prep and protection—spray foam needs careful installation to avoid overspray or damage

📈 What Else Affects the Price of Insulation?

Regardless of material, there are a few wildcard factors that can change your final number:

  • Access and layout: Vaulted ceilings, narrow crawlspaces, or complicated rooflines = more labor.
  • Demo or removal: If we need to rip out old insulation, that adds to the bill.
  • Code requirements: Want to hit energy code or qualify for rebates? You may need higher R-values.
  • Local rebates: In Connecticut, EnergizeCT rebates can significantly lower your out-of-pocket cost—especially for cellulose and spray foam.

💡 So What Should You Expect to Pay?

If you're in Connecticut and looking to insulate 1,000 sq ft, the sweet spot for most homes falls between $2,000 and $4,000. Think of that as the range for long-term comfort and energy savings.

Want a real number for your actual house? We’ll come check it out and give you a quote with no pressure and no fluff. Just real answers from real insulation nerds.

👉 Let’s talk insulation. Contact the Connecitcut insulation team.

Comfortable home because of insulation
General Information

10 Free or Cheap Ways to Keep Your Connecticut Home Cooler This Summer

Connecticut summers don’t mess around. One day it’s a nice breeze off the Sound, the next it feels like your house turned into a baked potato. But before you crank the AC to the point where your electric bill starts sweating too, here are ten ways to beat the heat—without breaking the bank.

Mike D
Mike D
May 14, 2025
4
 mins read

Connecticut summers don’t mess around. One day it’s a nice breeze off the Sound, the next it feels like your house turned into a baked potato. But before you crank the AC to the point where your electric bill starts sweating too, here are ten ways to beat the heat—without breaking the bank.

1. Shut the blinds like it’s your job

Seriously. About 30% of unwanted heat comes from your windows. Keep blinds and curtains closed during the hottest parts of the day—especially on south- and west-facing windows. Blackout curtains? Even better.

2. Box fans + window trick = poor man’s AC

Point a box fan out the window in the evening to blow hot air out while you crack a window on the cooler side of the house. It creates a little air current that pulls cool air in and shoves hot air out.

3. Switch your ceiling fans to “summer” mode

Yes, they have a summer setting. There’s usually a little switch near the base. Flip it so the fan spins counterclockwise—this pushes air down and creates a cooling breeze instead of just stirring the soup.

4. Ditch the incandescent bulbs

Old-school bulbs run hot. Swap 'em out for LEDs and your rooms stay a few degrees cooler. Plus, it cuts your electric bill. Win-win.

5. Cook less—or cook outside

Using the oven or stove heats up your kitchen like a pizza shop. Grill outside, eat more cold foods, or prep meals early in the day. Your house (and your face) will thank you.

6. Seal the air leaks

You know those little cracks around windows, doors, and basement bulkheads? They’re like VIP entry for hot air. Caulk, weatherstripping, and a little bit of foam sealant can go a long way. Not sure where the leaks are? We can help air seal your home.

7. Close off unused rooms

No need to cool the guest room your in-laws use twice a year. Shut the doors to rooms you’re not in—this keeps the cooler air circulating where you actually need it.

8. Use bathroom and kitchen exhaust fans

These fans aren’t just for smells and steam—they pull hot air and humidity right out of the house. Use 'em during and after cooking or showering to help the whole place cool down faster.

9. Add some attic insulation

Yep, insulation isn’t just a winter thing. A poorly insulated attic turns into a giant heat battery that radiates down into your living space all day long. Dense-packed cellulose can help keep that heat out in the summer and in during the winter. Spray foam is the most expensive of the insulation types and fiberglass tends to be the cheapest.

10. Schedule an energy audit

If your home feels like a sauna every summer, there’s a reason. A free or low-cost energy audit (like the ones offered through EnergizeCT) can pinpoint the exact spots your house is losing the fight against heat—and help you qualify for rebates to fix them.

Why Insulation Helps You Run the A/C Less

Think of insulation like a cooler—just like it keeps the cold in and the heat out, your home can do the same when it’s properly insulated.

Without insulation (or with old, crusty, half-bald insulation), all that nice cold air your A/C is working so hard to produce? It slips right out through your attic, walls, and basement like water through a colander. And the hot summer air outside? That stuff seeps in like an uninvited guest.

Add proper insulation—especially in your attic and walls—and suddenly, your A/C doesn’t have to work nearly as hard. You cool the house down once… and it stays cool. That means:

  • Lower energy bills
  • Less wear and tear on your HVAC system
  • More consistent comfort (no more sweatbox upstairs and meat locker downstairs)

Bottom line: good insulation gives your air conditioning a break—and your wallet one, too.

👉 Want to make your home cooler, quieter, and cheaper to run this summer? Let’s make a plan.

Allergies in the home
General Information

Why Do I Have Allergies in My Home?

You’re sneezing like you walked through a hayfield—but you’re just sitting on your couch. Your eyes itch, your throat feels scratchy, and every morning starts with a chorus of sniffles. What gives?‍The culprit might not be outside—your home itself could be stirring things up. Let’s dig into why indoor allergies happen and what you can do to breathe easier under your own roof.

Mike D
Mike D
May 15, 2025
4
 mins read

You’re sneezing like you walked through a hayfield—but you’re just sitting on your couch. Your eyes itch, your throat feels scratchy, and every morning starts with a chorus of sniffles. What gives?

The culprit might not be outside—your home itself could be stirring things up. Let’s dig into why indoor allergies happen and what you can do to breathe easier under your own roof.

1. Dust and Dander Are Everywhere

Even the cleanest homes collect dust—and with it comes dust mites, pet dander, and other microscopic freeloaders. They hang out in carpets, furniture, and especially insulation that's old or poorly sealed.

Fix it:

  • Regular vacuuming helps, but it’s just the surface. Upgrading old insulation and sealing gaps in your walls or attic can cut down on how much junk gets trapped in the first place.
  • Consider using an air purifier with a HEPA filter to catch smaller particles before they end up in your lungs.

2. Leaky Homes = Outdoor Allergens Sneaking In

Ever open a window during spring and instantly regret it? Now imagine tiny cracks and gaps doing that all the time. Pollen, pollution, and other allergens can sneak in through unsealed windows, doors, and attics.

Fix it:

  • Air sealing is your best friend here. Sealing up your home keeps outdoor allergens out and your indoor air cleaner. We see this all the time in older Connecticut homes—once we seal things up, the difference is night and day.
  • Keep windows closed during peak allergy seasons and use high-quality HVAC filters.

3. Your HVAC System Might Be Spreading It Around

If your ductwork is dusty, dirty, or full of gaps, it’s doing more than heating and cooling—it’s distributing allergens room to room like it’s running a mail route.

Fix it:

  • Get your ducts cleaned and sealed. You’d be surprised what builds up in there over the years.
  • Replace your air filters regularly (like, really regularly—not just when you remember).

4. Humidity and Mold Love Each Other

Too much moisture in your home invites mold and mildew—two of the biggest allergy triggers out there. Basements, attics, and bathrooms are prime real estate for this stuff.

Fix it:

  • Keep humidity between 30–50%. A dehumidifier can help if your basement feels like a rainforest.
  • Insulate and air seal areas like the attic and rim joists to reduce condensation and moisture build-up.

5. Old Insulation Can Be Part of the Problem

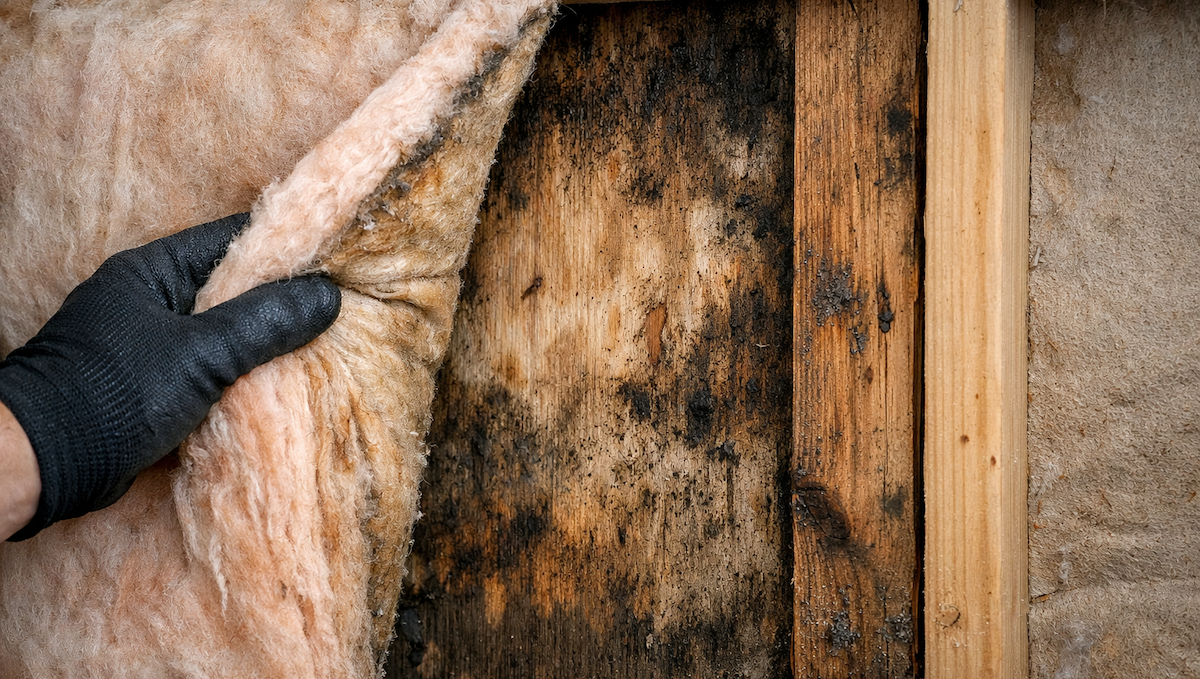
Insulation that’s been sitting for decades—especially if it’s fiberglass batts that were home to mice or moisture—can trap allergens and irritants. And when air moves through it, those particles end up floating into your living space.

Fix it:

  • Consider upgrading to dense-packed cellulose insulation, which not only performs better thermally but also helps block airflow and trap dust and allergens where they can’t bother you.
  • If the insulation is contaminated, the best move is to remove it and start fresh.

Is There an Insulation Type That’s Worse for Allergies?

Yes—and no. It’s not always the type of insulation that’s the problem, but the condition and installation that matter most.

That said, old fiberglass batts tend to be the usual suspects when allergies flare up. Over time, they can collect dust, pollen, rodent droppings, mold spores—you name it. And because fiberglass is air-permeable, it doesn’t do a great job of stopping airflow, which means all that gunk can hitch a ride straight into your breathing space.

On the flip side, dense-packed cellulose is treated to resist mold and pests, and it fills cavities more completely—blocking air movement and trapping particles where they can’t mess with your lungs. Spray foam is also a strong contender, since it seals air leaks and doesn’t support mold growth if installed properly.

Bottom line: Poorly installed or degraded insulation—especially if it’s contaminated—is way worse for allergies than a specific material. If you're constantly congested at home, it's worth looking behind the walls.

The Bottom Line

Your home should be a refuge, not a trigger. If you’re dealing with year-round allergies, the issue may be baked into the bones of the house—leaky seals, outdated insulation, moisture issues, or dusty ductwork.

Good news? You can fix it. Most of these problems come down to improving your building envelope: seal it tight, insulate it right, and make sure your air is clean.

👉 Want to get your indoor air under control? Contact us and let’s figure out what’s hiding behind the walls—and how to make your home a whole lot healthier.

Hot and cold room
Building Science

Why Are the Rooms in My House Such Different Temperatures?

Ever walk from your living room into your bedroom and feel like you just changed zip codes? One room’s sweating like a sauna, the next one’s an icebox. If your house plays temperature roulette, you’re not alone—and you’re definitely not imagining it.

Mike D
Mike D
May 12, 2025
3
 mins read

Ever walk from your living room into your bedroom and feel like you just changed zip codes? One room’s sweating like a sauna, the next one’s an icebox. If your house plays temperature roulette, you’re not alone—and you’re definitely not imagining it.

Let’s break down why this happens, and what you can actually do about it.

1. Your Insulation Might Be... Sad

This is the big one, folks. Inconsistent or missing insulation is often the root of the problem.

Older homes (especially anything built before the late '70s) usually have little to no insulation in walls, attics, or crawlspaces. Or, it’s been chewed up by time, mice, or moisture. When insulation’s spotty or thin, rooms lose heat (or gain it) at different rates, depending on their exposure to sun, wind, or shade. Understanding R-Values is important.

What to do about it:
Get an insulation assessment. A pro (👋 hi, that’s us) can check your attic, walls, and floors for weak spots and recommend a proper fix—often cellulose or spray foam in strategic places will even things out fast.

2. Your Ductwork’s Slacking Off

If you’ve got forced-air heating or cooling, the ductwork behind the scenes might be to blame. Leaky or poorly routed ducts can deliver all the warm air to the living room and leave your upstairs office out in the cold.

What to do about it:
Have your ducts inspected for leaks, gaps, or poor design. Sealing and balancing your system can restore harmony between floors.

3. Drafts Are Sneaking In

That room with the bay window that never feels quite right? Yeah, windows and doors are classic culprits for temperature swings. Cold air slips in around gaps, warm air slips out—repeat daily.

What to do about it:
Air sealing. It’s not glamorous, but it’s one of the best bang-for-your-buck improvements. Sealing up those tiny cracks and crevices with the right materials stops drafts cold and keeps temps consistent.

4. Your HVAC System Might Be Undersized (or Just Confused)

If your heating or cooling system wasn’t sized right—or if it doesn’t circulate air evenly across zones—then it’s no wonder some rooms feel like deserts and others like deep space.

What to do about it:
Get your system checked by an HVAC pro. Sometimes the solution is as simple as adjusting dampers or installing a zoned system.

5. Sunlight, Shade, and Room Placement

South-facing rooms soak up more sun. Top-floor bedrooms trap rising heat. Basements stay naturally cooler. The layout and orientation of your home can create natural temperature swings. Understand how heat transfer works can also be part of the explanation.

What to do about it:
Insulation helps even these out too, along with proper window treatments or zoned HVAC adjustments.

Bottom Line: Comfort Isn’t a Mystery—It’s a System

When your house feels like it has different climates in every room, it’s not just annoying—it’s costing you money. Uneven temperatures = energy waste, higher bills, and more wear on your heating and cooling system.

Most fixes boil down to a few essentials:
✅ Better insulation
✅ Proper air sealing
✅ HVAC tuning or upgrades

The good news? These problems are totally solvable. And you don’t have to guess what’s wrong—we’ll figure it out for you.

👉 Want a free insulation and air sealing assessment? Contact us here and let’s make every room feel just right.

No Item Found.

Our Values

Building Trust Through Excellence, One Home At A Time

Integrity First and Always

We treat every home as if it were our own, providing honest assessments and transparent recommendations.

Quality Without Compromise

We use only premium materials and proven installation techniques.

Customer-First Approach

From your first energy assessment to the final inspection, your satisfaction is our priority.

Frequently Asked Questions?

No items found.
No items found.

Let's Work Together

Ready to transform your home into an energy-efficient haven? Schedule your free Estimate today and experience the Nealon difference for yourself.

4.8 Customer Rating
EnergizeCT Insulation Installers Network
1500+ Homes Upgraded
Licensed & Insured