Case Study: Solving Attic Moisture Buildup the Right Way
The homeowner was dealing with a quiet but serious issue: moisture building up in the attic. Nothing was visibly leaking, but the house never quite felt comfortable, and energy bills kept climbing without a clear explanation. Over time, that excess moisture started creating the kind of attic environment where problems tend to stack up instead of resolve themselves.
A major contributor was the bathroom fan. Instead of venting damp air outside, it was dumping warm, humid air directly into the attic. Every shower added more moisture to a space that was never designed to handle it. In colder months especially, that moisture had nowhere to go, soaking into insulation and lingering above the ceiling.
The homeowner also wanted to use the attic for light storage, but the space didn’t feel clean, dry, or stable enough to trust. Between the moisture concerns and rising utility costs, it was clear something in the attic wasn’t working the way it should—and it wasn’t going to fix itself.
Results Highlights
Addressed moisture problems by properly venting the attic so humid air wasn't trapped.
What We Found: A Bathroom Fan, Poor Airflow, and Moisture-Soaked Insulation
Once we got into the attic, the moisture issue became easy to trace. The bathroom fan was exhausting straight into the attic, pumping warm, humid air directly into the insulation and roof structure. Over time, that moisture had nowhere to escape, turning the attic into a damp, stagnant space, especially during the winter when warm air meets cold surfaces.
Airflow was also part of the problem. The soffits weren’t properly baffled, which meant fresh air couldn’t move through the attic the way it’s supposed to. Without a clear path from soffit to ridge, moisture just sat there, soaking into whatever it touched.
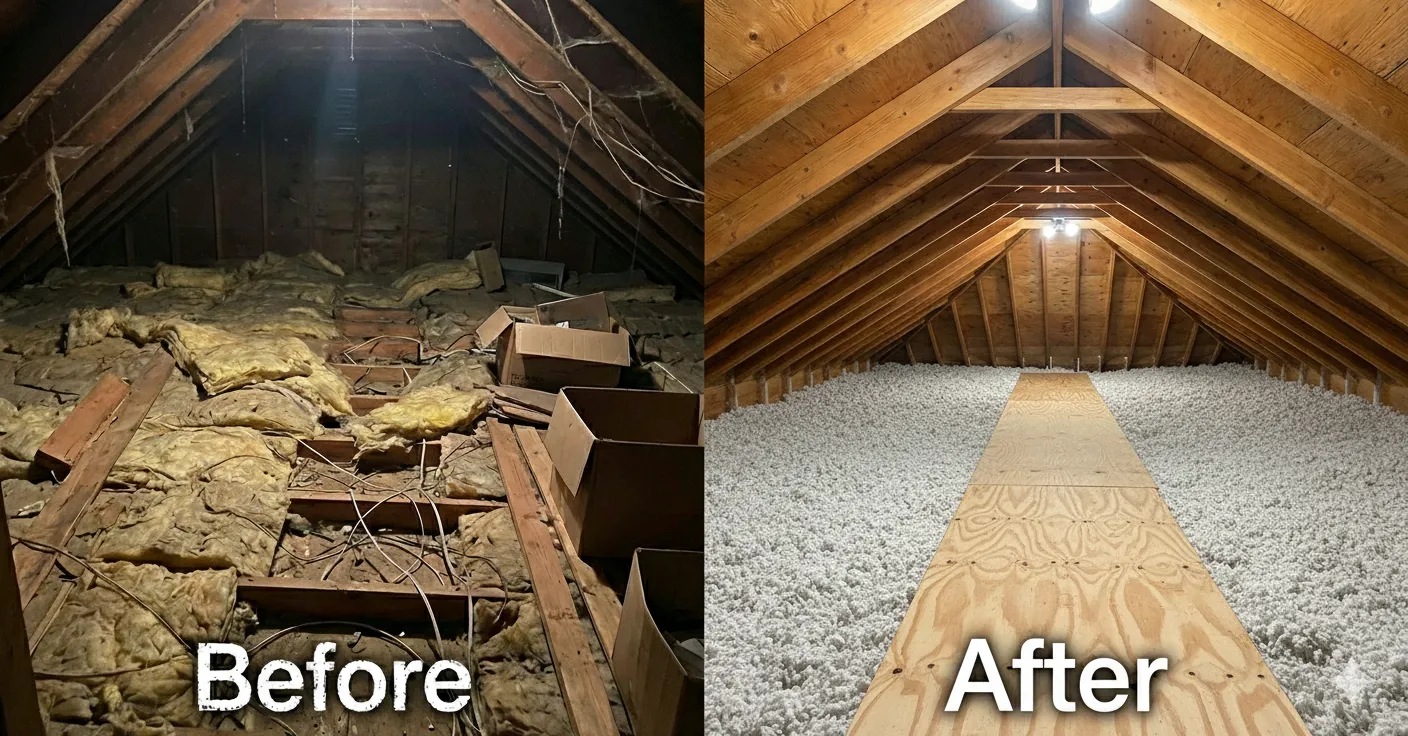
The insulation told the rest of the story. There was an older layer of R-30 fiberglass batts on top, with blown fiberglass underneath. Portions of the insulation were matted down and contaminated, a sign it had been exposed to moisture for a long time. Instead of protecting the home, the attic had become a holding tank for humidity, one that was quietly undermining comfort, efficiency, and durability.
The Solution: Rebuilding the Attic to Control Moisture at the Source
Step 1: Remove the old insulation and reset the attic
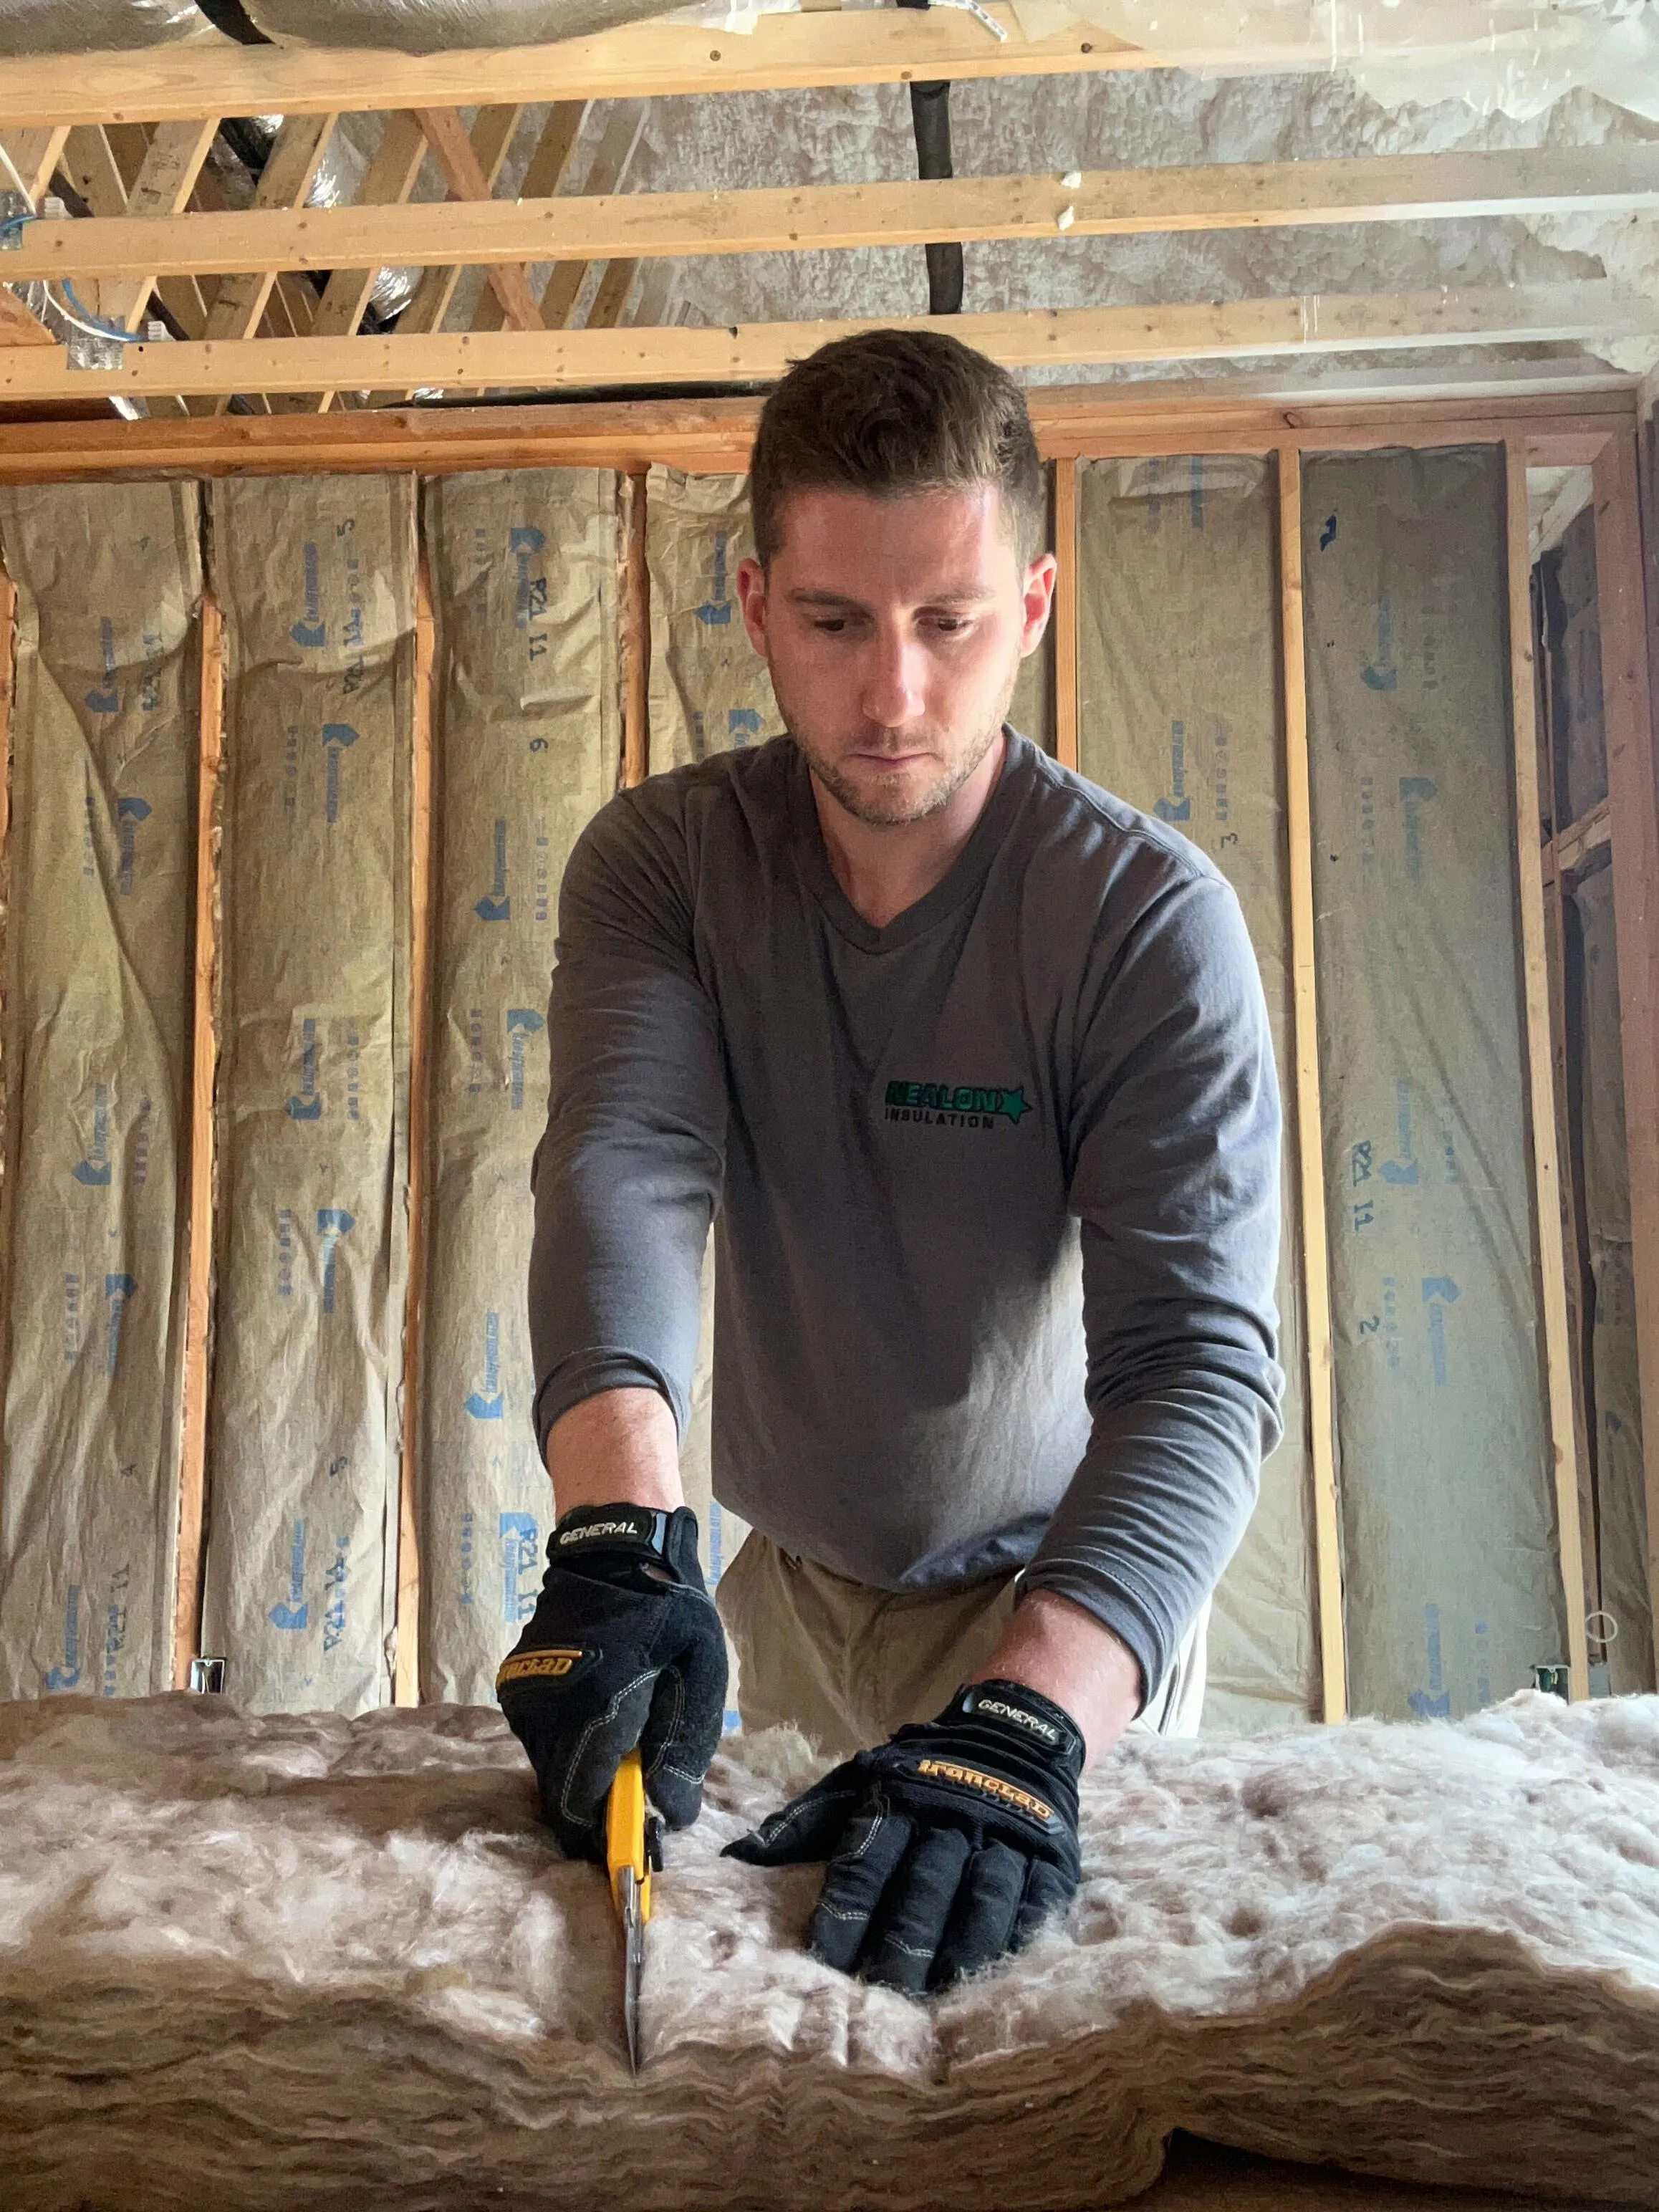
We carefully removed the existing R-30 fiberglass batts and used an insulation vacuum to extract the blown fiberglass below. Once everything was out, we swept, vacuumed, and cleaned between the bays so we weren’t building new systems on top of old moisture problems. Removing wet insulation is the only answer.
Step 2: Restore proper airflow from soffit to roofline
We installed blockers and soffit baffles to create a clear ventilation path, allowing fresh air to move through the attic instead of trapping humidity.
Step 3: Air seal the ceiling plane to stop moisture migration
All wire and pipe penetrations were sealed with one-part foam. Recessed light covers were installed, and a poly vapor barrier was laid over the ceiling plane to limit moisture movement from the living space below.
Step 4: Build a raised storage platform, without creating a moisture trap
A raised platform was installed around the attic hatch for safe storage and walkability, designed to maintain airflow and allow full insulation coverage beneath it.
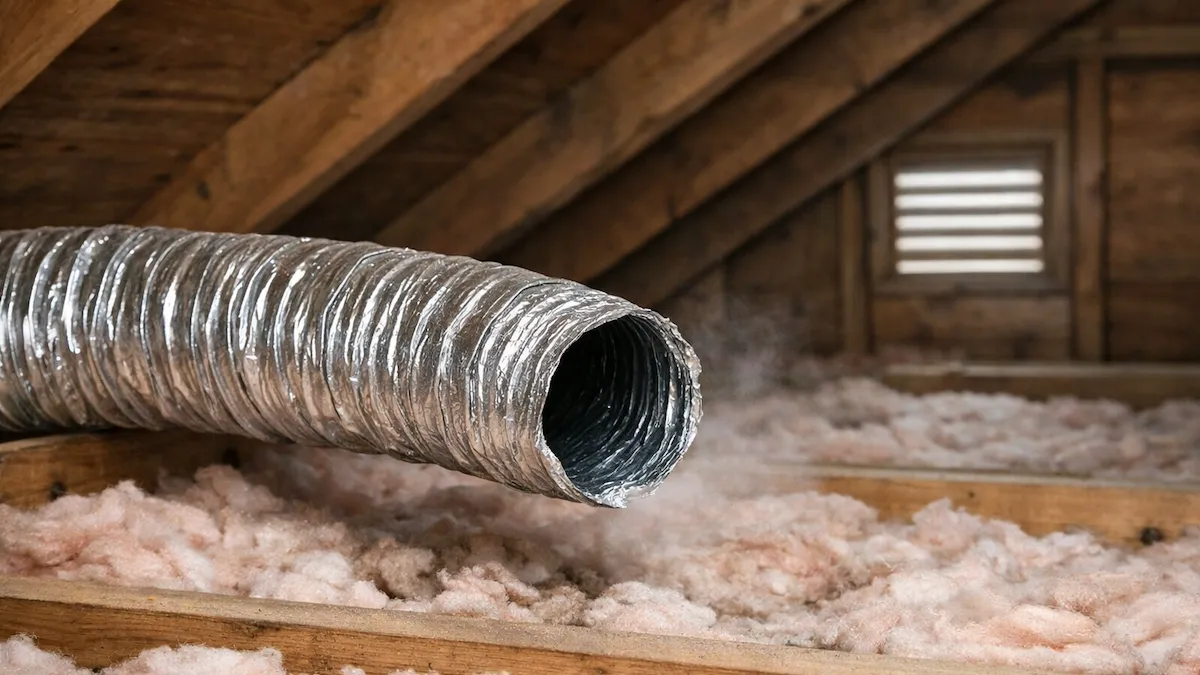
Step 5: Vent the bathroom fan to the exterior
We installed new insulated flex duct and a roof vent cap, connecting the bath fan properly so humid air exits the home instead of entering the attic.
Step 6: Re-insulate for consistent coverage and performance
Approximately 14 inches of Class I cellulose was blown in across the attic, including underneath the raised platform, restoring full-depth insulation and improving overall performance.
Step 7: Insulate and seal the attic hatch
A 4-inch rigid foam hatch cover was installed to reduce air leakage and heat loss—one of the most common and overlooked sources of attic moisture problems.
The Result: A Dry Attic, Lower Energy Bills, and Long-Term Stability
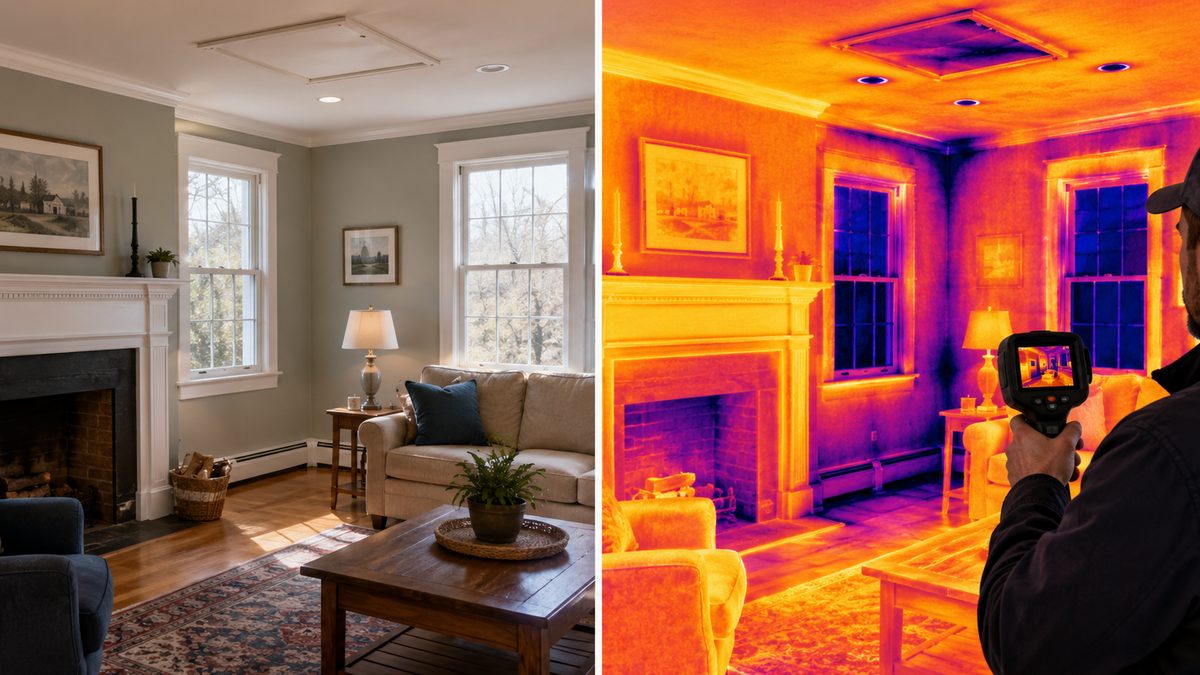
Six months after the work was completed, the difference was clear. The attic was dry, stable, and no longer collecting moisture from daily bathroom use. With the fan properly vented outside and airflow restored, humidity was no longer being trapped above the ceiling.
The insulation was finally doing its job, keeping temperatures more consistent throughout the home. The homeowner saw a noticeable drop in energy usage, with utility bills coming in at nearly half of what they were before.
Just as importantly, the attic became a space the homeowner could trust. No lingering dampness, no insulation breakdown, and no signs of recurring issues. The moisture problem was solved at the source, and the attic was no longer working against the rest of the house.
Takeaway: Why Attic Moisture Problems Require a System-Level Fix
Attic moisture problems rarely fix themselves. They usually stem from airflow mistakes, poor ventilation, and small gaps that quietly add up over time. In this case, correcting where moisture was going, tightening the ceiling plane, and rebuilding the attic as a complete system turned a damp, inefficient space into a dry, high-performing one.
Get Ahead of Attic Moisture Before It Gets Worse
If your attic feels humid, uncomfortable, or your energy bills don’t add up, moisture may be the underlying issue. We help homeowners across Connecticut identify attic moisture problems and fix them correctly—from ventilation to air sealing to insulation.
👉 Schedule an estimate to address your homes moisture problems.
Related Articles

Let's Work Together
Ready to transform your home into an energy-efficient haven? Schedule your free energy assessment today and experience the Nealon difference for yourself.