How to Install an Attic Hatch in Connecticut
Every home has that one forgotten spot where energy quietly slips away. In a lot of Connecticut houses, it’s not the windows or the walls—it’s that flimsy square in your ceiling known as the attic hatch.
Most people don’t think twice about it. It’s just a way to get into the attic, right? But if your attic hatch isn’t properly sealed or insulated, it’s basically a six-square-foot hole leaking warm air straight into the attic all winter long. Imagine leaving a window cracked open when it’s twenty degrees outside, same idea, just sneakier.
A proper attic hatch installation does two things:
- It makes it easy and safe to access your attic.
- It keeps your conditioned air inside your home.
In Connecticut’s climate, that matters. Our winters don’t mess around, and an unsealed attic access can undermine even the best insulation job. Heat rises, drafts follow the path of least resistance, and before you know it, your furnace is running overtime to replace what’s escaping through a poorly installed hatch.
Done right, though, an airtight, insulated attic hatch can be the missing puzzle piece between a drafty, unevenly heated home and one that finally feels comfortable from floor to ceiling.
Why the Attic Hatch Matters More Than You Think
Here’s the thing about air: it’s sneaky. It doesn’t care how much insulation you’ve got in your attic—if there’s a path out, it’s taking it. And the attic hatch? That’s often the biggest, easiest exit in the house.
Air sealing is the secret ingredient to keeping a home comfortable and energy efficient.
Think about it like a coffee cup with a hole in the lid. You can fill it with all the hot coffee you want (that’s your insulation), but if the lid isn’t sealed (that’s your attic hatch), the heat still escapes. You end up refilling the cup—cranking your furnace—over and over again.
An unsealed attic access door can leak as much warm air as a small window left open year-round. That means higher energy bills, colder rooms below the hatch, and even condensation issues in the attic. Over time, that warm air meeting cold surfaces can create the perfect recipe for ice dams—something Connecticut homeowners know all too well.
But here’s the good news: a tight-fitting, insulated attic hatch solves all that. When installed properly, it locks in your heated air, keeps your attic cold (the way it should be in winter), and helps your insulation actually do its job.
So before you pile another inch of insulation in the attic, make sure the “door to the attic” isn’t quietly undoing all your hard work. Because no matter how much insulation you add, if your attic hatch leaks air, you’re heating the outdoors—and paying for it every month.
Choosing the Right Type of Attic Hatch
Before you grab a saw and start cutting into drywall, you’ll want to decide what kind of attic hatch actually fits your home—and your goals. Not all attic accesses are built the same, and the wrong type can make life harder (or colder) than it needs to be.
Here’s a quick breakdown of the main options:
When choosing an attic access door, think about how often you’ll use it, where it’s located, and how much insulation you need. For most New England homes, we recommend an airtight, insulated unit installed with foam sealant or weatherstripping around the edges.
And here’s a pro tip: always check your local building code for minimum attic access size. In most cases, it’s around 22" x 30"—big enough for inspection and maintenance, but small enough to keep your ceiling intact.
A properly chosen and installed attic hatch isn’t just about access, it’s about keeping the conditioned air where you pay for it to stay.
Step-by-Step: How to Install an Attic Hatch (the Right Way)
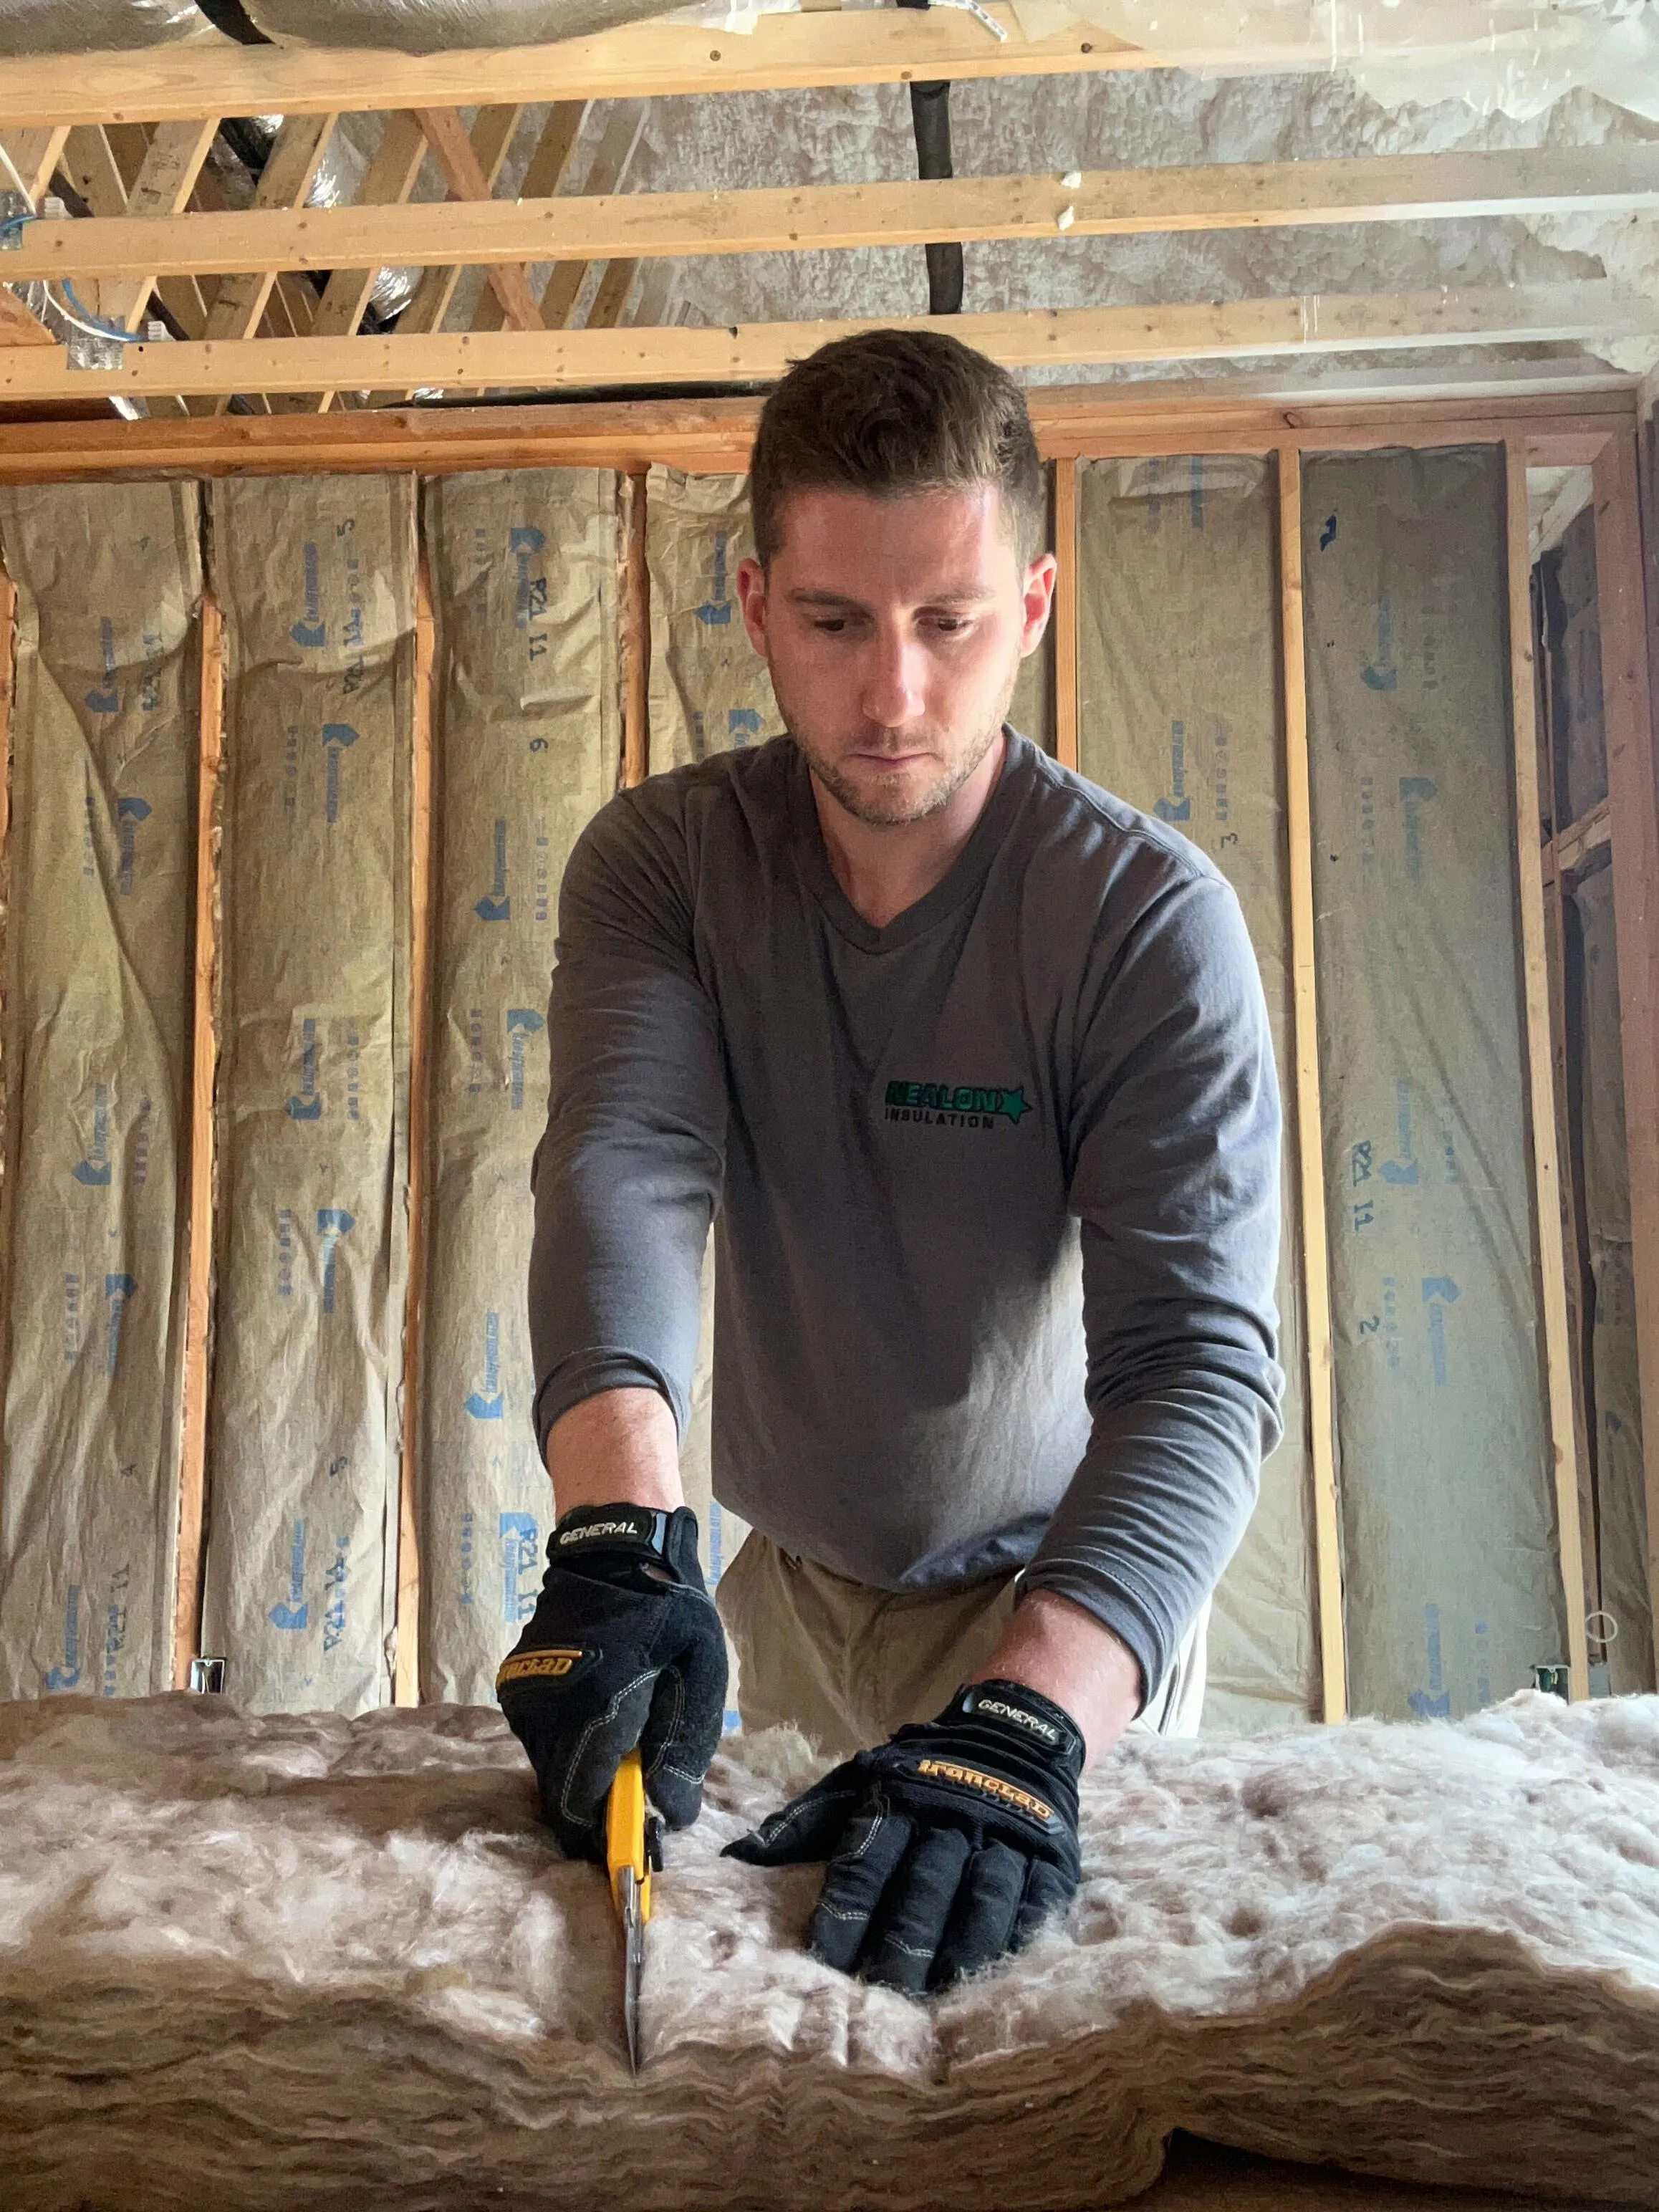
Installing an attic hatch isn’t rocket science—but it’s also not something you want to “wing.” A sloppy cut or loose seal can turn your new access door into a permanent draft leak. So, whether you’re DIY-ing it or sizing up a contractor’s work, here’s how a proper attic hatch installation should go down.
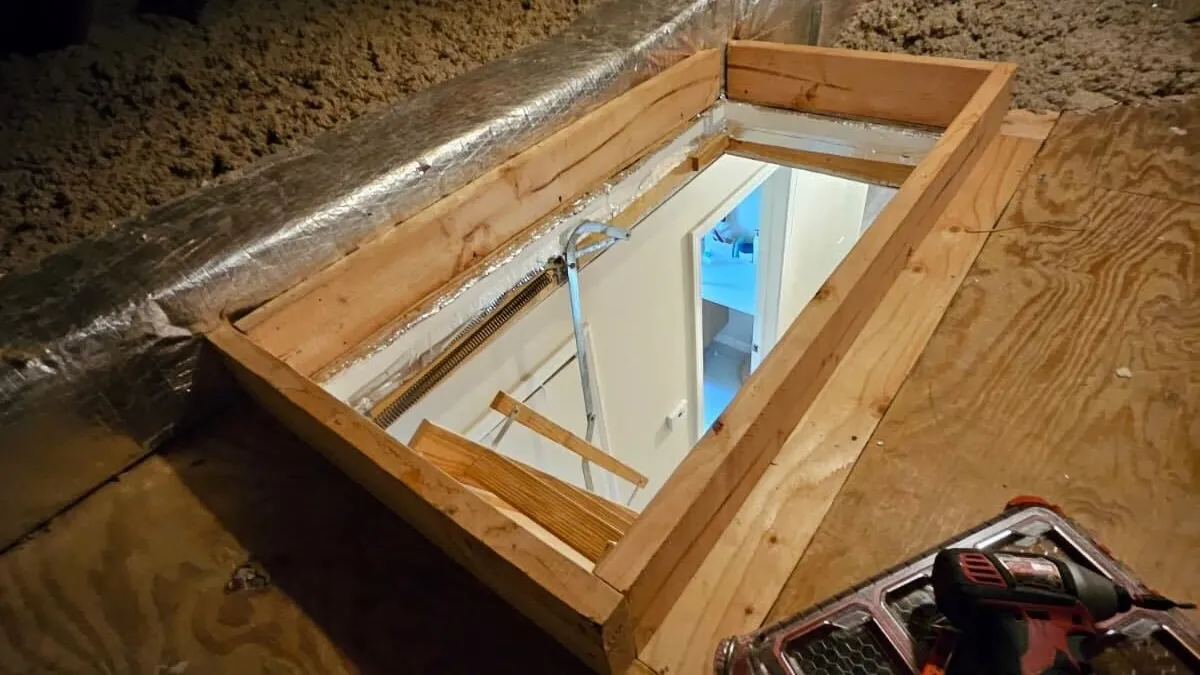
1. Measure and Frame the Opening
Locate the ceiling joists and mark out the access size—usually around 22" x 30". Carefully cut the drywall and frame the opening with 2x4s for strength. Keep it square. If it’s even slightly off, the hatch won’t close tight, and air will slip through.
2. Install the Hatch or Ladder Unit
If you’re using a pre-built attic access door, screw it directly into the framing. For a drop-down attic ladder, ensure it’s level, properly blocked, and secure before trimming out the frame.
Pro tip: Don’t rely on drywall to hold weight—your framing should carry the load.
3. Air Seal the Perimeter
Even a small gap around the hatch leaks air like a chimney. Run a bead of expanding foam or high-quality caulk around the frame. Once dry, add weatherstripping where the hatch meets the trim.
4. Add Insulation
A bare hatch panel is basically a cold spot in your ceiling. Attach rigid foam board or install a pre-insulated attic hatch cover to match your attic’s R-value (R-49 to R-60 for Connecticut homes). If you DIY, make sure the door still opens and closes cleanly.
5. Finish and Trim
Finish with trim molding or paint for a clean look. If your hatch is in a finished space, a magnetic latch or foam gasket adds a little polish and helps keep the seal tight. Done right, you’ll have a sturdy, easy-to-open attic door that’s airtight, durable, and ready to work as hard as your insulation does.
Air Sealing and Insulating the Attic Hatch
If your attic hatch isn’t airtight, your insulation might as well be wearing flip-flops in a snowstorm. You can pile a foot of cellulose on the attic floor, but if the hatch leaks, warm air will still find its way out—and cold air will sneak right back in.
That’s where air sealing and insulating your attic hatch come in. The goal is simple: keep conditioned air where it belongs and stop drafts dead in their tracks.
Seal the Gaps First
Most attic hatches leave a narrow gap between the frame and drywall; perfect for leaks. Use spray foam or caulk around the perimeter, then add weatherstripping or a foam gasket to the hatch lid.
For drop-down ladders, retrofit adhesive weatherstripping or look for models with built-in gaskets. The seal should be snug but smooth enough for easy closing.
Add the Right Insulation
Your hatch door is part of the ceiling—it needs the same R-value as the rest of your attic. In Connecticut, that’s about R-49 to R-60. You can:
- Attach rigid foam board to the back of the hatch door.
- Use a pre-insulated attic access cover that fits over the opening.
- Or install an insulated attic tent for pull-down ladders.
A well-insulated hatch improves comfort, balances temperatures, and keeps the warm air down where it belongs.
Check for Leaks
On a cold day, hold your hand near the hatch, or use a thermal camera. Feel a draft? You’ve still got leaks. Pros use blower door tests or infrared imaging to confirm airtightness, but a quick “hand test” works surprisingly well.
Done right, your airtight attic hatch becomes part of your home’s thermal envelope, one less weak link stealing comfort and energy dollars.
Common Mistakes to Avoid
Most attic hatches fail not because they’re complicated—but because people rush the details. Here are the biggest mistakes we see out in the field:
1. Skipping the Air Seal
Even a tiny gap leaks more air than you’d think. Foam or caulk around the frame and add weatherstripping at the panel edge.
2. Using the Wrong Material
Thin plywood or drywall panels aren’t insulation—they’re heat sinks. Always add rigid foam or upgrade to a pre-insulated attic access door.
3. Cutting the Wrong Joists
Never cut through a ceiling joist just to “make it fit.” Frame around it properly or risk damaging your ceiling structure.
4. Forgetting the Ladder Seal
Pull-down ladders are draft magnets. Foam around the frame and install a ladder cover or attic tent to seal it tight.
5. Ignoring Moisture
Warm air escaping into a cold attic can lead to mold and rot. Air sealing stops that moisture before it starts.
A hatch that looks fine but leaks air is like wearing a winter coat with the zipper open—it still looks the part, but it’s not doing the job.
When to Call a Professional
Some home projects make sense to DIY—this isn’t one of them. A sloppy attic hatch installation can waste hundreds in lost energy every year.
Call a professional if your hatch is drafty, misaligned, or sits above a space that never stays warm.
A qualified insulation contractor will:
- Use blower door tests or thermal imaging to locate leaks.
- Match your hatch’s insulation to your attic’s R-value.
- Air seal every seam and joint.
- Ensure the setup meets local building codes.
At Nealon Insulation, we’ve been sealing Connecticut attics since 1977. We know what works—and what doesn’t. A properly sealed, insulated attic hatch can stabilize room temps, stop drafts, and prevent ice dams before they start.
So if your attic hatch looks like it came with the original roof, it’s probably time for an upgrade.
Final Thoughts: Small Hatch, Big Energy Savings
It’s funny how something as small as an attic hatch can have such a big impact. Most folks focus on their insulation or HVAC, but that little square door in your ceiling is often the missing link between comfort and waste.
A well-built, air-sealed attic hatch keeps warm air in, cold drafts out, and your energy bills steady. It’s quick, affordable, and delivers measurable results all winter long.
👉 Ready to stop heating your attic and start saving real money? Contact Nealon Insulation for professional attic hatch installation and air sealing across Connecticut’s shoreline. We’ll make sure your attic is tight, efficient, and built to last.
Common FAQ's about Attic Hatches
How do I know if my attic hatch is leaking air?
Detect attic hatch air leaks by feeling for drafts or temperature changes around the edges on a cold or windy day. Dust streaks or insulation fibers often indicate air movement. For accurate detection, use an infrared camera or schedule a blower door test to locate escaping heat.
What’s the best material for insulating an attic hatch?
The best material for insulating an attic hatch is rigid foam board. It provides a high R-value, is lightweight, and easy to cut. A two-inch polyisocyanurate board delivers about R-13 to R-15 insulation. Pre-insulated attic covers or “attic tents” also work well for drop-down ladder systems.
How often should an attic hatch be inspected or maintained?
Inspect your attic hatch once a year, preferably before winter. Check for gaps, drafts, cracked foam, and worn weatherstripping. Tighten ladder hinges and springs if applicable. A five-minute annual inspection helps maintain insulation integrity and prevents long-term heat loss through the attic opening.
Can I install an attic hatch in a finished ceiling without damaging the drywall?
You can install an attic hatch in a finished ceiling without damaging drywall by cutting carefully between joists and using proper framing. Locate joists with a stud finder, measure twice, and add trim molding to cover edges. Proper support prevents cracks and maintains a clean finish.
Will upgrading my attic hatch really make a difference in energy savings?
Upgrading your attic hatch can significantly improve energy efficiency. An unsealed hatch may leak up to 30 cubic feet of air per minute—equal to leaving a small window open all winter. Proper sealing and insulation can reduce heating costs by 10–15% and improve comfort by minimizing drafts.
Related Articles


Let's Work Together
Ready to transform your home into an energy-efficient haven? Schedule your free energy assessment today and experience the Nealon difference for yourself.