Connecticut Insulation Code Requirements 2026: The Practical Guide for Homes & Commercial Buildings
Who This Guide Is For (And What You’ll Learn)
Let’s cut through the noise: if you’re in Connecticut and planning to insulate a home or commercial building, the only thing that matters is what the Connecticut insulation code requirements actually say right now. Nobody wants to fail inspection, rip out brand-new drywall, or spend money on “R-what-now?” guesses.
This guide is built for two crowds:
- Homeowners who just want to know if their attic, basement, or walls measure up to code before they spend a dime.
- Contractors who already speak R-values and air changes per hour, but want the cliff notes on the latest 2022 Connecticut State Building Code (which, for the record, pulled in the 2021 IECC with local amendments).
Here’s what you’ll learn as you scroll:
- The minimum R-values you need for attics, walls, basements, floors, and slabs.
- The air sealing and blower door test numbers you must hit before your building official signs off.
- How the code treats vapor barriers, crawlspaces, and basements (hint: it’s about keeping moisture where it belongs).
- Which insulation types are allowed, restricted, or need to be covered up for fire safety.
- What’s fair game for a DIY homeowner and when the law says “call a pro.”
Think of this as your field manual. Less fine print, more straight talk.
Prefer to listen? Check out the link below.
Connecticut at a Glance: Climate Zone, Code Family, Scope
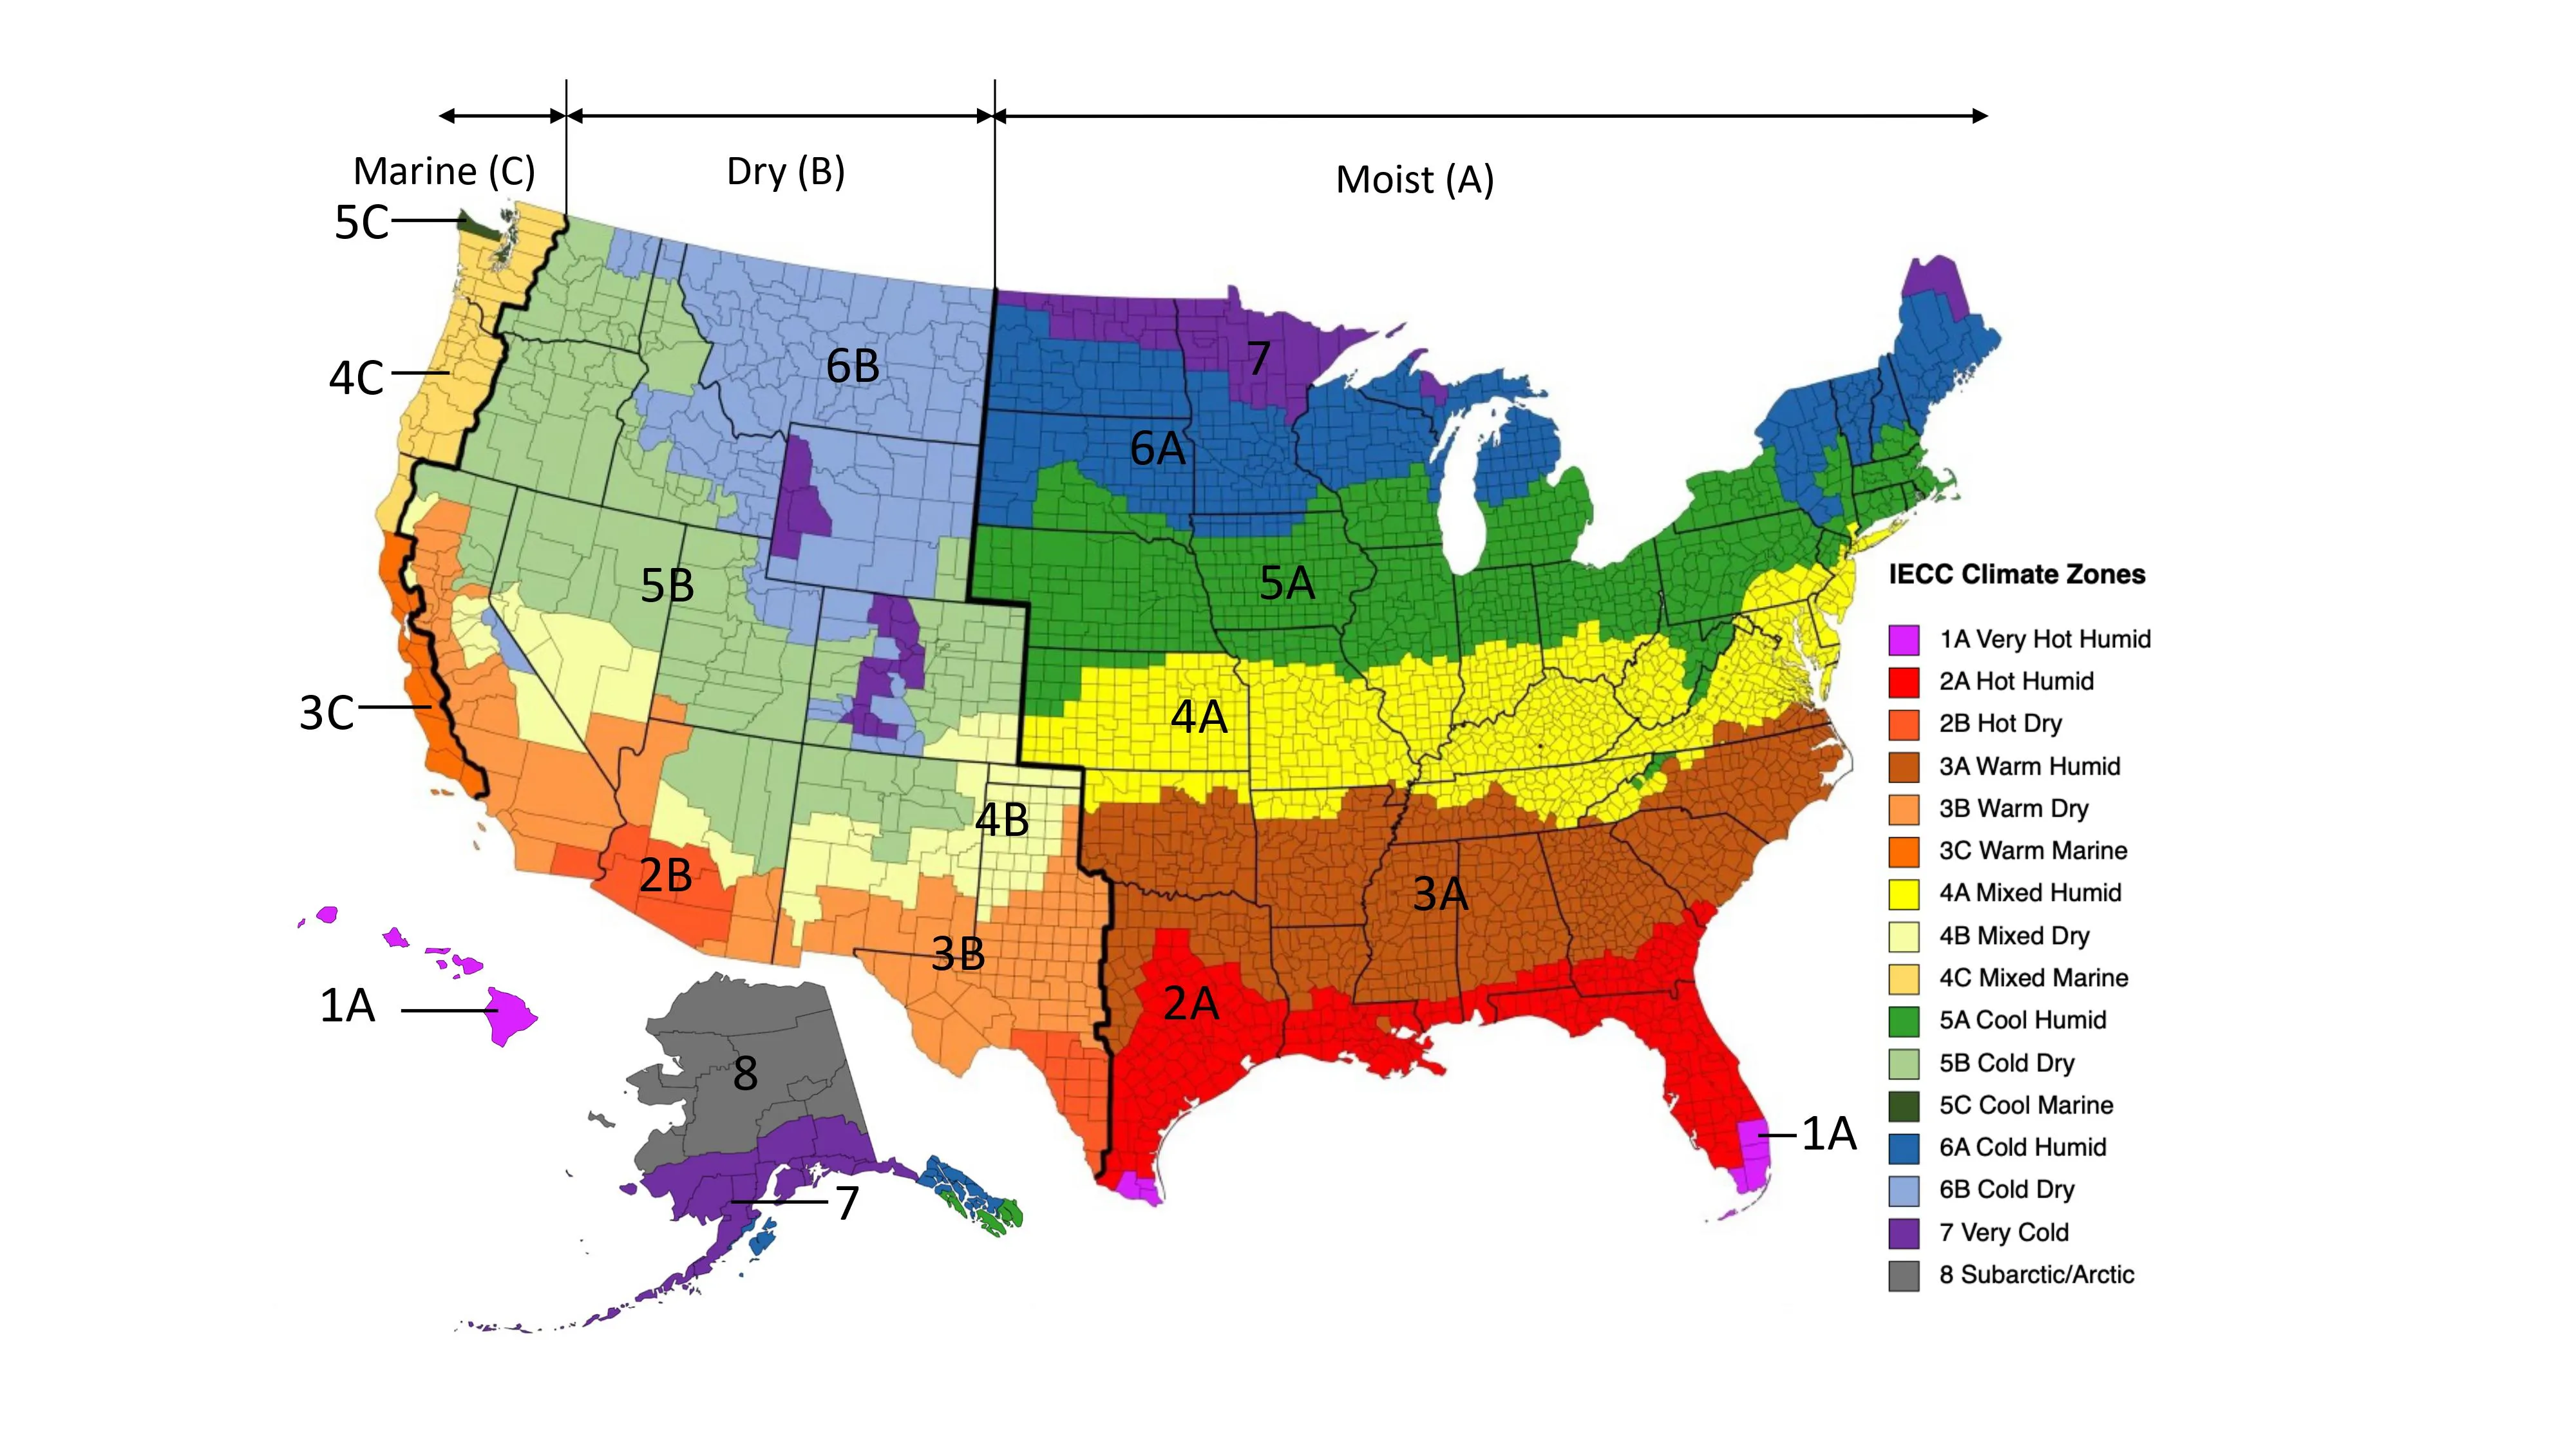
Connecticut sits squarely in Climate Zone 5A—translation: cold winters, humid summers, and plenty of freeze/thaw action. That climate zone drives the Connecticut insulation code requirements, because what works in Arizona won’t cut it in New Haven.
The rulebook is the 2022 Connecticut State Building Code (CSBC). It’s built on the 2021 International Energy Conservation Code (IECC) with a few Connecticut-specific tweaks. For commercial projects, you’ve got a fork in the road: follow the IECC or use ASHRAE 90.1-2019. Either way, the targets are the same—tighten the envelope, beef up the insulation, and keep the HVAC from doing all the heavy lifting.
Who does this apply to?
- New construction: Every stick of wood, roll of insulation, and bead of spray foam is inspected under these rules.
- Additions and major renovations: If you’re adding square footage or gutting to studs, expect code-level insulation and air sealing in the affected areas.
- Existing buildings: Top off your attic or blow cellulose into your walls? You’re not forced to bring the whole house to 2026 standards, but the code is still the yardstick inspectors use.
Bottom line: if you’re pulling a permit in Connecticut today, this is the playbook.
What’s Changing in 2026 (And What Isn’t)
If you’re skimming this guide in 2026, here’s the straight answer: most of the insulation rules you see above are still the ones inspectors are enforcing today, but Connecticut is in the middle of a code transition.
Right now, permits are still being reviewed under the 2022 Connecticut State Building Code, which is based on the 2021 IECC. That’s why the R-values, blower door limits, and air sealing requirements in this guide still hold up in the field.
However, Connecticut is preparing to roll out the 2026 Connecticut State Building Code, which is expected to adopt the 2024 IECC as its energy code foundation. This newer IECC doesn’t throw insulation out the window—but it does change how compliance can be demonstrated. Instead of relying as heavily on rigid prescriptive tables alone, the 2024 IECC introduces more flexible performance-based and credit-style compliance paths that look at the building envelope as a whole.
Here’s the key takeaway:
- Climate Zone stays the same (Connecticut is still Zone 5A).
- Air sealing and testing remain non-negotiable—tight buildings are still the goal.
- Insulation still matters, but future code paths may allow more trade-offs between assemblies instead of one-size-fits-all R-value targets.
- Final Connecticut-specific insulation numbers for the 2026 code are not yet published, and local amendments will matter.
In plain English: if you’re pulling permits today, follow the requirements in this guide. If you’re planning a project that will land squarely under the 2026 code, expect more flexibility in how you prove efficiency—but not lower expectations for performance. The bar isn’t dropping; the math behind it is just changing.
Residential Minimums: Prescriptive R-Values That Pass Plan Review
The prescriptive path is the straight shot through compliance: hit the numbers on the page, and your inspector signs off. In Climate Zone 5A, those numbers aren’t guesses—they’re law.
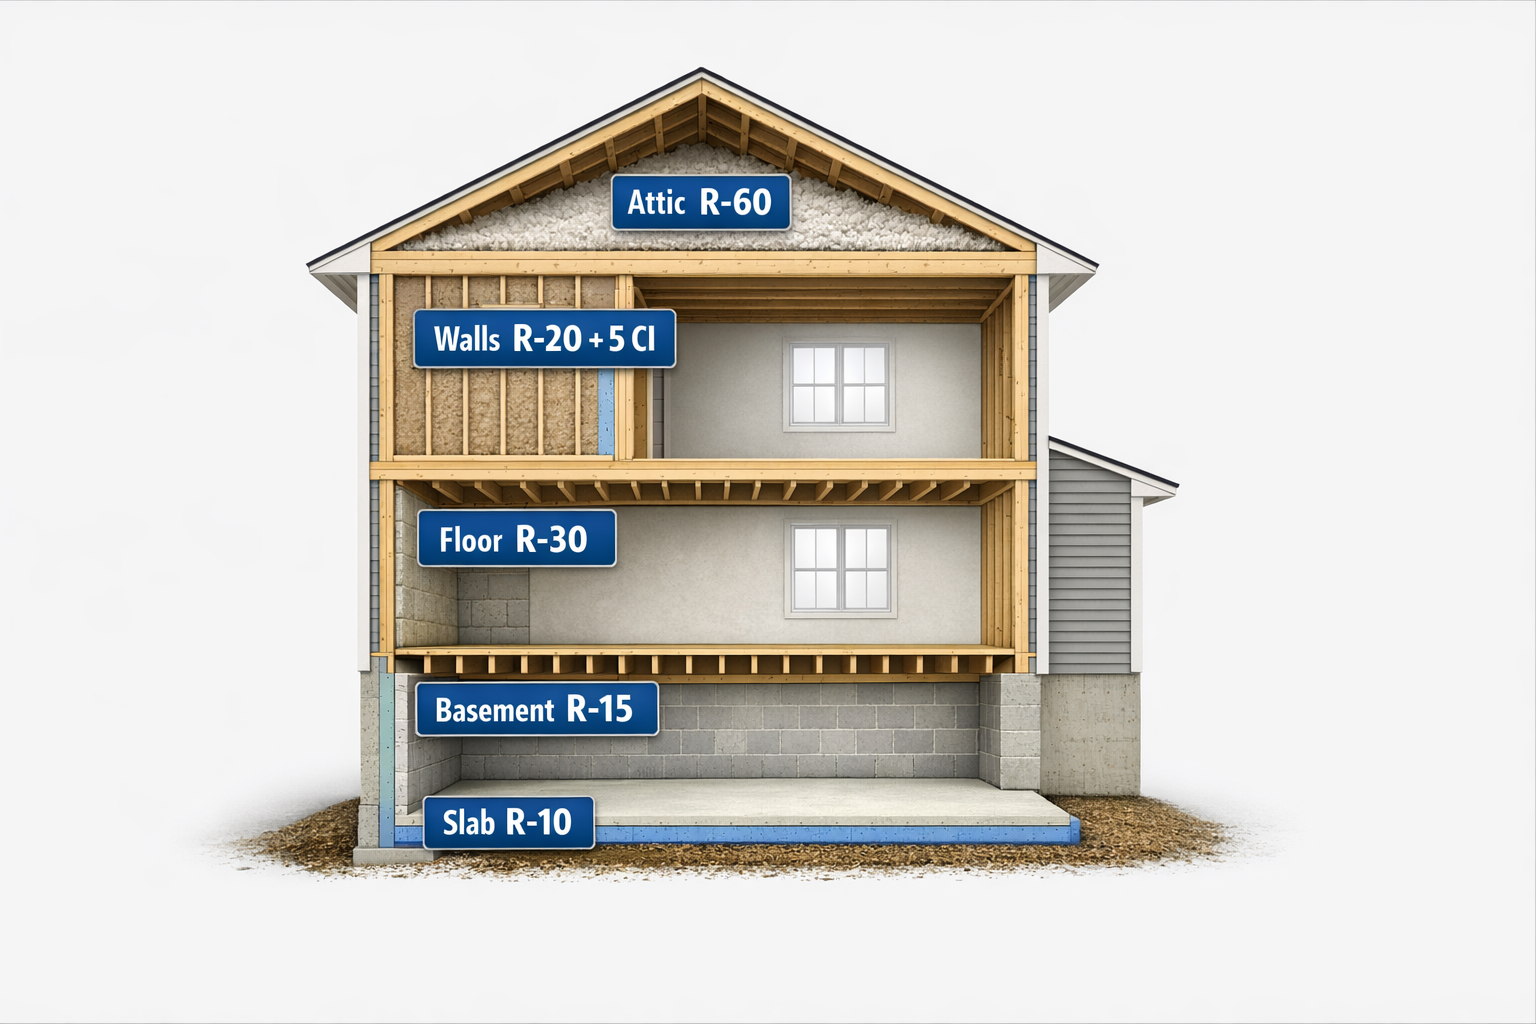
- Attics and ceilings: R-60 minimum. That’s a thick blanket of blown cellulose or fiberglass across the attic floor.
- Above-grade walls: Either R-30 cavity or R-20 cavity + R-5 continuous insulation. Continuous exterior insulation is how you cut thermal bridging.
- Floors over unheated spaces: R-30 so your bonus room doesn’t freeze your feet off.
- Basement walls: R-15 continuous or R-19 cavity. Interior or exterior insulation works, but bare concrete doesn’t.
- Slab-on-grade floors: R-10 around the perimeter, extended 4 feet down or out.
- Crawl spaces: Insulate walls at R-15 continuous or R-19 cavity, or treat the crawl as outside and insulate the floor above to R-30.
All of these require Grade I installation quality—no gaps, voids, or floppy batts.
Residential Insulation Requirements (Climate Zone 5A)
Commercial Envelope Minimums: Hitting IECC (or ASHRAE 90.1) in CZ5A
Commercial jobs (anything over three stories or non-residential) can follow IECC 2021 or ASHRAE 90.1-2019. Both demand more than stuffing batts—you’ll be dealing with continuous insulation and airtight assemblies.
- Roofs: R-30 continuous insulation above deck (averaged for tapered systems).
- Above-grade walls: Steel-framed need R-13 cavity + R-7.5 continuous or about R-20 continuous. Mass walls need around R-11.4 continuous.
- Slab edges: R-10 (24” depth) unheated; R-15 (48” depth) heated.
- Basement walls: R-7.5 continuous or R-13 cavity.
- Windows: Max U-0.30 fixed, U-0.40 operable, with SHGC limits.
- Air leakage: Whole-building test ≤0.40 CFM/sf @ 75 Pa.
Commercial Insulation Requirements (Climate Zone 5A)
Air Sealing: The Half of Performance Most People Miss
Quick Tips: Insulation’s the flashy part. But if you don’t seal the leaks, you’re basically wearing a down jacket with the zipper open.
- Air barrier: Must be continuous around the conditioned space.
- Residential blower door: ≤3 ACH50. Fail, and you’re chasing leaks.
- Duct testing: Required if ducts leave conditioned space.
- Commercial leakage: ≤0.40 CFM/sf @ 75 Pa, verified by test or inspection.
Explanation: Insulation gets all the glory—big R-values, thick batts, shiny foil-faced foam. But the truth? Without good air sealing, insulation can’t do its job. Imagine walking outside in January wearing a brand-new down jacket… with the zipper wide open. That’s exactly what happens when you pile on insulation but ignore leaks.
Connecticut’s code is crystal clear: every home and commercial building needs a continuous air barrier wrapped around the conditioned space. That means no gaps at rim joists, no leaky attic hatches, no forgotten plumbing or wire penetrations. The idea is simple—keep inside air in, outside air out, and let your insulation actually perform.
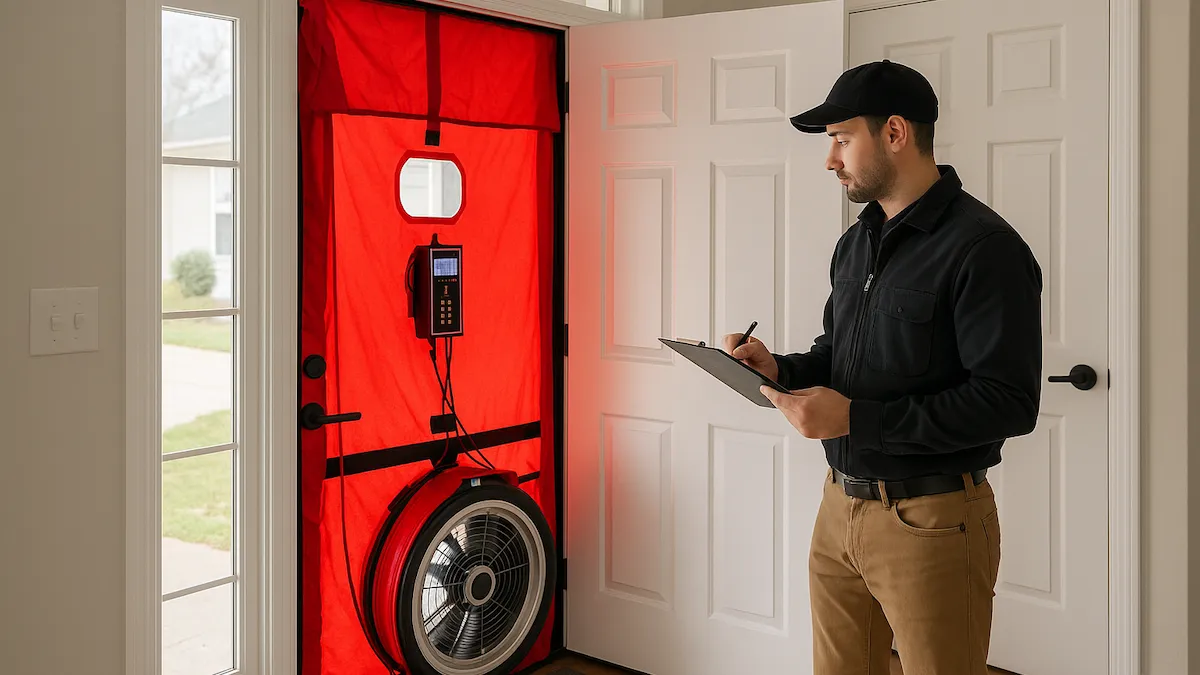
How do they check it? With a blower door test. For new homes, your house has to come in at 3 ACH50 or less (air changes per hour at 50 Pascals). Commercial buildings get a different metric—no more than 0.40 CFM per square foot of envelope area at 75 Pascals, verified by a full building test or a detailed inspection. And if your HVAC ducts run outside the conditioned envelope, you can expect a separate duct leakage test too.
The bottom line: build tight, ventilate right. Seal the shell first, then add controlled ventilation—bath fans at minimum, or an HRV/ERV system if you want to play it smart. Done right, air sealing improves comfort, cuts energy waste, and keeps moisture where it belongs.
Want the deep dive? Check out our full guide on air sealing and why it matters.
Vapor Control & Moisture Management
Quick Tips: Never trap moisture. Every assembly needs at least one direction to dry.
- Walls: Class I or II vapor retarder inside. Class III (painted drywall) only works with enough exterior continuous insulation.
- Unvented roofs: Closed-cell spray foam doubles as vapor retarder. Open-cell requires extra coating.
- Crawl spaces: Dirt floors need a sealed 6-mil poly vapor barrier.
- Basements: Use rigid foam or closed-cell spray foam against concrete; no bare poly against walls.
- Golden rule: Never trap moisture. Avoid double vapor barriers unless ratios are correct.
Explanation: Insulation keeps your heat where it belongs. Vapor control keeps water vapor from sneaking into the walls and turning your studs into a science experiment. In Connecticut’s climate—cold winters, muggy summers—that balance matters just as much as R-value. That’s why the Connecticut insulation code requirements spell out exactly how to handle vapor barriers.
Start with the walls. In Climate Zone 5, the code calls for a Class I or II vapor retarder—things like polyethylene sheeting or kraft-faced batts—on the interior side of exterior walls. The goal is to keep indoor humidity from drifting into cold wall cavities and condensing. A looser Class III retarder, like painted drywall, only works if you’ve already got enough continuous insulation on the outside to keep the sheathing warm.
Roofs are a different animal. If you’re insulating an unvented roof deck, closed-cell spray foam pulls double duty: it’s insulation and a vapor retarder all in one. Open-cell foam can be used too, but only if it’s coated with a vapor-retarding layer. Skip that step, and the roof sheathing could quietly rot from hidden condensation.
Down below, crawl spaces demand special care. If you’re sealing a crawl, the dirt floor must be covered with a 6-mil polyethylene vapor barrier, seams overlapped and taped, edges run up the wall. Without it, you’re basically humidifying your entire house from underneath.
And then there are basements. A common mistake is stapling poly sheeting right against the concrete walls—that just traps ground moisture where it can do damage. Instead, the safe play is to insulate with rigid foam boards or closed-cell spray foam directly against the concrete. Those materials handle moisture without breaking down, and they double as vapor control.
The golden rule is simple: never trap moisture. Every assembly needs at least one direction to dry. Stack vapor barriers on both sides of a wall, and you’ve built a mold factory.
Done right, vapor control is invisible. You don’t see it once the drywall goes up, but it quietly keeps your insulation dry and your structure healthy for decades.
Insulation Materials & Code Notes
Quick Tips: Inspectors want proof—labels, spec sheets, and approvals.
- Fiberglass: Cheap, everywhere, but only works if installed tight. Kraft facing counts as a vapor retarder.
- Cellulose: Dense-packed or blown. Needs certificate at attic hatch.
- Spray foam: Closed-cell = insulation + air + vapor barrier. Must be covered by ½" drywall or ignition barrier. Open-cell needs extra vapor control.
- Rigid foam: EPS, XPS, Polyiso. Great for continuous insulation, but watch for vapor-closed layers. Must be covered inside.
- Mineral wool: Fire-resistant, water-repellent, vapor-open. Excellent for exterior CI.
Explanation: Not all insulation is created equal—and Connecticut’s building code doesn’t treat it that way either. Each material has its strengths, quirks, and fine print. If you want to pass inspection without a headache, here’s how the most common options stack up.
Fiberglass is the old standby—the pink or yellow batts you see at every big-box store. It’s cheap, available everywhere, and about R-3 per inch. The catch? It only works if it’s installed perfectly: snug in the cavity, no gaps, no compression. Even a sloppy half-inch gap can knock down performance. If you use kraft-faced batts, that kraft paper doubles as a vapor retarder, which checks a code box for walls.
Cellulose takes a different approach. It’s shredded, fire-treated newspaper that gets blown in loose-fill across an attic or dense-packed into wall cavities. At about R-3.5 per inch, it’s slightly better than fiberglass and great at filling irregular gaps. But it comes with a paperwork requirement: installers must leave a certificate near the attic access showing coverage, depth, and R-value. Inspectors will look for it, and if it’s missing, you’ll be answering questions.
Spray foam is the overachiever of the group. Closed-cell foam runs about R-6 to R-7 per inch and pulls triple duty: insulation, air barrier, and vapor retarder all at once. Open-cell foam is cheaper and softer (around R-3.5 to R-4 per inch) but needs an extra vapor-retarding layer in Connecticut’s climate. Code also draws a hard line here: all foam plastics must be covered by a thermal barrier—usually ½-inch drywall—or, in attics and crawl spaces, an approved ignition barrier coating. No exceptions.
Rigid foam boards—EPS, XPS, and polyiso—are the go-to for continuous insulation. EPS is budget-friendly, XPS gives you about R-5 per inch, and polyiso pushes toward R-6. Use them on the exterior to cut thermal bridging, or inside basements where moisture resistance is key. Just remember: foil-faced polyiso is a vapor barrier, so plan your wall assembly carefully to avoid trapping moisture. And like spray foam, rigid boards must be covered inside with drywall or another code-approved thermal barrier.
Mineral wool (or rockwool) is the tough guy. It’s non-combustible, water-repellent, and about R-4 per inch. Because it stays vapor-open, it’s perfect for exterior continuous insulation—your walls can breathe outward while still hitting high R-values. Inspectors also like seeing it around chimneys and furnaces, since it won’t burn.
No matter which option you choose, remember this: inspectors want proof. Keep the packaging, spec sheets, or installer certificates handy. If you try to call compressed R-19 batts “R-19” in a 2x4 wall, expect a red tag until you can prove otherwise.
Installation Standards: Pass-the-Inspection Checklist
Quick Tips: inspectors aren’t looking for creativity; they’re looking for consistency
- ✅ Insulation must be tight to the air barrier.
- ✅ Blown insulation: level depth with rulers + installer’s certificate.
- ✅ Recessed lights: IC/AT rated only.
- ✅ Attic accesses: insulated and weatherstripped.
- ✅ Clearances: maintain around chimneys and flues.
- ✅ Crawl/basement: vapor barriers lapped and sealed, foam safe from moisture.
- ✅ Documentation: keep packaging and product info.
Explanation: You can buy the highest R-value insulation on the shelf, but if it’s tossed in like stuffing in a Thanksgiving turkey, the inspector—and your heating bill—will call you out. The Connecticut insulation code requirements don’t just measure thickness; they judge craftsmanship.
Take the attic, for example. Blown-in insulation has to look like a fresh snowfall—even depth across the whole floor, no bald spots. Depth rulers need to stick up like little fence posts, and an installer’s certificate should be stapled right near the hatch. Skip those, and your attic looks more like a patchy backyard lawn than code-compliant insulation.
Lighting trips up a lot of folks too. Recessed cans buried under insulation? They’ve got to be IC-rated and airtight. Otherwise you’re basically cutting a hole in your thermal envelope and wrapping it around a toaster. Inspectors spot this one in seconds.
Then there are the “hidden offenders.” That pull-down attic stair, for example—it’s basically a giant hole in your ceiling unless it’s insulated and weatherstripped. Same goes for rim joists, crawl space vapor barriers, and the edges where insulation is supposed to meet air barriers. If those details aren’t tight, the whole system underperforms.
And don’t forget fire safety. Foam plastics left exposed in basements or living areas are a guaranteed red tag. The code insists on a thermal barrier—usually half-inch drywall—before you cover it up and call it done.
Inspectors aren’t looking for creativity; they’re looking for consistency. Insulation should be neat, continuous, and labeled. Do it right the first time, and inspection is a five-minute wave and signature. Cut corners, and you’ll be hauling batts back out to do it twice.
Compliance Paths: Prescriptive Path
Quick Tips: There are minimums you can’t dodge—like blower door tests and basement insulation.
- Prescriptive: Meet R-values and details, no questions.
- UA trade-off: Balance envelope performance using REScheck/COMcheck.
- ERI (residential): Build to a score, but renewables don’t count in CT.
- Performance modeling (commercial): Energy models to prove compliance.
Explanation: Not every project fits neatly into the prescriptive tables, and the code writers know it. That’s why the Connecticut insulation code requirements offer a few different ways to prove your building is efficient enough to pass. Think of them as different trails up the same mountain—some shorter, some steeper, but all leading to the same summit.
The simplest route is the prescriptive path. Just follow the tables: R-60 in the attic, R-30 in the floors, vapor barrier in the right place. Inspectors love this option because it’s black and white—either you hit the numbers, or you don’t.
But maybe your design doesn’t play nice with those numbers. Say you’ve got a modern build heavy on glass. In that case, you can use the UA trade-off method. Instead of every component hitting its exact R-value, you balance the overall envelope performance using tools like REScheck (for homes) or COMcheck (for commercial). Beef up the attic, ease off the walls, and as long as the total thermal performance pencils out, you’re in the clear.
For residential projects, there’s also the Energy Rating Index (ERI) path. It’s like a credit score for your home’s efficiency. Connecticut’s wrinkle? You can’t pad the score with solar panels or renewables—the envelope and systems have to carry the weight.
And for larger commercial jobs, teams often lean on performance modeling. Engineers run energy simulations to show the design performs as well—or better—than the code baseline. It takes math, paperwork, and an engineer’s stamp, but it can unlock flexibility in how you balance insulation, glazing, and HVAC systems.
No matter which path you choose, remember this: some rules are non-negotiable. Blower door testing, basement insulation, and minimum R-values in key places always apply. These aren’t loopholes, just different ways of proving you’re delivering an efficient, code-compliant building.
Weatherization & Retrofits
Quick Tips: Older homes don’t need to meet today’s full code, but upgrades get you close:
- Air seal first. Don’t bury leaks.
- Attic insulation: Topping up to R-49 or R-60 pays off fast.
- Duct sealing: Especially if ducts run in unconditioned spaces.
- Wall insulation: Dense-pack cellulose improves comfort; exterior foam when re-siding.
- Basements & crawls: Rigid foam + vapor barriers keep them dry and warm.
- Utility help: Energize CT offers audits and rebates.
Explanation: Connecticut is full of older homes—Cape Cods, Colonials, ranches from the ‘60s—that were built long before the current Connecticut insulation code requirements came along. The good news? You don’t have to gut them to the studs to get closer to code-level performance. Weatherization is about making the most of what you already have, sealing up the leaks, and adding insulation where it counts.
The first step is almost always air sealing. It’s the cheapest fix with the biggest payoff. Chasing down attic bypasses, foaming rim joists, and sealing plumbing or wire penetrations does more for comfort than piling on batts. If you insulate before sealing, you’re just burying leaks under fluff.
Once the leaks are under control, the attic is the next battleground. Most older houses have a skimpy layer of insulation up there—maybe R-19 if you’re lucky. Code today calls for R-60, so topping it off with blown cellulose or fiberglass is a no-brainer. Just don’t forget the soffit baffles; otherwise you’ll choke off ventilation and trade efficiency for moisture problems.
Walls are trickier. You’re not tearing off plaster or drywall unless you’re remodeling, so the usual play is dense-packing cellulose into wall cavities. That won’t bring you all the way to modern R-20 + 5 continuous, but it will knock down drafts and make rooms far more comfortable. If you ever re-side the house, that’s your chance to add rigid foam outside and bring the whole wall assembly closer to code.
Then there are the basements and crawl spaces, which are usually the biggest comfort complaints. Bare concrete walls bleed heat year-round. Adding rigid foam to foundation walls, or sealing a crawl with a vapor barrier and wall insulation, makes a huge difference—suddenly those icy floors upstairs don’t feel so icy.
And let’s not forget ductwork. In a lot of older homes, ducts run through attics or crawl spaces, leaking air and wasting money. Sealing them up, or better yet relocating them inside the conditioned space, gets you closer to code-level performance without touching a single stud bay.
The best part? You don’t have to go it alone. Programs like Energize Connecticut will send an auditor with a blower door and thermal camera to show you exactly where the leaks are—and they’ll chip in rebates for the upgrades. For many homeowners, that makes weatherization one of the fastest paybacks in the whole efficiency game.
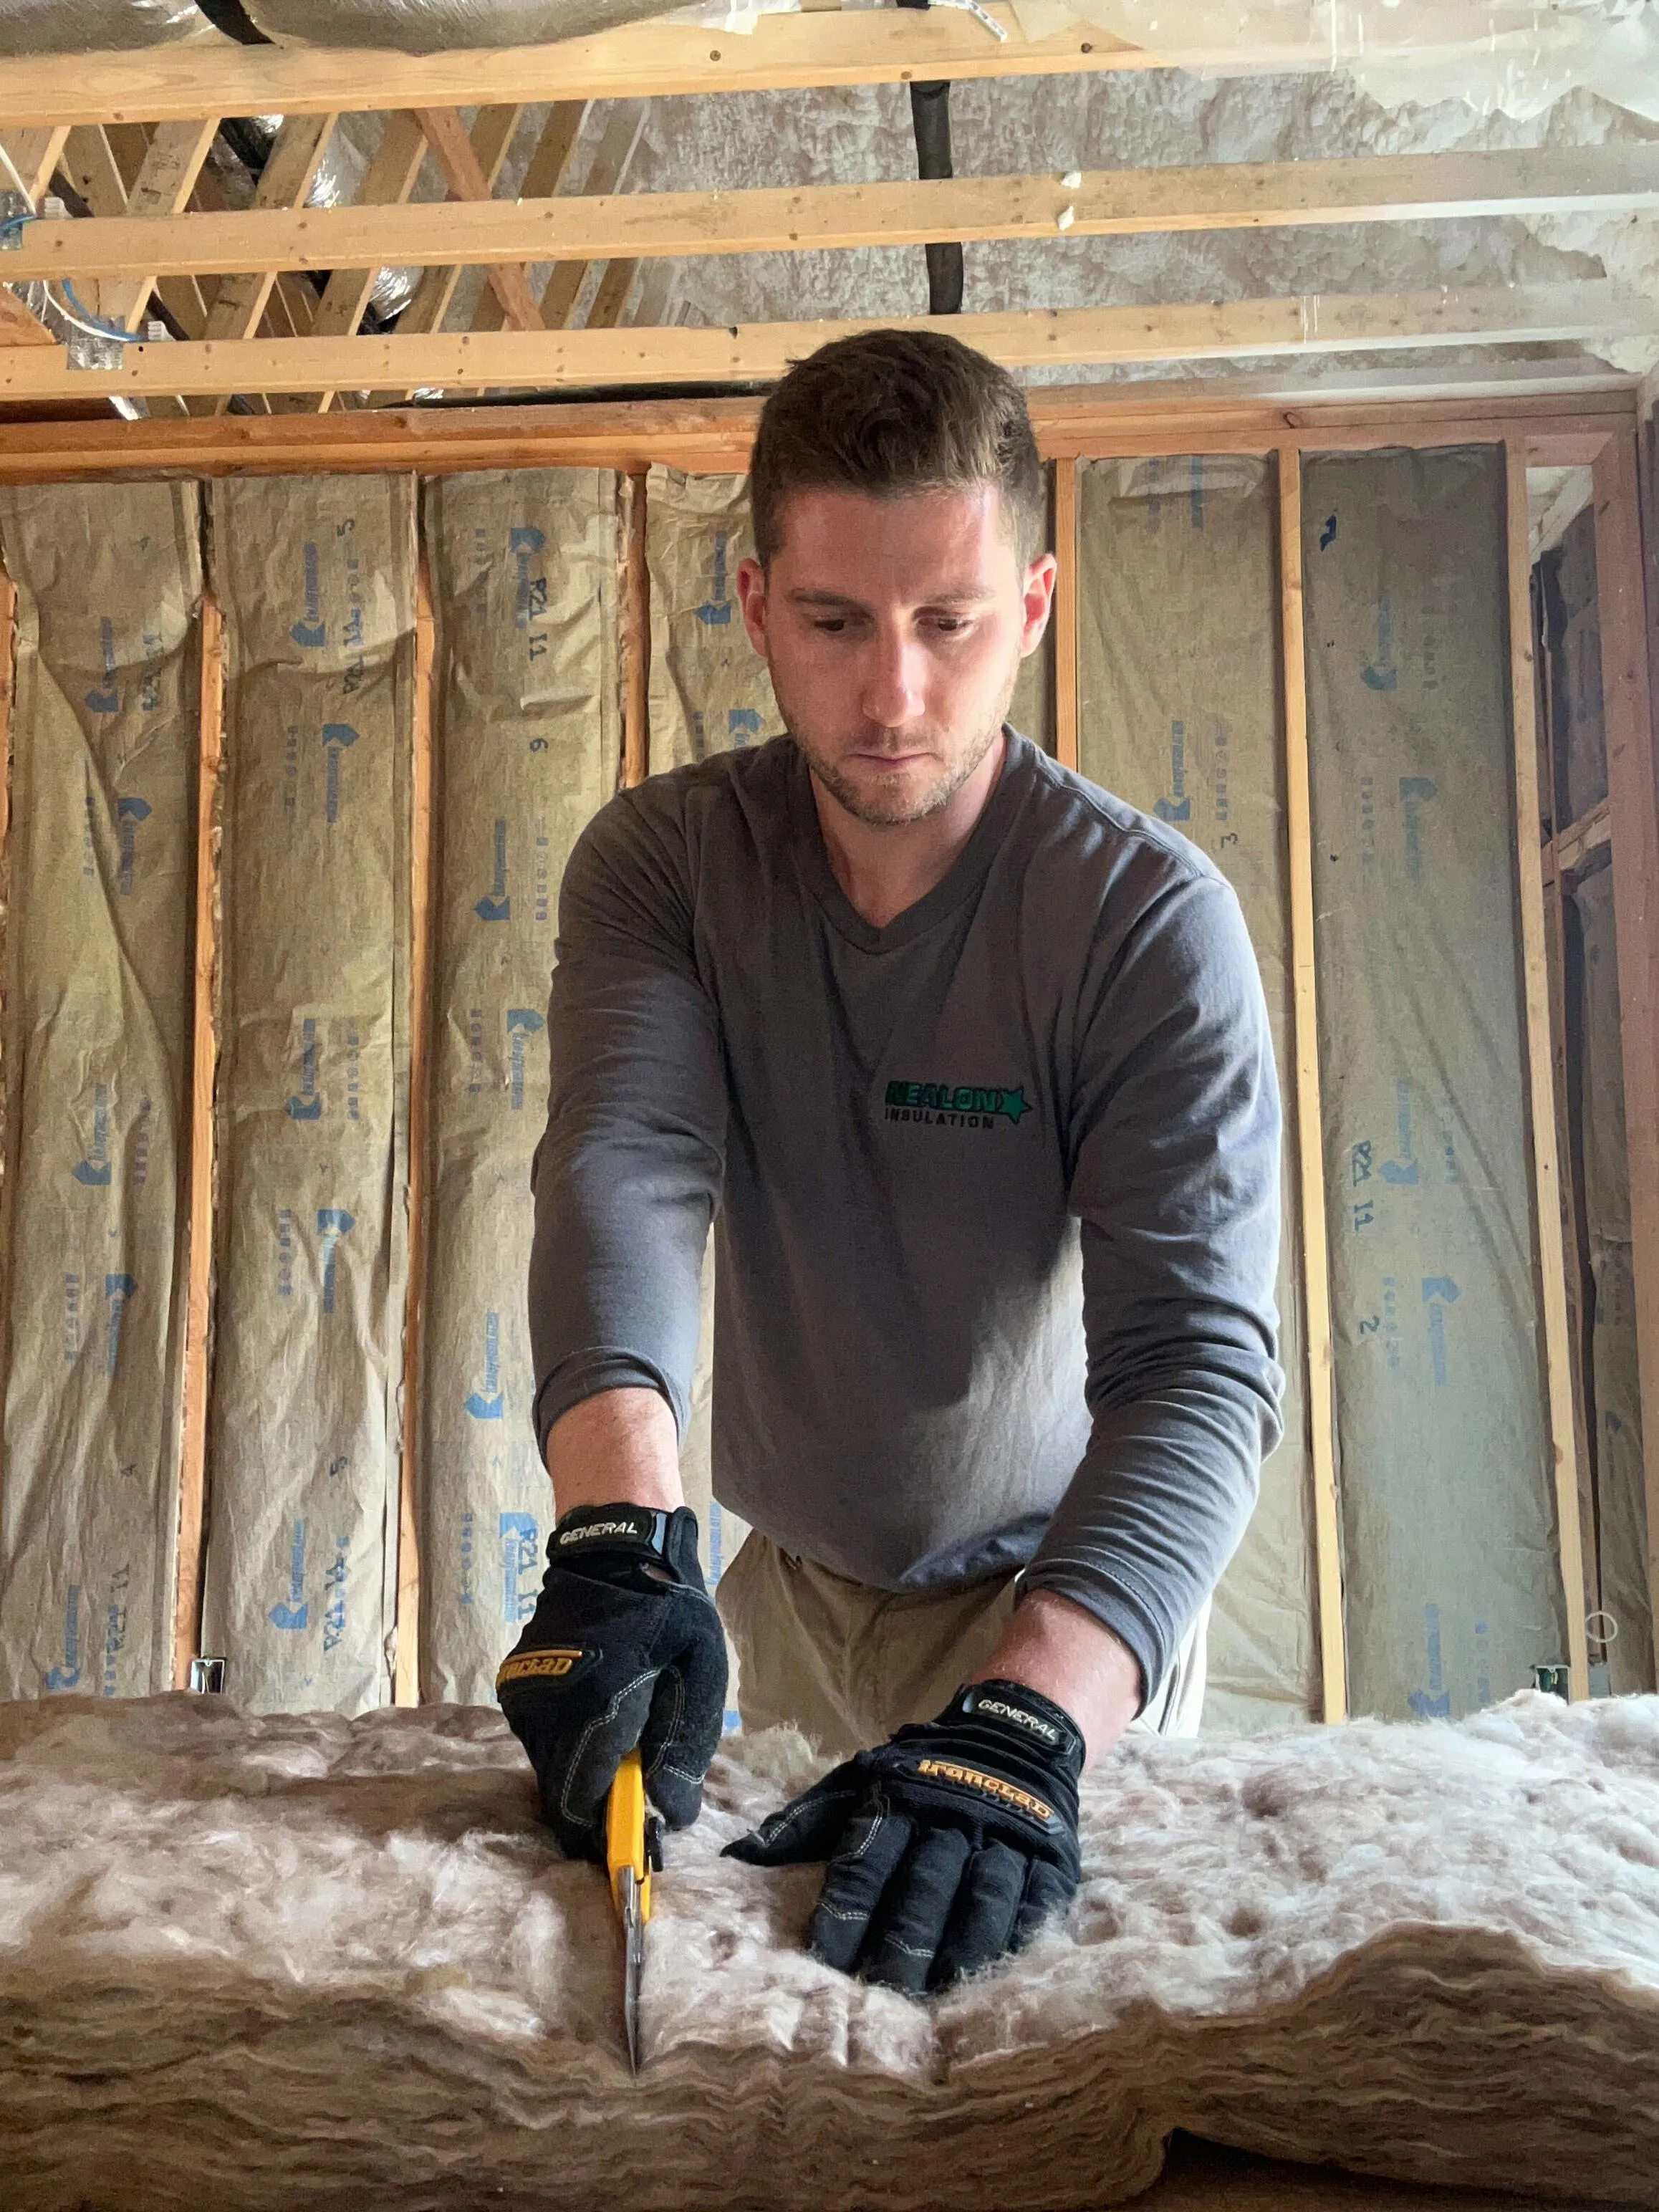
Removing Insulation from Walls: Step-by-Step Guide for Homeowners
DIY vs Contractor
Quick Tips: Skip the permit, and you may hit trouble selling or with insurance later.
- DIY-friendly: Caulking, weatherstripping, attic blow-in, batt install, crawl vapor barriers.
- Pro-only: Spray foam, HVAC/electrical work, basement finishing, commercial projects.
- Permits: Homeowners can pull their own for single-family homes, but inspections still apply.
Explanation: Plenty of homeowners in Connecticut are handy enough to swing a hammer or run a rented insulation blower. And the building code doesn’t forbid you from doing your own work—if it’s your primary residence, you can even pull your own permits. But there’s a big difference between the jobs a confident DIYer can tackle and the ones that really do require a pro.
For starters, air sealing is firmly in the DIY camp. A tube of caulk, a can of spray foam, and some weatherstripping can go a long way toward tightening up leaky windows, doors, and utility penetrations. The same goes for adding insulation in an open attic—you can rent a blower, follow the coverage chart, and get the job done in a weekend. Even laying batts in rim joists or rolling out a vapor barrier on a crawl space floor is fair game for someone comfortable working around tight spaces.
But once you cross into projects that involve chemistry, fire safety, or mechanical systems, that’s where a contractor earns their paycheck. Spray foam insulation looks simple in YouTube videos, but it requires specialized equipment, knowledge of curing chemistry, and strict fire-code compliance. Miss one detail, and you’ve either wasted money or created a hazard. The same goes for jobs that touch electrical or HVAC systems—you can’t legally rewire a circuit or seal ductwork without the proper license. Basement finishing falls into this category too; between vapor barriers, framing, fire protection, and egress requirements, it’s a code-heavy zone best left to pros. And when it comes to commercial projects, don’t even think about DIY—the bar is higher, the testing stricter, and the inspectors less forgiving.
One more thing: permits matter. Even if you’re doing your own insulation in a single-family home, the inspector still has the final say. Skip the paperwork, and you could hit snags when you try to sell—or worse, find out your insurance won’t cover a claim after a fire.
So here’s the rule of thumb: if it’s simple and safe, DIY it. If it’s complex, code-intensive, or involves systems that can burn down the house, call a pro. That way you’ll save money where it makes sense, and sleep easier knowing the critical stuff is in professional hands.
Permits, Documentation & Closeout
Quick Tips: Get it right, and you’ll pass without headaches.
- Permits required: Always for new builds and additions. Usually for basements. Sometimes for attic top-offs—check locally.
- Inspectors check: R-values, air sealing, vapor control, clearances, IC/AT cans, attic certificates.
- Testing: Blower door, duct tests, and commercial leakage tests.
- Proof: Keep labels, spec sheets, and approvals ready.
Explanation: Insulation might not feel like “permit-worthy” work, but in Connecticut, building officials see it differently. If you’re insulating as part of a new build, addition, or basement finish, you can bet it requires a permit. Even something as simple as topping off an attic can trigger paperwork in some towns, so it’s always smart to check with your local building department before renting the blower.
Once the insulation is in, the real test begins: inspection. Inspectors don’t just eyeball whether the batts look fluffy enough. They’ll check that the R-values match what’s on your plans, that the insulation is installed snugly against air barriers, and that vapor retarders are where they belong (on the warm-in-winter side of the wall). They’ll also scan for clearance issues around chimneys and flues, confirm that recessed lights are IC/AT-rated, and look for baffles keeping attic ventilation clear. In attics with blown insulation, they’ll expect to see depth markers sticking up and a signed installer’s certificate posted by the hatch.
Then come the tests. For new homes, a blower door test is mandatory—you’ve got to hit ≤3 ACH50 to pass. If you’ve got ducts running through unconditioned spaces, a duct leakage test is also on the menu. On the commercial side, the bar gets even higher: entire buildings may need an air leakage test or a documented field inspection of the air barrier system.
And don’t forget the paper trail. Inspectors can (and often will) ask to see packaging labels, spec sheets, or installer certificates to prove the insulation is what you claim it is. If you’re using foam products, ICC approvals and fire-safety documentation may also be required.
Get all of this right, and closeout is painless—just a quick nod, a signature, and you’re moving on to drywall or final occupancy. Miss the details, and you’ll be staring at a correction notice and scheduling a re-inspection that costs you time and money.
Full list of Connecticut building departments
Common Mistakes (And How to Avoid Them)
Quick Tips: Do it right the first time and you won’t be re-insulating under a red tag.
- Blocking soffit vents.
- Using non–IC/AT recessed lights in insulated ceilings.
- Skipping air sealing before insulating.
- Double vapor barriers.
- Ignoring rim joists.
- Leaving foam plastics exposed.

Explanation: On paper, insulation looks simple—buy the right R-value, fill the cavities, and call it a day. But in the field, small missteps can derail an otherwise solid job and land you with a correction notice. Here are the slip-ups inspectors see most often, and why they matter.
Blocking soffit vents is a classic. You blow insulation all the way to the eaves without installing baffles, and suddenly your attic can’t breathe. The result? Moisture buildup, mold, and ice dams that chew up shingles. A five-dollar baffle fixes what could turn into a five-thousand-dollar roof problem.
Another common one is burying the wrong recessed lights. Non–IC/AT rated cans in an insulated ceiling are basically little space heaters venting into your attic. They waste energy and create fire hazards. The code is clear: only IC-rated, airtight fixtures belong in contact with insulation.
Then there’s the temptation to skip air sealing because “the insulation will cover it anyway.” Wrong. Insulation hides leaks; it doesn’t stop them. If you don’t seal first, you’re paying to heat the outdoors, no matter how much fluffy stuff you pile on top.
Moisture control trips people up too. Double vapor barriers—say, poly inside and foil-faced foam outside—can trap water inside a wall assembly. With nowhere to dry, the wall becomes a mold incubator. Assemblies need at least one way to dry, and code inspectors know it.
Rim joists are another blind spot. That band around the edge of your house leaks heat like crazy if left bare. Insulating and sealing it with rigid foam or spray foam is one of the biggest comfort improvements you can make. Ignore it, and you’ll feel the drafts every winter.
And finally, exposed foam plastics. Spray foam or rigid foam boards left uncovered in basements or living spaces are a direct code violation. They have to be covered with a thermal barrier—usually half-inch drywall—before you move on.
The moral? None of these mistakes are glamorous, but every one of them can cost you an inspection, money, and comfort if you get them wrong. Do it right the first time, and you won’t be re-insulating under a red tag
Connecticut Resources & Official References
- 2022 Connecticut State Building Code (CSBC)
- Office of the State Building Inspector
- Codes & Standards Committee (meeting notes online)
- ASHRAE 90.1-2019 (commercial compliance path)
- DOE REScheck & COMcheck
- Energize CT for rebates and audits
- Local building departments for permit rules
Wrapping It Up
The Connecticut insulation code requirements aren’t just red tape—they’re a blueprint for keeping your building efficient, dry, and comfortable for decades. Whether you’re a homeowner topping off the attic or a contractor managing a commercial envelope, the message is the same: build tight, insulate right, and respect moisture.
Stick to the prescriptive R-values, hit your blower door number, and use the right vapor control, and you’ll pass inspection without breaking a sweat. Miss those details, and you’ll be stuck redoing work no one wants to pay for twice.
The good news? You don’t have to figure it out alone.
Common FAQ's about Connecticut Building Code
How often does Connecticut update its building insulation code?
Connecticut updates its building insulation code every three to five years. The updates follow new editions of the International Energy Conservation Code (IECC), with state-specific amendments. The current 2022 code is based on the 2021 IECC. Always verify the latest code through the Connecticut DAS or local authorities.
Do older homes in Connecticut have to meet today’s insulation code?
Older homes in Connecticut do not have to meet today’s insulation code unless major renovations occur. Projects like additions, basement finishing, or wall stripping require updated insulation. For basic retrofits, such as attic insulation, inspectors focus on safe installation rather than full code compliance.
Is spray foam the only way to meet air sealing requirements in Connecticut?
Spray foam is not the only way to meet air sealing requirements in Connecticut. Traditional materials like caulk, gaskets, rigid foam, and taped sheathing also qualify. Compliance depends on passing the blower door test at ≤3 ACH50, not on the specific materials used.
Are there special insulation rules for historic homes in Connecticut?
Yes. Historic homes in Connecticut often follow alternate insulation rules to preserve architectural character. Buildings on state or national registers may use less invasive methods, like dense-packing or attic insulation, instead of meeting full code assemblies. Always confirm specific requirements with your local building department.
What happens if my project fails the blower door or insulation inspection?
If your project fails the blower door or insulation inspection in Connecticut, you must correct the issues before proceeding. Inspectors issue a correction notice detailing fixes. Common problems include air leaks, thin insulation, or missing vapor barriers. A re-inspection is required before the permit can close.
Related Articles


Let's Work Together
Ready to transform your home into an energy-efficient haven? Schedule your free energy assessment today and experience the Nealon difference for yourself.