How to Insulate an Exterior Wall in an Existing Home
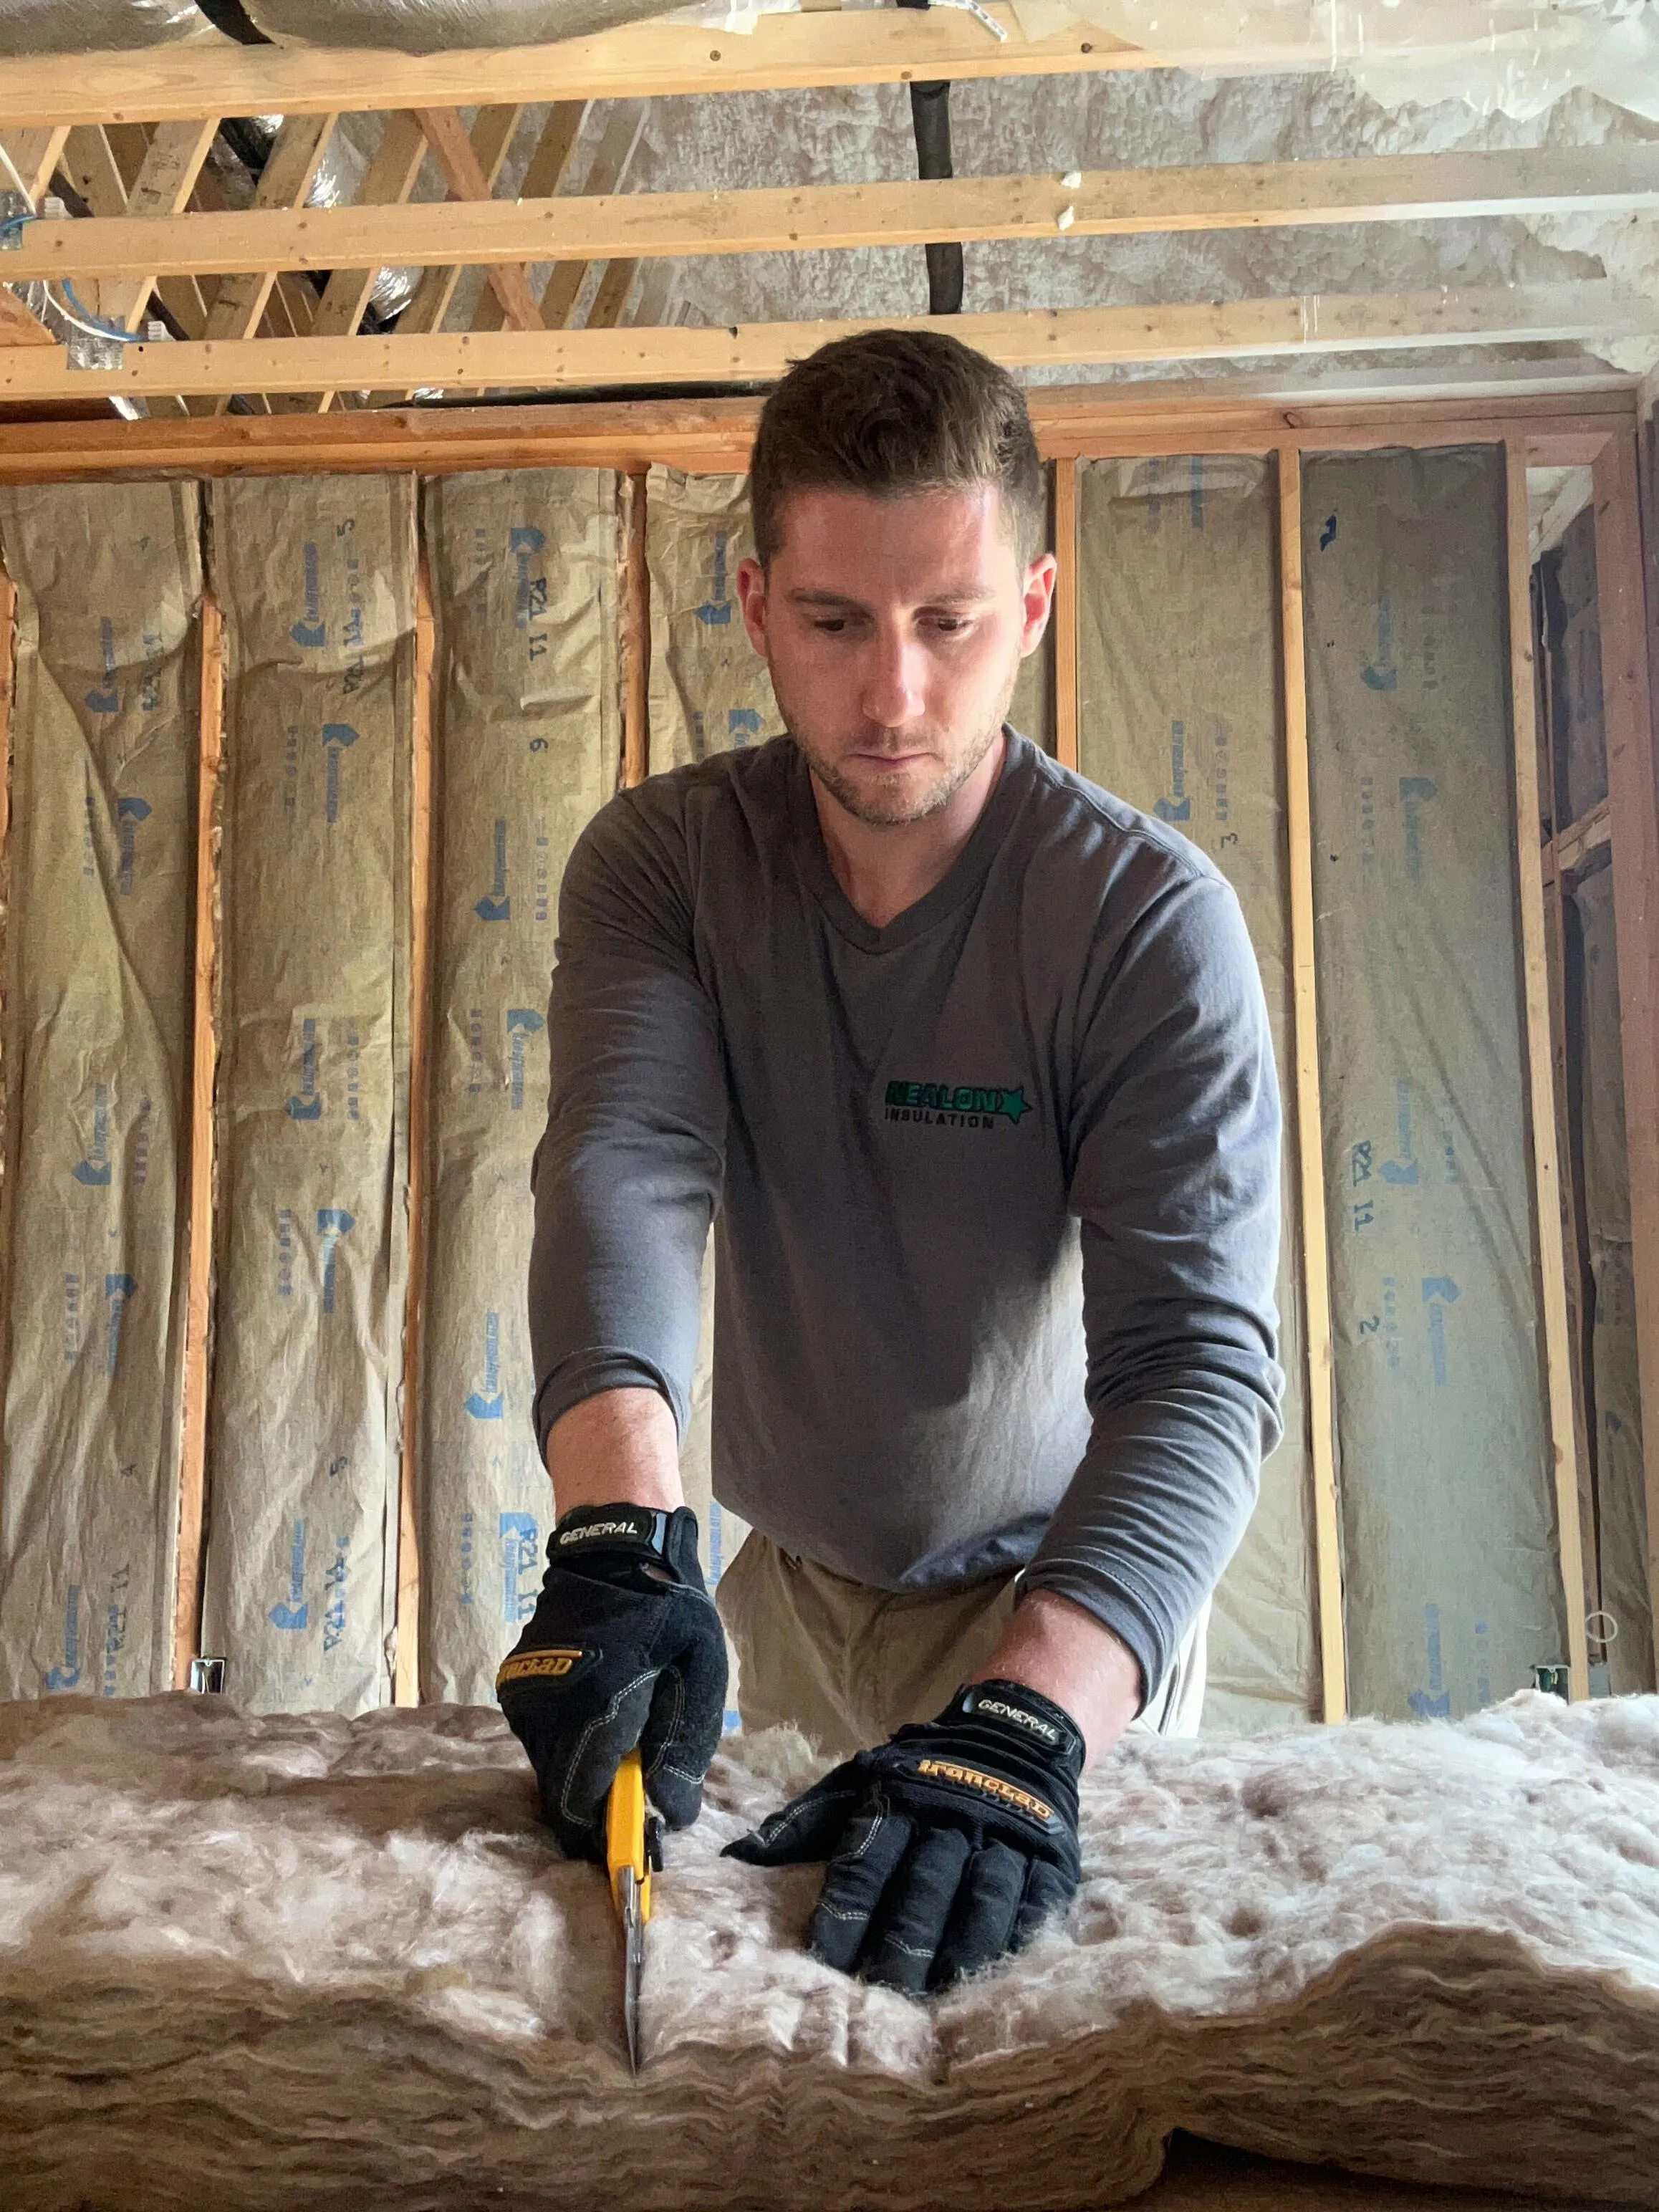
Let’s say your house was built back when gas was under a buck and insulation was more of a “maybe” than a must. Odds are, your exterior walls are either barely insulated—or not insulated at all. That’s bad news for your wallet, your comfort, and your sanity every time the weather swings 40 degrees in a day (which, in Connecticut, happens a lot).
Good news: you don’t need to rip your drywall out to fix it. There’s a clean, smart method called drill-and-fill that gets the job done with minimal mess and maximum payoff.
Read about the step by step method below.
Want a video walkthrough instead? Check it out below.
Why Bother Insulating Exterior Walls?
It’s not just about being cozy in February (though that’s a big perk). Adding insulation to those empty wall cavities makes your home:
✅ Cheaper to run – You’ll use less heat in the winter and less A/C in the summer. Energy bills drop.
✅ More comfortable – Say goodbye to random cold spots and that draft that hits you like a slap every time you walk past the hallway.
✅ Quieter – Street noise, barking dogs, leaf blowers—insulation helps block all of it.
✅ Better protected – Insulation helps deter pests and slows down moisture buildup, which means less risk of mold or mildew.
✅ More valuable – Energy-efficient homes are more attractive to buyers. Simple as that.
The Drill-and-Fill Method: A Step-by-Step Walkthrough
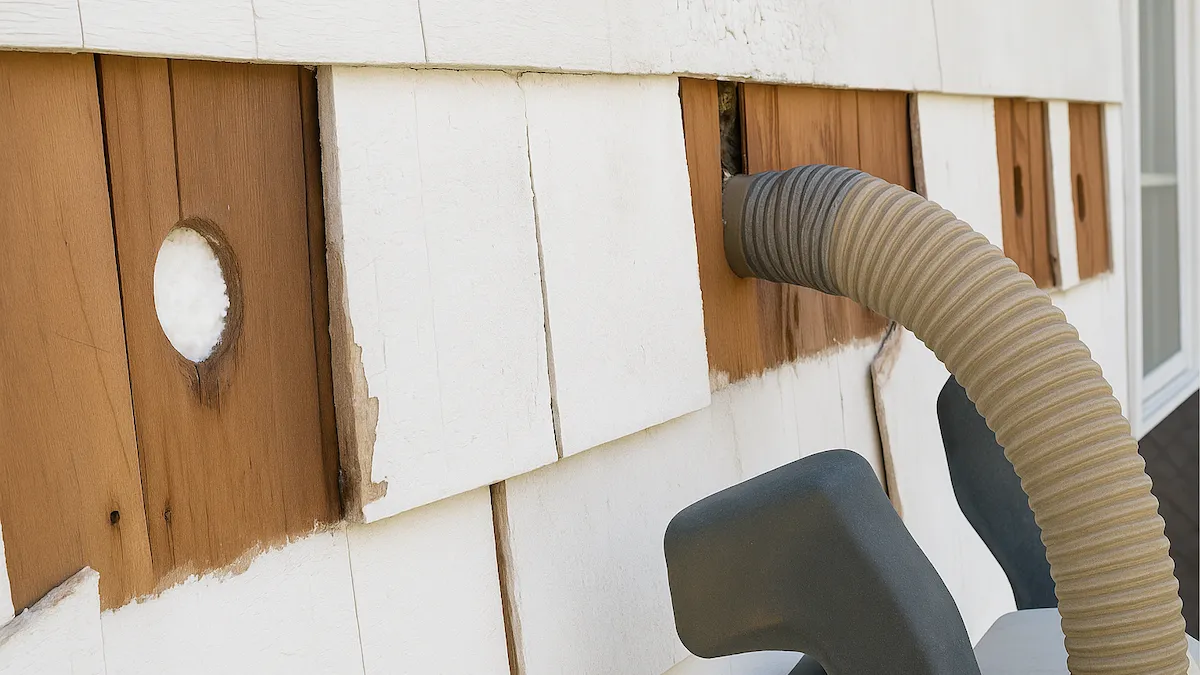
Step 1: Pop Off Some Siding
We gently remove a few pieces of your home’s exterior siding. No sledgehammers. No chaos. Just enough to get access to the wall cavities behind it.
Step 2: Drill Holes in the Sheathing
We drill small, evenly spaced holes in the sheathing between the studs—basically creating access ports into those empty wall cavities.
Step 3: Blow in the Insulation
This is where the magic happens. We use high-pressure equipment to blow dense-pack cellulose into every nook and cranny of those walls. It fills the space tight, seals up air gaps, and won’t settle over time. We can also use fiberglass, but it’s not as good at blocking air. Spray foam works too, but it’s way more expensive and a lot more invasive for existing walls.
Step 4: Seal the Holes
Once the walls are fully packed, we plug and seal each hole tight. No leaks, no loose ends.
Step 5: Reinstall the Siding
We carefully pop the siding back on. When we’re done, you won’t even know we were there—aside from how much warmer and quieter your home feels.
What’s the Best Insulation for Exterior Walls?
If you own an older home in Connecticut, dense-pack cellulose insulation is hands-down the best choice for retrofitting exterior walls—especially with the drill-and-fill method. It’s designed for exactly this kind of job: closed wall cavities, unpredictable framing, and homes that need a serious comfort upgrade without serious demolition.
Here’s why cellulose wins:
- Superior Air Sealing – Dense-pack cellulose fills every nook and cranny, reducing drafts and stopping air leaks in their tracks—far better than fiberglass.
- Great R-Value Performance – At about R-3.8 per inch, it delivers solid thermal resistance in typical 2x4 or 2x6 framing.
- Sustainable and Safe – Made from recycled newspaper and treated with borate, it’s fire-resistant, pest-resistant, and mold-inhibiting.
- Moisture Smart – Unlike fiberglass, cellulose doesn’t hold onto moisture and actually helps buffer humidity, which is a win in our damp coastal climate.
What about fiberglass? Sure, it’s cheap. But it doesn’t seal air gaps, it’s prone to sagging over time, and it performs poorly in cold, windy conditions—the kind Connecticut specializes in.
And spray foam? It’s excellent for new construction or open walls, but it’s overkill (and overpriced) for most retrofits. Installing it inside finished walls often means cutting open your drywall—not ideal if you're trying to avoid a renovation.
What’s the Right R-Value for Exterior Walls in Connecticut?
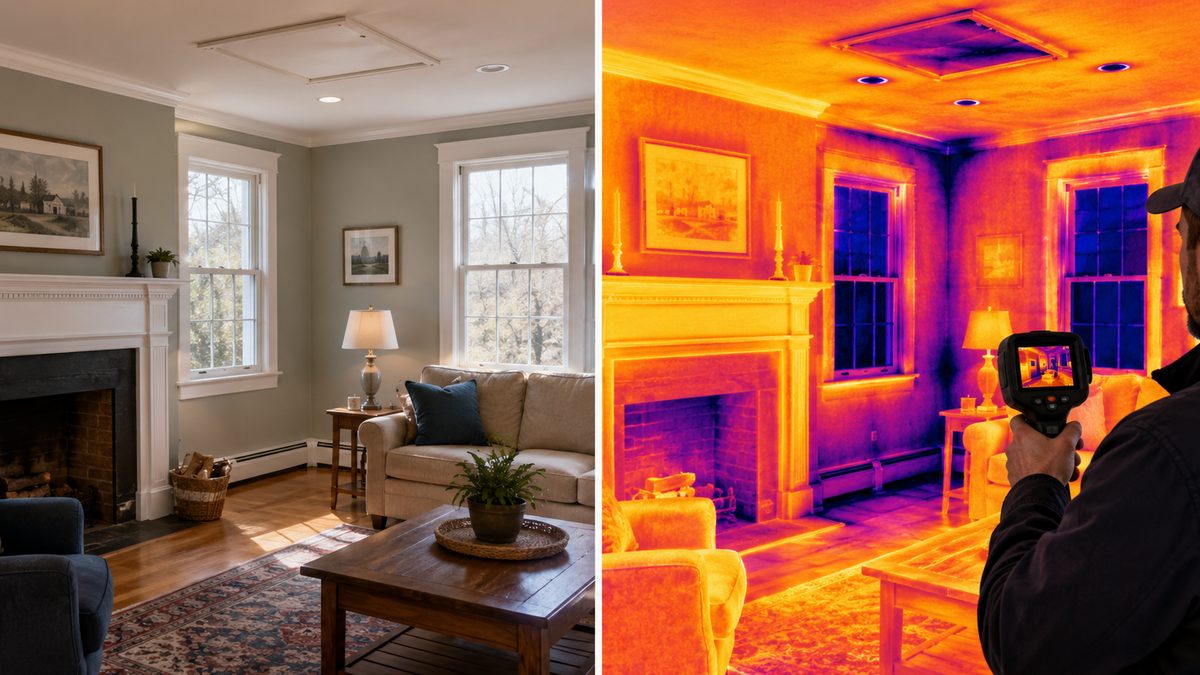
If your home’s walls are hollow, you’re not just losing heat—you’re leaking money. The R-value is how we measure insulation’s ability to resist heat flow. The higher the R-value, the better your walls are at keeping warm air in during winter and hot air out in the summer.
In Connecticut, the recommended R-value for exterior walls is R-13 to R-21, depending on your home’s framing and the insulation material used. Most older homes (especially those built before the 1980s) fall way below that—if they have any insulation at all.
Here’s where dense-pack cellulose shines. It delivers around R-3.8 per inch, which means a typical 2x4 wall cavity can reach R-13 to R-15 without tearing out your drywall. For 2x6 walls? You’re looking at R-20 or more, all installed from the outside using the drill-and-fill method.
If you want to calculate the R-Value of your home, check out our R-Value calculator.
Can You Insulate Interior Walls?
Yes—you can insulate interior walls. But it’s not about keeping the heat in. It’s usually about blocking noise and adding comfort between rooms.
Interior wall insulation is great if:
- You’re tired of hearing every word from the next room.
- You want more peace and quiet in bedrooms or home offices.
- You’re finishing a basement or garage and want to separate noisy areas.
- You just don’t want to hear the toilet flush from across the house (totally fair).
The most common materials for interior walls are:
- Dense-pack cellulose – Great for retrofitting without tearing down drywall. It dampens sound and fits snugly between studs.
- Fiberglass batts – A good budget option if you’re renovating and have walls open.
Ready to Fix What’s Hiding in Your Walls?
If your home’s exterior walls are empty—or packed with insulation old enough to remember disco—it’s time for an upgrade. Drill-and-fill insulation is the fastest, cleanest way to boost comfort, cut energy costs, and stop heating the great outdoors. No drywall mess, no major renovation—just a smarter, tighter, more efficient home built to handle Connecticut’s wild weather swings.
👉 Curious what your walls are working with? Reach out to Nealon Insulation and we’ll take a look. No pressure, just straight answers.
FAQs About Exterior Wall Insulation
Will this add insulation to every wall in my house?
No, drill-and-fill insulation only adds insulation to exterior walls—not every wall in your home. Interior walls are typically left uninsulated unless soundproofing is requested. During a consultation, we identify which exterior areas need the upgrade.
Can you insulate brick or stucco homes with drill-and-fill?
Yes, you can insulate some brick or stucco homes with drill-and-fill, but it depends on construction. Masonry exteriors require specialized drilling, and in some cases, interior access or panel removal may be better. A site evaluation determines the best method.
How long does the whole process take?
Most drill-and-fill insulation jobs take 1–2 days, depending on your home's size and wall count. Crews work section by section to limit disruption, and you can stay home during the process. The job is efficient, clean, and typically completed in one visit.
Will this damage my siding or leave visible marks?
No, drill-and-fill insulation does not damage your siding or leave visible marks. Siding or shingles are carefully removed and reinstalled, and drill holes are sealed behind them. The process is minimally invasive, leaving no trace once complete.
What if my walls already have some insulation?
If your walls already have insulation, we can still improve performance with a dense-pack “top-off.” Using tools like a borescope camera, we inspect existing insulation and either fill gaps or replace underperforming material based on its condition.
Does insulating walls reduce indoor humidity?
Yes, insulating walls can reduce indoor humidity indirectly by sealing air leaks and minimizing drafts. Better insulation improves temperature and moisture control, making your HVAC system more efficient and reducing muggy air—especially during humid Connecticut summers.
Is it safe for older homes with knob-and-tube wiring?
No, it’s not safe to insulate around active knob-and-tube wiring due to fire risk. If the wiring has been decommissioned or replaced, insulation can be safely installed. We always check for this during the initial inspection to ensure code compliance and safety.
Related Articles

Let's Work Together
Ready to transform your home into an energy-efficient haven? Schedule your free energy assessment today and experience the Nealon difference for yourself.