How Is Blown-In Insulation Installed?
If you’re considering blown-in insulation, you’re probably asking one very practical question: what actually happens during installation? Not the brochure version—the real, boots-on-the-ground process. How it gets into your attic or walls, how long it takes, and what you should expect while the work is happening.
Here’s the short answer upfront:
Blown-in insulation is installed using specialized equipment that evenly distributes loose insulation material into attics or enclosed cavities to a specific depth and density.
When it’s done correctly, the process is fast, controlled, and far less disruptive than most homeowners expect.
The longer answer—and the one that actually matters—depends on the space being insulated, the condition of the home, and whether the installer is doing more than just “blowing fluff and leaving.” In this guide, we’ll walk through how blown-in insulation is installed step by step, what happens before and after the hose turns on, and why the details of the process make such a big difference in comfort and performance.
Listen to our deep dive podcast on blown-in insulation
What Is Blown-In Insulation?
Blown-in insulation is a loose-fill insulation material installed using a blowing machine rather than being cut and fitted by hand. Instead of rolls or rigid panels, the insulation consists of small particles that are blown through a hose and spread evenly across a space.
The two most common materials are:
- Cellulose, typically made from recycled paper treated for fire resistance
- Fiberglass, made from lightweight glass fibers
Both materials work by trapping air, which is what actually slows heat loss and heat gain in a home. Check out our fiberglass vs cellulose article for a deep dive between the two materials.
What makes blown-in insulation especially effective is coverage. Because it’s loose and flexible, it flows around framing, wiring, plumbing, and other obstacles that batts struggle to fit around cleanly. That’s why contractors most often use blown-in insulation in:
- Attics
- Existing walls
- Hard-to-reach or irregular cavities
Unlike batt insulation, which depends on perfect cutting and placement, blown-in insulation is installed to a measured depth and density. When done correctly, it creates a continuous thermal blanket with fewer gaps and weak spots.
Where Blown-In Insulation Is Typically Installed
Blown-in insulation shines in areas where access is limited or framing isn’t perfectly uniform—which describes most real homes.
Attics
Attics are the most common and impactful place for blown-in insulation. The material is blown across the attic floor to a specific depth, creating a continuous layer over ceilings, framing, and penetrations.
Blown-in attic insulation works especially well because it:
- Covers joists, wiring, and uneven surfaces evenly
- Can be added over existing insulation
- Allows precise control over final R-value
For many homes, attic insulation delivers the biggest comfort improvement for the least disruption.
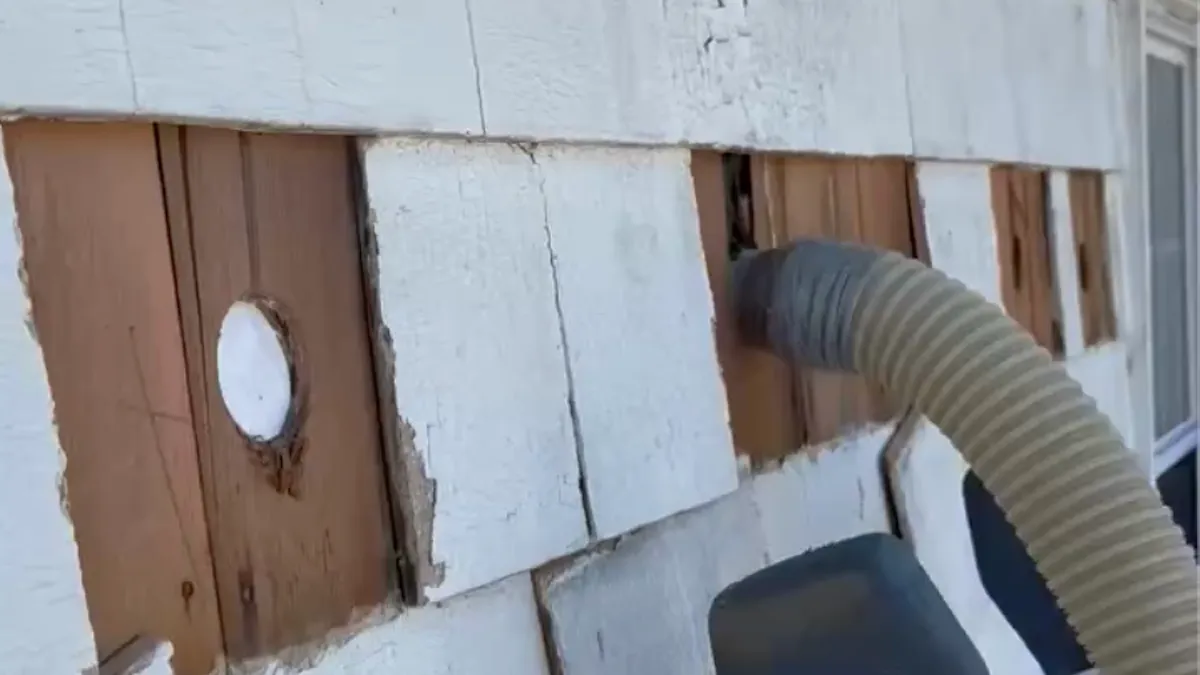
Existing Walls
In finished homes, blown-in insulation is often the only practical way to insulate walls without removing drywall. Small access holes are drilled, insulation is blown into each cavity, and the holes are patched afterward.
This is commonly done in:
- Older homes with empty wall cavities
- Rooms that feel cold or drafty
- Renovations where walls aren’t fully opened
Wall insulation requires careful control of density. Too little leaves voids. Too much can cause settling or pressure issues.
Other Enclosed Cavities
Blown-in insulation is also used in:
- Floor systems over garages or crawl spaces
- Knee walls and sloped ceilings
- Tight or irregular framing cavities
Anywhere batts are hard to install cleanly, blown-in insulation provides more consistent coverage.
How Blown-In Insulation Is Installed (Step by Step)
A quality blown-in insulation job follows a clear, repeatable process. When steps are skipped, performance suffers. When they’re done in the right order, the results are immediate and long-lasting.
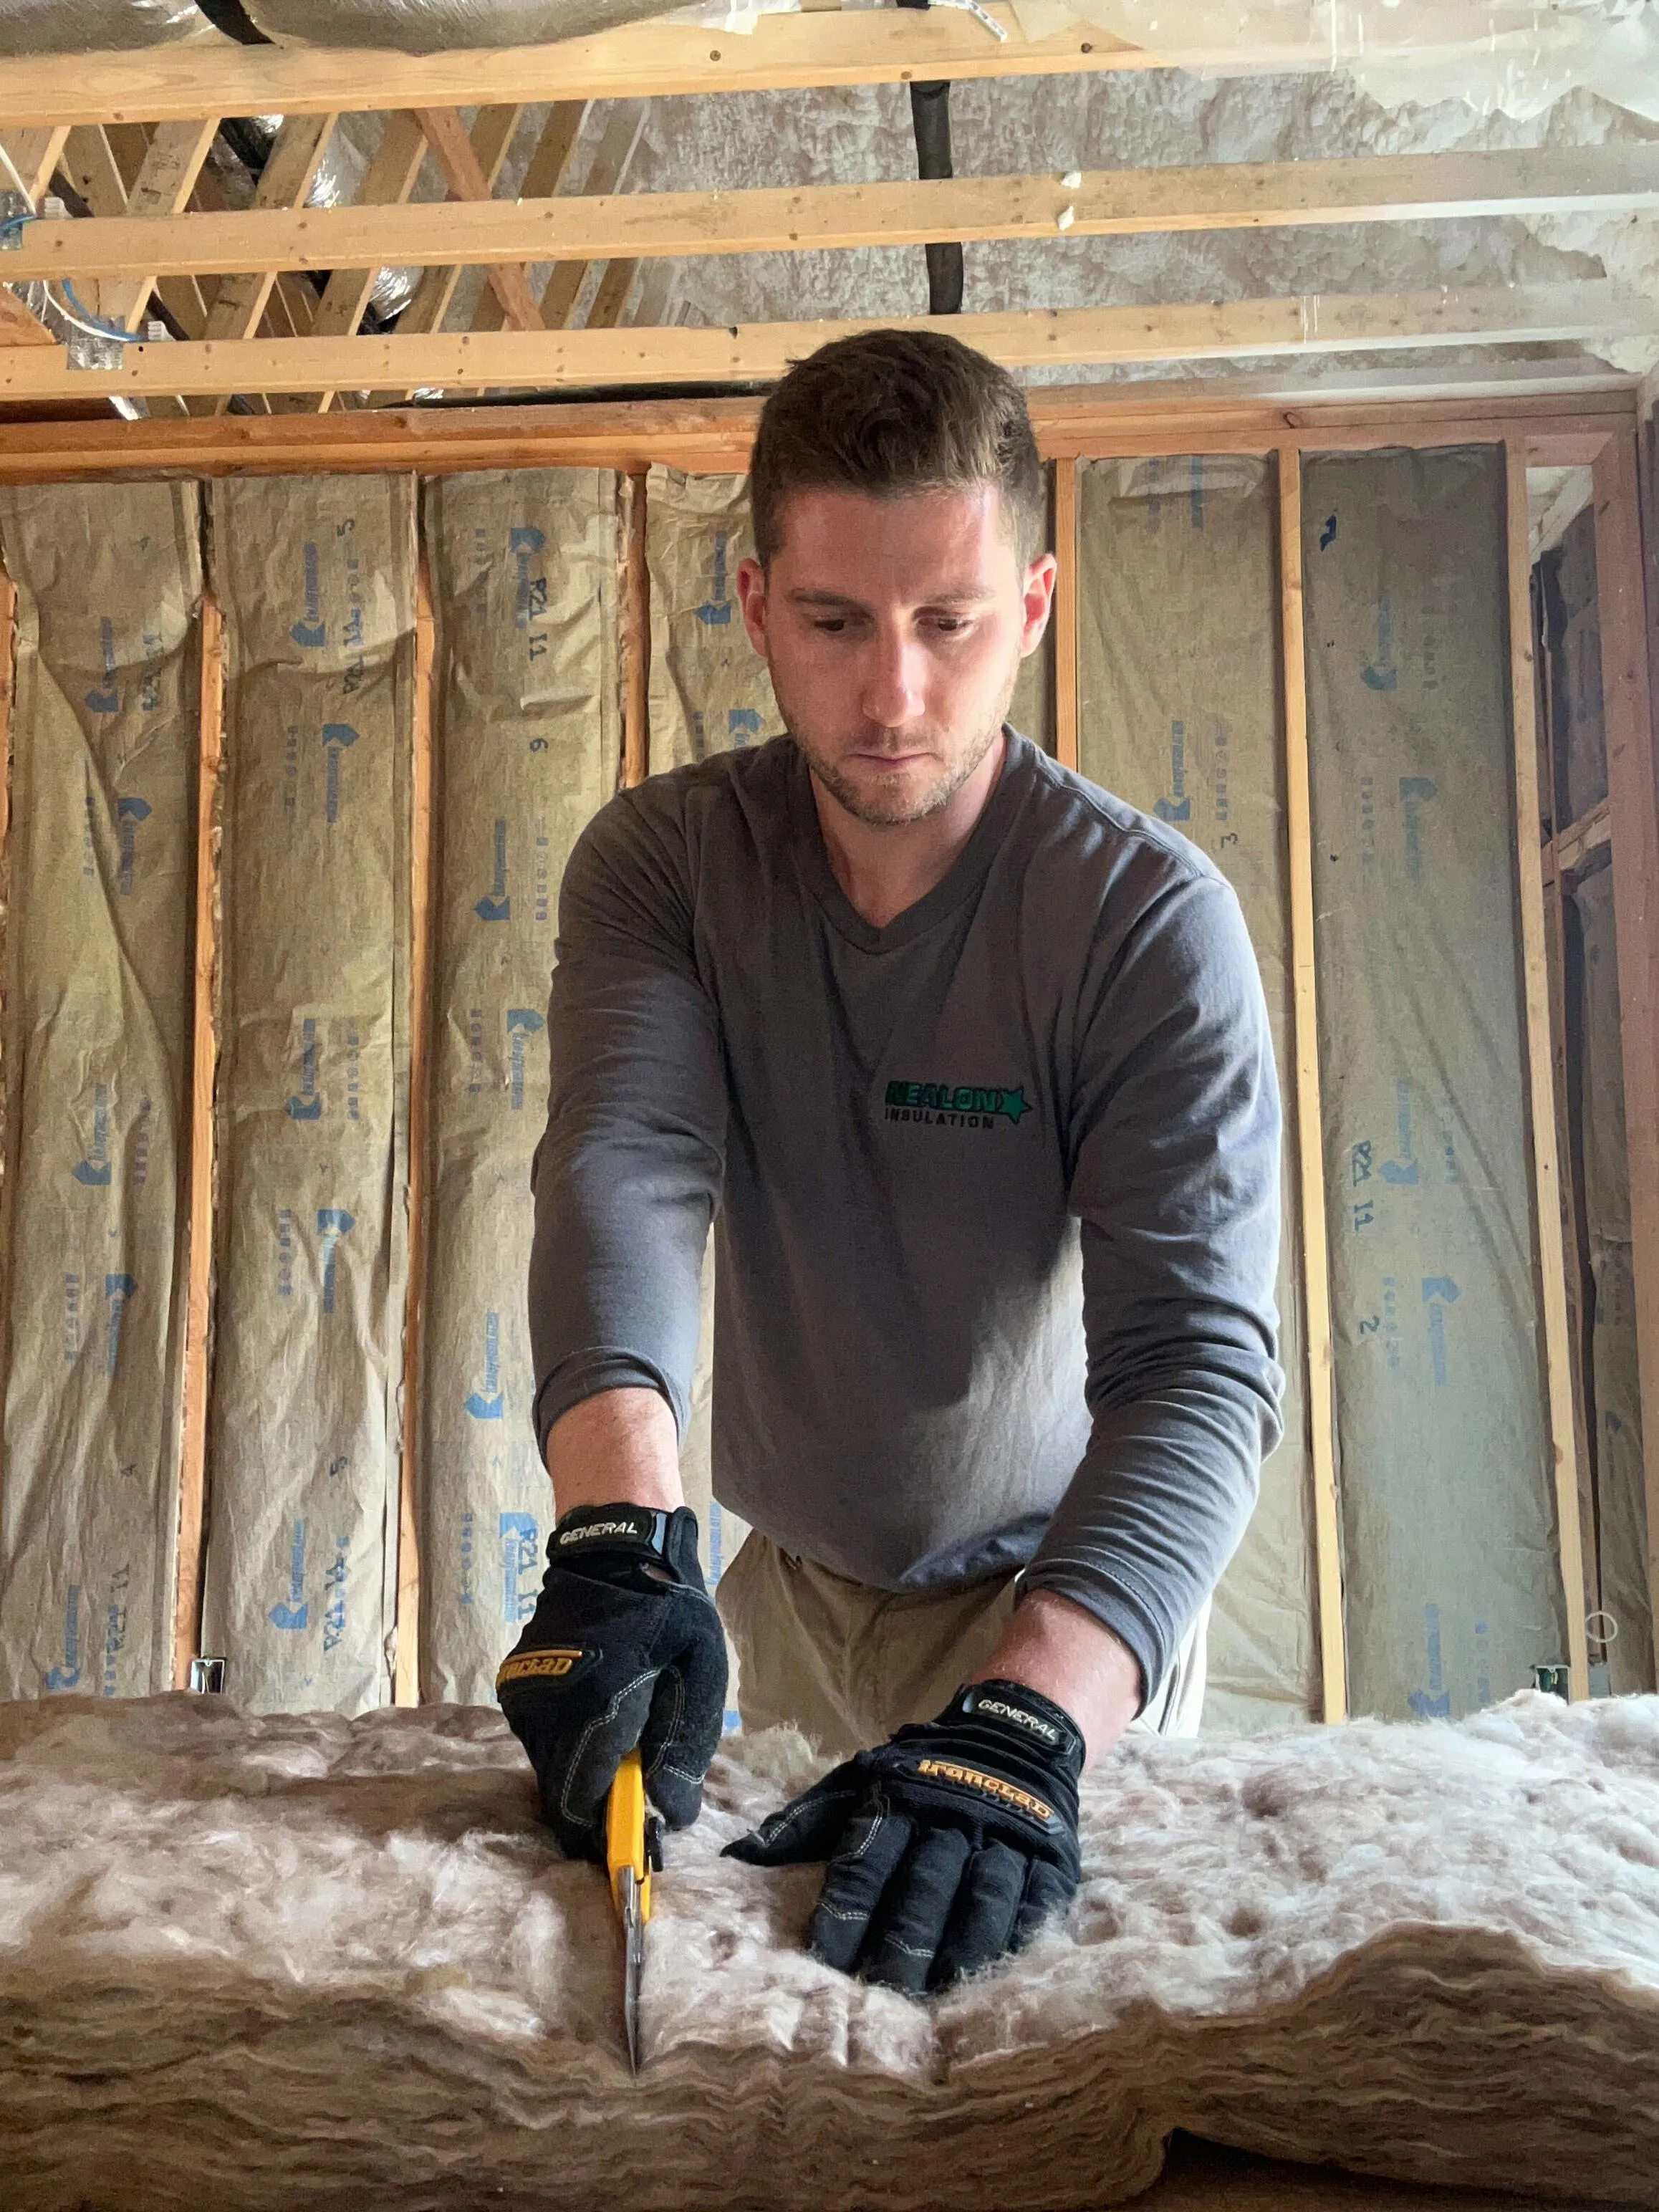
Preparing the Space
The area is inspected and prepped before any insulation is blown. This includes:
- Clearing access paths
- Identifying wiring, fixtures, and framing
- Measuring existing insulation levels
Problem areas like uneven coverage or visible air leaks are identified early.
Air Sealing and Prep Work
This is where good installations separate themselves from average ones. Read more about why air sealing is important.
Before insulation goes in, air leaks are sealed around:
- Top plates
- Wiring and plumbing penetrations
- Chimneys and flues
- Attic hatches
Baffles or insulation dams may also be installed to protect ventilation and keep insulation where it belongs.
Setting Depth and Coverage Targets
Blown-in insulation isn’t installed by guesswork. Coverage targets are calculated based on:
- Desired R-value
- Square footage
- Insulation type
Depth markers are placed in attics so coverage can be verified during and after installation.
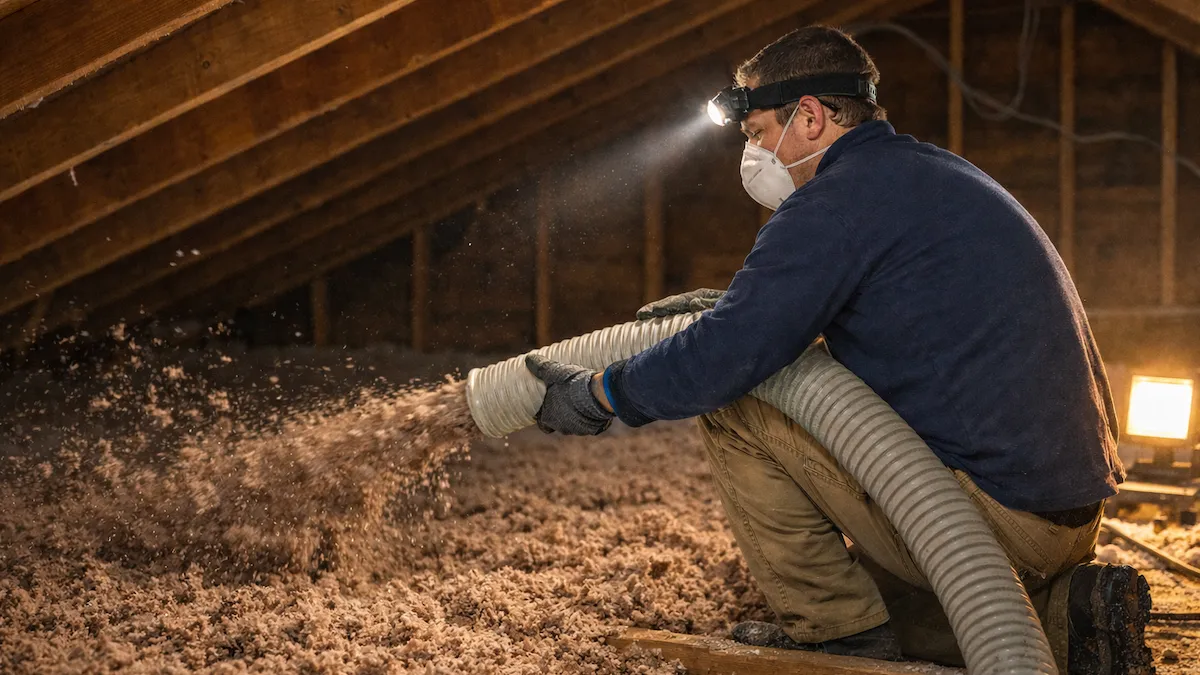
Blowing in the Insulation
The insulation material is fed into a blowing machine, broken up, and pushed through a hose into the space.
Installers work methodically, building coverage evenly rather than piling material in one spot. In walls, each cavity is filled to the proper density to avoid voids or settling.
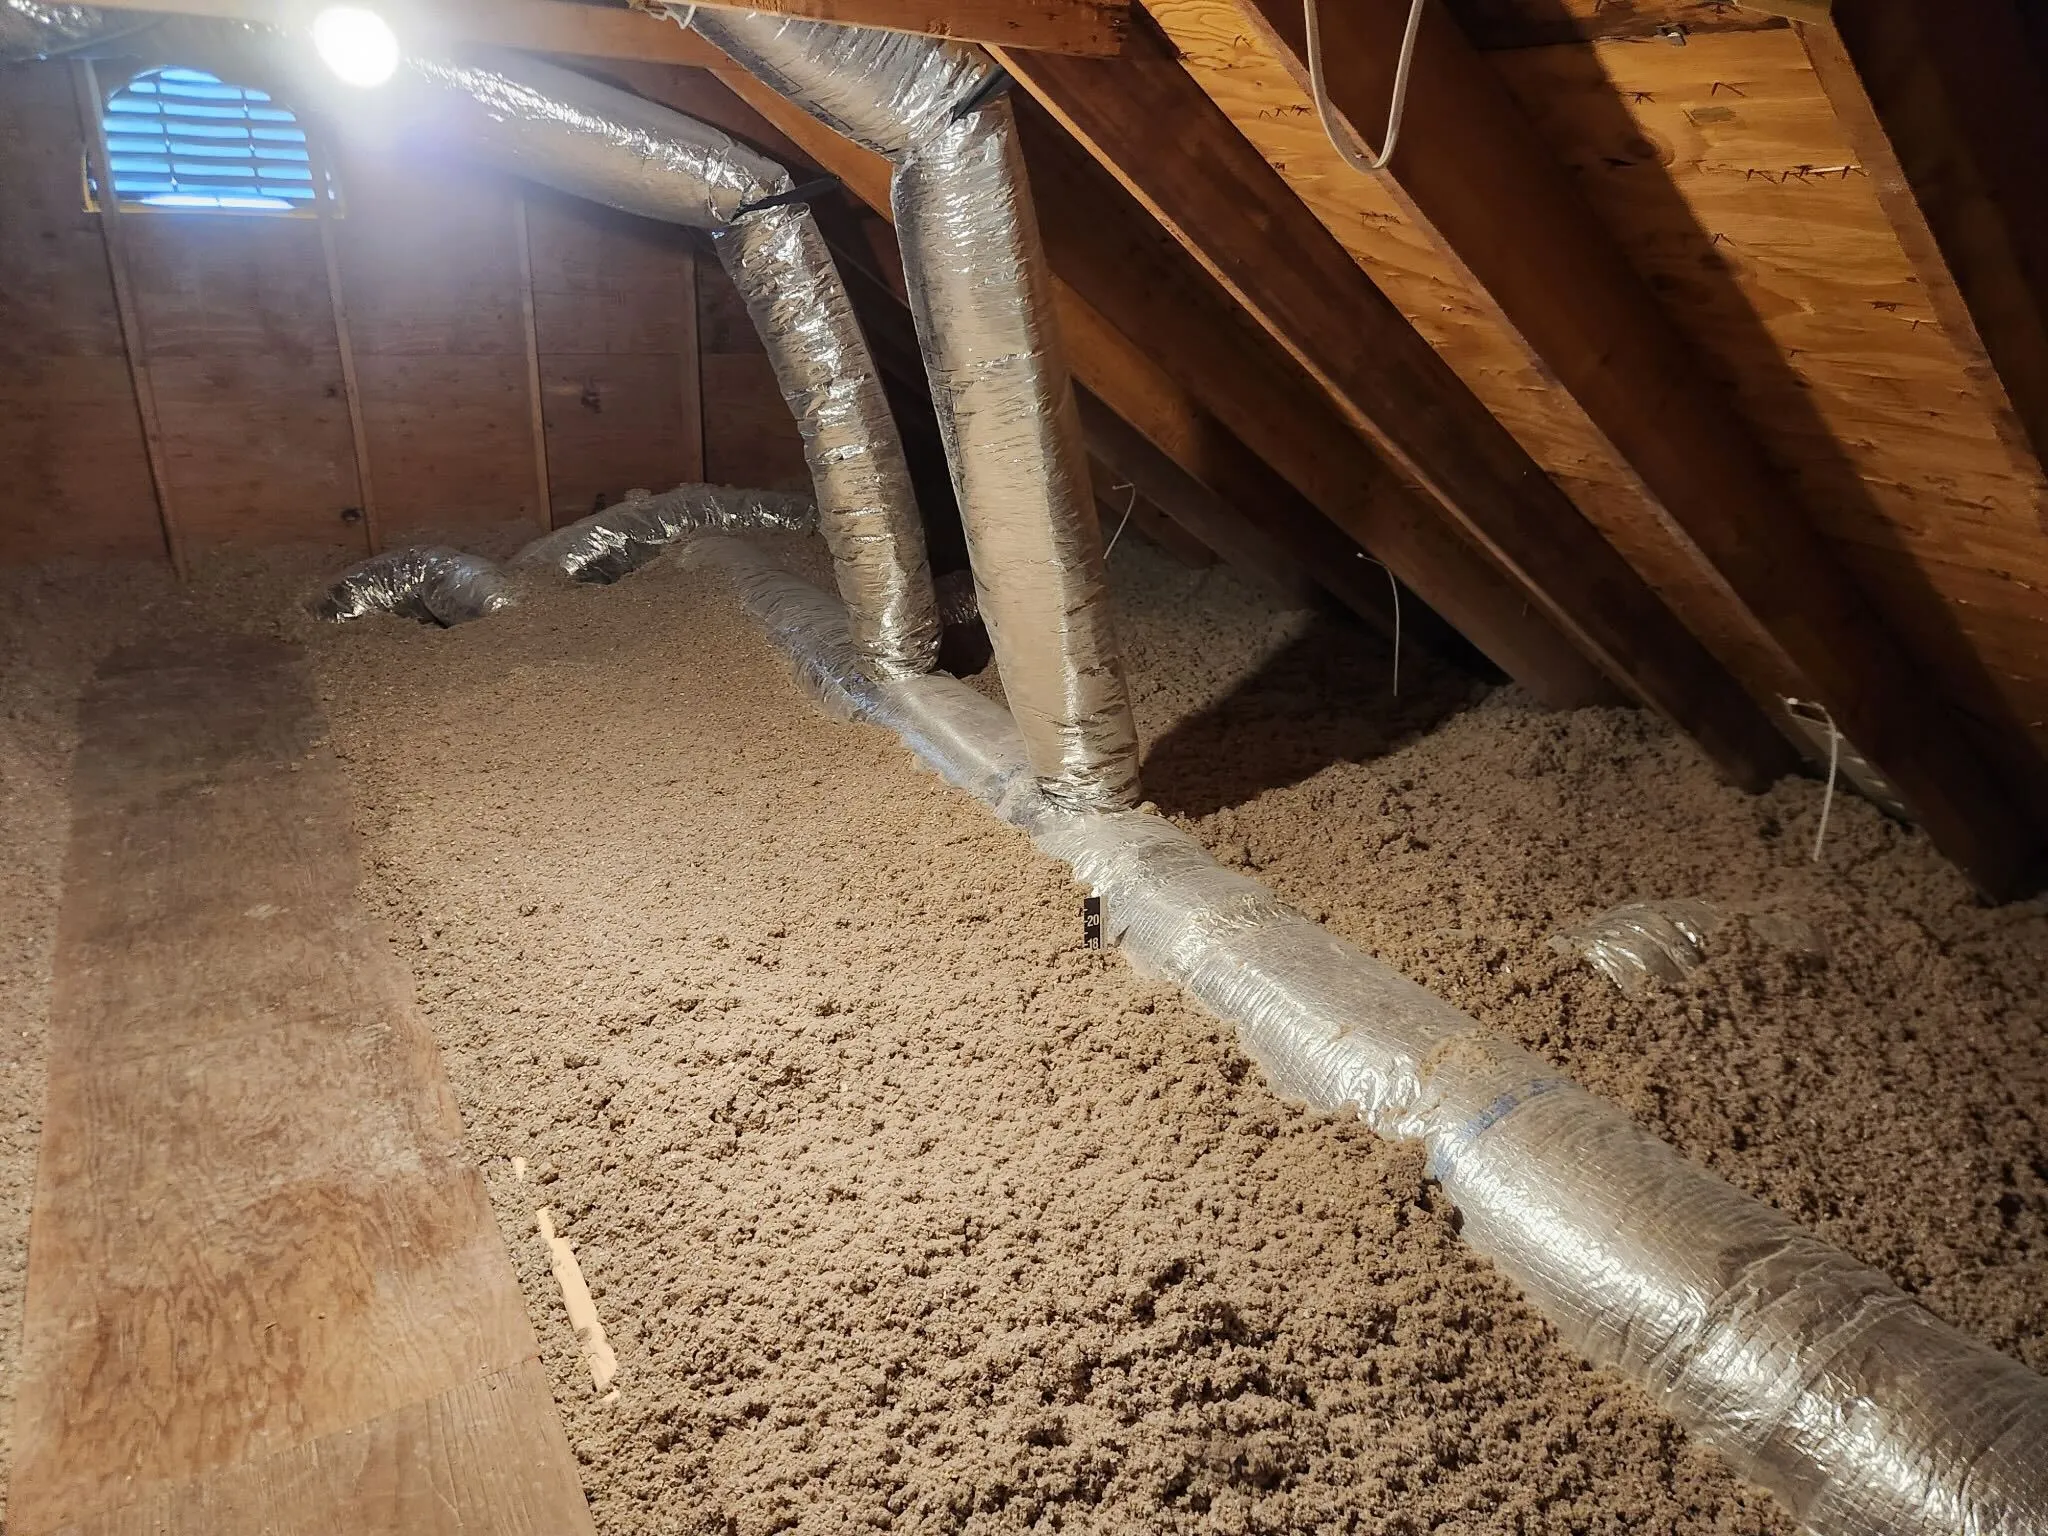
Final Inspection and Cleanup
After installation, the area is checked for:
- Consistent depth and coverage
- Proper clearances
- Unblocked ventilation paths
Access points are sealed and work areas are cleaned before the job is complete.
What Homeowners Can Expect During Installation
Blown-in insulation is one of the least disruptive home improvement projects you can schedule.
Noise and Activity
The blowing machine is typically set up outside. You’ll hear it cycling on and off, along with some foot traffic, but it’s not demolition-level noise.
Dust and Cleanliness
Professional installers control dust by protecting access areas and containing work zones. In attics, work happens above the ceiling plane. For walls, access holes are drilled and sealed after insulation is installed.
When done properly, this is not a messy project.
Do You Need to Leave the House?
In most cases, no. Homeowners usually stay in the home during attic installations. For wall work, you may need to stay out of specific rooms temporarily.
How Long Does Blown-In Insulation Installation Take?
Most blown-in insulation projects are same-day upgrades.
- Attic installations: Typically three to six hours
- Wall insulation projects: Usually one day, sometimes two for larger homes
Timeline depends on access, prep work, and the number of areas being insulated, but this is rarely a multi-day disruption.
Can Blown-In Insulation Be Installed Over Existing Insulation?
Often, yes—but only if the existing insulation is in good condition.
When Adding Over Existing Insulation Works
- Existing insulation is dry and clean
- Coverage is thin or uneven
- No major moisture or air leakage issues
When Removal Is Smarter
- Insulation is wet, moldy, or damaged
- Rodent contamination is present
- Air leaks need major repair
Adding insulation over problems doesn’t fix them—it hides them.
How Blown-In Insulation Improves Comfort and Energy Efficiency
Properly installed blown-in insulation changes how a house feels and performs.
Homeowners often notice:
- Fewer drafts
- More even temperatures
- Quieter interiors
- Reduced HVAC run time
Because heat loss is slowed, heating and cooling systems don’t have to work as hard, which improves efficiency and reduces wear over time.
Blown-In Insulation vs Other Installation Methods
Blown-in insulation is often compared to batt insulation and spray foam.
Compared to Batts
- Better coverage in irregular framing
- Fewer gaps and compression issues
- Easier to retrofit in existing homes
Compared to Spray Foam
- Less invasive
- More cost-effective for large areas
- Often used alongside targeted air sealing
Many homes benefit from a hybrid approach rather than a single insulation type.
Why Professional Installation Matters
Blown-in insulation performance depends on how it’s installed, not just how much is added.
Professional installation ensures:
- Proper density and depth
- Coordinated air sealing
- Long-term performance without settling
- Verified coverage
A great time to instal blown-in insulation is when you are renovating a home. Anyone can blow insulation into a space. Making it perform is a different skill set.
FAQ's About Blown-In Insulation Installation
How do I know if my home actually needs blown-in insulation right now?
A home needs blown-in insulation when existing insulation is thin, uneven, or underperforming. High energy bills, uncomfortable rooms, exposed attic floors, and homes built before modern insulation standards indicate a problem. Confirm the need with a professional evaluation that measures insulation depth, air leakage, and attic or wall conditions.
How do I know if the installer is putting in the right amount of insulation?
An installer applies the correct amount of insulation by calculating square footage, target R-value, and insulation type before installation. Proper jobs include visible attic depth markers, documented material quantities, and a clear explanation of how coverage meets specifications. An installer who cannot explain depth and density verification is a red flag.
Will blown-in insulation affect my attic ventilation or cause moisture problems?
Blown-in insulation does not cause attic ventilation or moisture problems when installed correctly. It improves moisture control by reducing warm, moist air leakage into the attic. Problems only occur when soffit vents are blocked, air sealing is skipped, or existing moisture issues are ignored. Proper installers use baffles to protect airflow paths.
What should be included in a professional blown-in insulation quote?
A professional blown-in insulation quote includes insulated areas, target R-values, insulation type and thickness, air sealing scope, and all prep and cleanup work. Quotes that only state “add insulation” without performance details prevent accurate comparison and accountability. Clear specifications ensure the work meets energy and comfort standards.
How soon will I notice results after blown-in insulation is installed?
Homeowners usually notice blown-in insulation results immediately. Indoor temperatures feel more stable, drafts decrease, and uncomfortable rooms improve the same day. Energy savings appear gradually on utility bills over 1–3 billing cycles. If comfort does not improve quickly, unresolved air leaks or poor installation quality are likely causes.
Final Thoughts: Is Blown-In Insulation the Right Choice for Your Home?
Blown-in insulation works because it fits real homes—not perfect ones. When installed correctly, it delivers meaningful comfort improvements with minimal disruption.
The key takeaway is simple: the details matter. A thoughtful evaluation and professional installation are what turn insulation into real performance.
Ready to Take the Next Step?
If you’re considering blown-in insulation, the smartest move is getting clear answers specific to your home—not guesses or generic recommendations.
👉 To schedule a consultation and see whether blown-in insulation is the right fit for your house, contact Nealon Insulation.
Related Articles


Let's Work Together
Ready to transform your home into an energy-efficient haven? Schedule your free energy assessment today and experience the Nealon difference for yourself.