Why Is My Insulation Not Working? Common Problems & Solutions

You crank the heat and still need three blankets. You blast the AC and your second floor still feels like the inside of a bread oven. Meanwhile, your energy bill looks like a car payment.
So you’re asking: "What the heck is going on? I have insulation. Why isn't it working?"
Good question. Insulation should keep your home comfortable year-round. But just having it doesn’t mean it’s doing its job. Like anything else in a house, it can be installed wrong, wear out, or just not be the right fit for where you live.
Let’s break down the most common reasons insulation underperforms—and how to fix them before winter (or summer) bites back.
1. Not Enough Insulation (a.k.a. Your R-Value’s on Life Support)
The problem: You might have insulation, but not enough of it. It’s like wearing a windbreaker in January—technically clothing, but not keeping you warm.
Why it matters: Insulation works by resisting heat transfer. Not enough R-value = heat leaks out in winter, seeps in during summer.
The fix:
Here’s what Connecticut homes should have:
- Attic: R-49 to R-60
- Walls: R-13 to R-21
- Floors: R-25 to R-30
- Basements/Crawl Spaces: R-10 to R-19
If you’re way below those numbers, it’s time to bulk up. We recommend blown-in cellulose insulation—it packs tighter, performs better, and actually stays where it’s supposed to.
2. Your Insulation’s Old and Saggy
The problem: Insulation doesn’t last forever. Over time, it compresses, shifts, settles—or just plain gives up.
Why it matters:
- Fiberglass batts can slump or fall out of place.
- Older blown-in fiberglass settles like sand in an hourglass.
- Even old cellulose can sag if it was installed before modern treatments.
The fix:
Have your attic checked. If your insulation looks like a pancake instead of a fluffy cake, it’s not doing much. We typically top off or replace with modern cellulose—it stays in place better and keeps your R-value high.
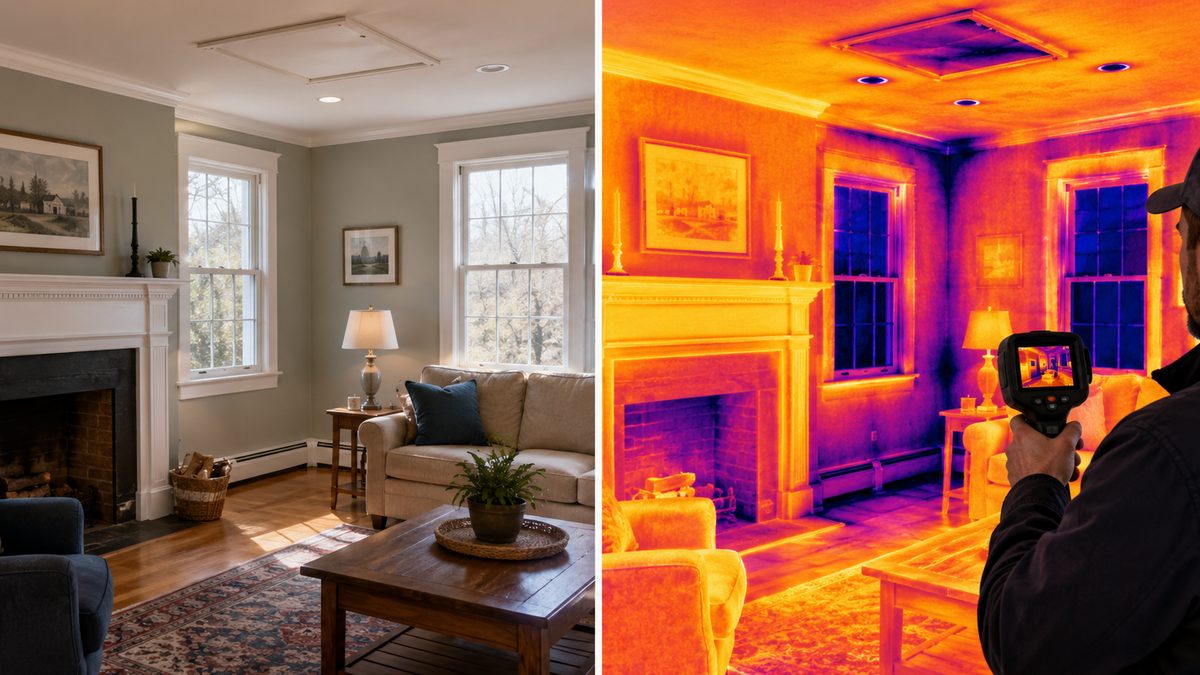
3. You’ve Got Air Leaks Everywhere
The problem: Even the best insulation can’t stop air that’s sneaking around it. Drafts around windows, doors, can lights, attic hatches—these are the usual suspects.
Why it matters:
- In winter: warm air escapes, cold air creeps in.
- In summer: your cooled air leaks out like a deflating balloon.
The fix:
- Weatherstrip doors and windows
- Seal attic penetrations before insulating
- Use spray foam or rigid foam to block bigger gaps (pipes, vents, etc.)
- Pro tip: Never insulate before you air seal. That’s just putting a blanket over a broken window.
4. Moisture Is Wrecking Your Insulation
The problem: If your attic or basement has poor ventilation, leaks, or condensation, you could have wet insulation.
Why it matters:
- Wet fiberglass is basically useless.
- Spray foam can trap moisture—mold loves that.
- Moisture flattens insulation and kills your R-value.
The fix:
- Choose cellulose—it handles moisture better than fiberglass.
- Improve attic or crawl space ventilation.
- Fix any roof leaks, flashing gaps, or foundation cracks ASAP.
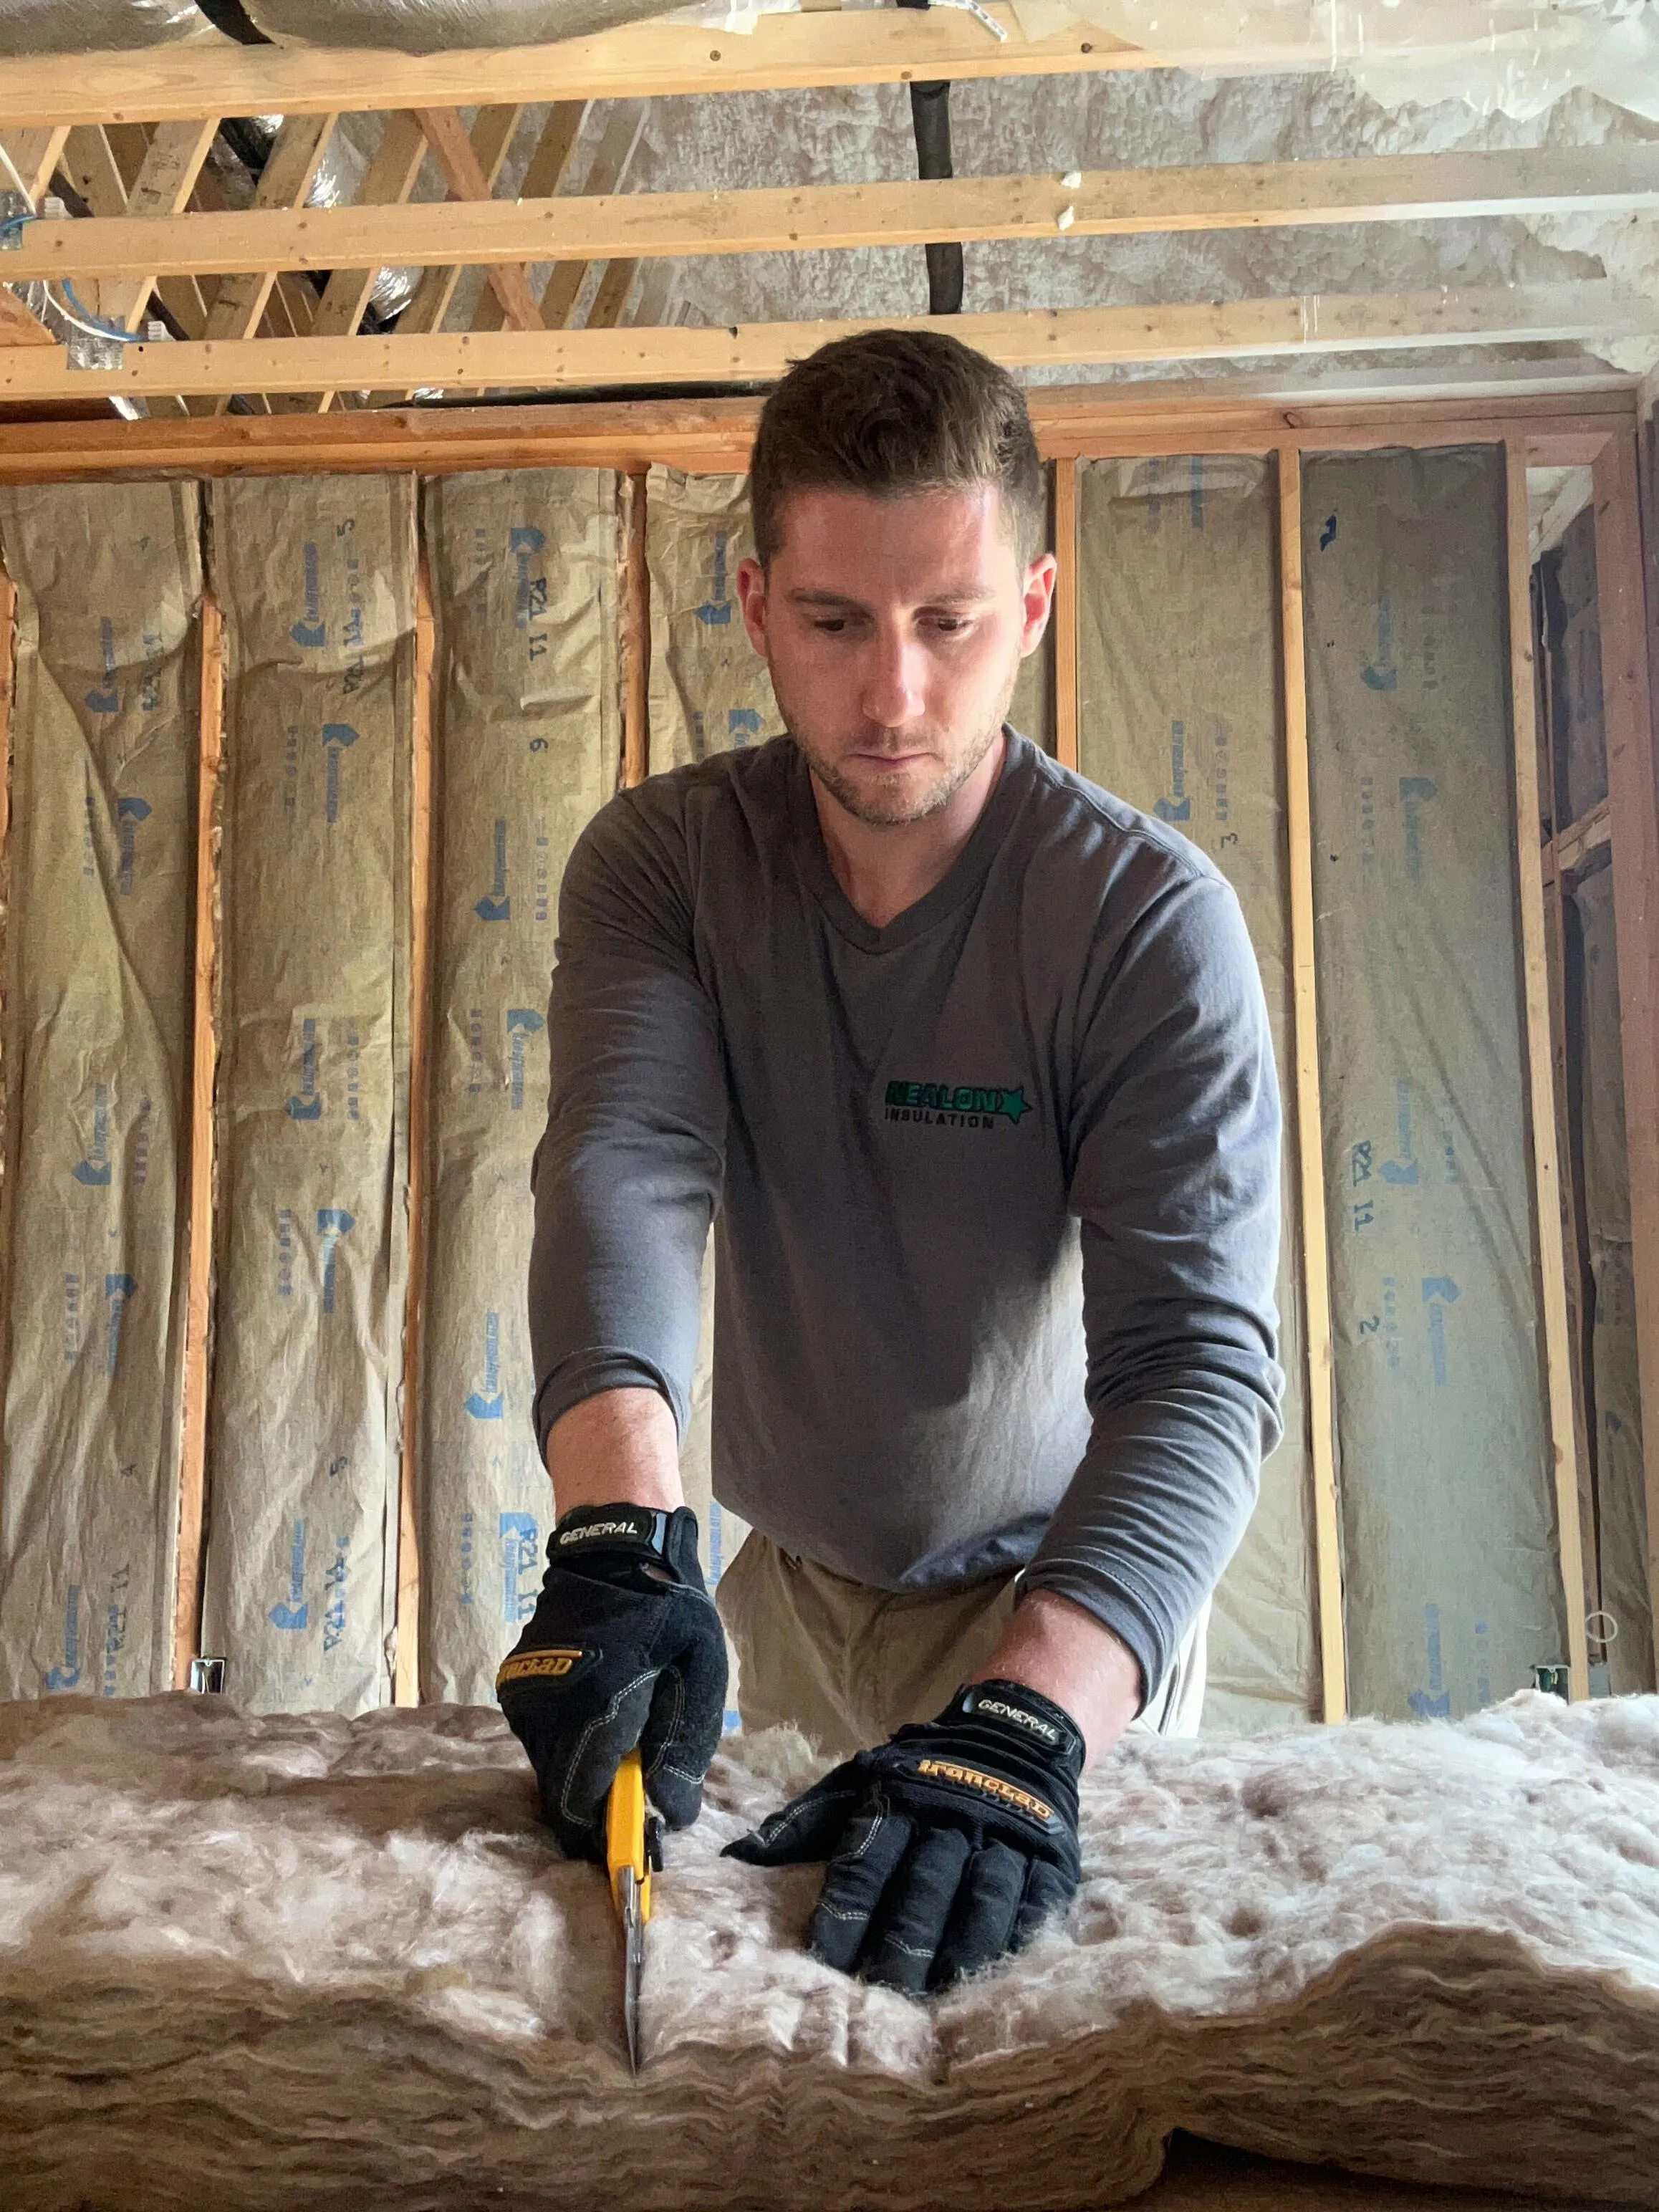
5. It Was Installed Like a Weekend DIY Project (a bad one)
The problem: We see this all the time—gaps, compressions, missed spots. Doesn’t matter how good the material is if it’s not installed right.
Why it matters:
- Gaps = heat loss
- Compressed batts = reduced R-value
- No air sealing = insulation gets bypassed completely
The fix:
- Hire pros (like us). Seriously. It matters.
- We blow in dense-pack cellulose that fills every nook, cranny, and gap.
- We don’t just dump insulation and leave—we air seal first, every time.
6. Rodents Turned Your Attic into an Airbnb
The problem: Mice, squirrels, and raccoons love insulation. It’s warm, it’s soft, and they don’t care if it’s supposed to keep your energy bills low.
Why it matters:
- They tear up your insulation
- Their waste contaminates it
- They create airflow gaps and invite mold
The fix:
- Seal up entry points (soffits, vents, roof lines)
- Use borate-treated cellulose, which pests hate
- Remove and replace any contaminated insulation
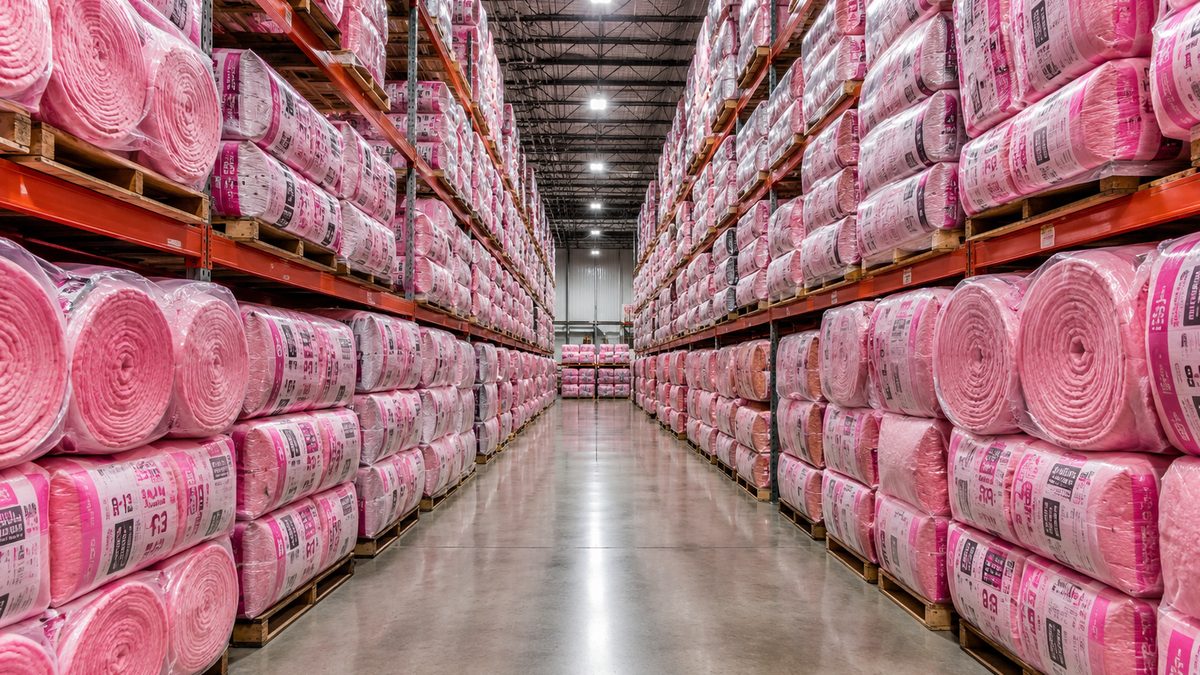
7. You Picked the Wrong Type of Insulation
The problem: Not all insulation is built for New England. What works in Arizona doesn’t always work here.
Why it matters:
- Fiberglass batts leak air and settle
- Spray foam can trap moisture and costs a fortune to fix if things go south
- Rigid foam works in basements, but not great in attics
The fix:
Go with blown-in cellulose for most applications. It checks all the boxes:
- High R-value
- Pest-resistant
- Moisture-tolerant
- Fills every gap
- Made for our climate
How We Can Help (Without the Sales Fluff)
At Nealon Insulation, we’ve been fixing insulation problems since bell bottoms were a thing (1977, to be exact). Whether your attic needs a full rehab or just a tune-up, we know what works in Connecticut homes.
✅ Free insulation inspections
✅ Specialists in blown-in cellulose
✅ EnergizeCT rebates to help you save
✅ No pressure—just straight answers
Bottom line: If your insulation isn’t working, there’s always a reason. Let’s find it—and fix it right.
📞 Give us a call or book a free inspection. We’ll get your home feeling like home again.
Related Articles

What Is the Best Insulation for a Crawl Space?
If your floors feel cold in winter or your home smells a little... earthy after a rainstorm, your crawl space might be the reason. Most folks never give it a second thought—until they’re dealing with mold, drafts, or energy bills that look like a second mortgage. That’s the thing about crawl spaces: they’re out of sight, but not out of mind when it comes to how your home performs.
In Connecticut, where weather swings from humid summers to icy Nor’easters, insulating your crawl space isn’t just a nice-to-have—it’s essential. Done right, it keeps moisture out, warm air in, and critters where they belong (anywhere but under your house). Done wrong—or not at all—and you’re inviting mold, rot, and sky-high heating costs.
So what’s the best crawl space insulation? Spray foam? Fiberglass? Foam board? We’ve tested them all. This guide breaks it down in plain English—no sales fluff, just real-world pros and cons—so you can make the right call for your home and your wallet.
The Real Question: What Makes an Insulation Type “Best”?
Let’s clear something up: there’s no one-size-fits-all answer when it comes to the best crawl space insulation. Anyone who tells you otherwise probably sells one product and calls it a day.
Here’s the truth—what works best depends on what you’re working with. Got a vented crawl space with good airflow? That’s a different playbook than a damp, musty crawl with a dirt floor. Planning to fully encapsulate with a vapor barrier and seal it tight? Now we’re talking a whole different set of rules.
To figure out the right material, we look at six things:
- Moisture resistance – Can it handle humidity without growing a mold farm?
- Air sealing – Does it block drafts and keep outdoor air from creeping in?
- R-value – How well does it slow down heat loss?
- Durability – Will it stay put, or fall to the floor in five years?
- Install method – Are we insulating the subfloor, the walls, or the whole crawl?
- Cost vs. performance – What gets you the most bang for your buck?
If your crawl space is damp or flood-prone, for example, you need something that won’t absorb water or fall apart—spoiler alert: fiberglass doesn’t make the cut. That’s where options like closed-cell spray foam or rigid foam board shine, especially when paired with proper crawl space encapsulation insulation.
Bottom line: The best insulation does more than just pass code—it solves your specific problem. That’s what we aim for every time.
Option 1: Closed-Cell Spray Foam (The Gold Standard for Encapsulation)
If you’re serious about sealing your crawl space tight—like “forget-it’s-even-there” tight—closed-cell spray foam is the heavyweight champ. It’s what we reach for when a homeowner wants long-term performance, moisture control, and insulation all in one shot.
Why? Because this stuff doesn’t just insulate—it air seals and acts as a vapor barrier, too. Spray it on the crawl space walls and rim joists, and you’ve created a shell that blocks moisture, drafts, and even pests.
What makes it great:
- High R-value per inch
- Water resistant
- Air sealing power
- Adds structural strength
Now, is it the cheapest option? Not by a long shot. But if you're after a one-and-done solution that performs year-round and pays you back on your energy bills, this is the one to beat.
Option 2: Rigid Foam Board (Budget-Friendly for Encapsulation)
If spray foam is the Cadillac, rigid foam board is the dependable pickup. It gets the job done without draining your wallet.
These boards (typically polyiso or XPS) are installed on crawl space walls and sealed at the seams. When combined with a floor vapor barrier, they create a solid moisture and thermal barrier.
Why we use it:
- Good R-value
- Moisture resistant
- Long-lasting and clean
- More affordable than spray foam
This setup works great in encapsulated crawl spaces where you want durability and performance—without breaking the bank. Just make sure the seams are sealed, or pair it with some spray foam for a tighter air seal.
Option 3: Fiberglass (What Not to Use in a Damp Crawl Space)
Let’s just say it: fiberglass insulation and crawl spaces don’t get along. We find it all the time—soaked, sagging, and moldy. It may be cheap up front, but it often turns into a money pit down the line.
Why it fails in most crawl spaces:
- Absorbs moisture
- Supports mold
- Falls down over time
- Rodents love it
Unless you’ve got a bone-dry, well-vented crawl space (rare around here), skip it. And if you’ve got old fiberglass under there now? Check out our insulation removal service—we’ll get rid of it and set you up with something that works.
Option 4: Blown-In Cellulose (Only in Certain Crawl Space Setups)
We love blown-in cellulose for attics and walls—but it has a very specific use case in crawl spaces.
If you’ve got a dry, vented crawl space and want to insulate the floor joists from below, cellulose can be a smart move. It air-seals better than fiberglass and resists pests and mold (thanks to its borate treatment).
But if there’s any chance of moisture, it’s a no-go. Cellulose absorbs water and will settle or rot over time. Use it only in the right conditions, and you’ll be happy. Use it in a damp crawl, and you’re back to square one in a few years.
Bonus Consideration: Vapor Barrier vs. Insulation – What’s the Difference?
A vapor barrier is not insulation, and insulation is not a vapor barrier.
- Vapor barrier: a plastic sheet laid across the crawl floor to stop ground moisture.
- Insulation: blocks heat transfer—either along the floor or the crawl space walls.
If you want your crawl space to stay dry and efficient, you need both. A vapor barrier keeps moisture out. Insulation keeps heat in. Skipping either one usually leads to problems—either comfort issues or moldy headaches.
When in doubt, ask us to take a look. We’ll tell you what you need—and what you don’t.
Real Talk: Is Crawl Space Insulation Worth It in Connecticut?
Here’s the bottom line: insulating your crawl space is absolutely worth it—especially here in Connecticut, where the weather throws everything at your home in a single year.
What you gain:
- Warm floors in winter
- Lower energy bills
- No more musty smells
- Less mold and rot
- Better home value
We’ve been fixing crawl spaces since 1977. When it’s done right, you only have to do it once.
How Much Does Crawl Space Insulation Cost in Connecticut?
Here’s a rough idea of what homeowners around here are paying:
- Fiberglass (floor only): $1.50–$2.50/sq ft
- Blown-in cellulose: $2.00–$3.50/sq ft
- Rigid foam board: $3.50–$5.50/sq ft
- Spray foam (full encapsulation): $5.00–$8.00+/sq ft
Your price depends on crawl size, access, current condition, and whether you’re adding a vapor barrier or drainage. We’ll give you a clear, honest quote before we touch a thing.
Common Crawl Space FAQ's
How do I know if my crawl space needs new insulation?
You’ll know your crawl space needs new insulation if you notice cold floors, musty odors, rising energy bills, or visible issues like sagging insulation, mold, or rodent activity. Moisture on the vapor barrier is another red flag. These signs often mean your crawl space insulation is failing or missing entirely.
Should I insulate the crawl space walls or the subfloor?
Insulate crawl space walls if the space is encapsulated, as this keeps it within your home’s thermal envelope. For vented crawl spaces, insulate the subfloor between joists. Using the wrong method can lead to cold floors or moisture problems, so the choice depends on whether the crawl space is sealed or ventilated.
Can I insulate my crawl space myself?
You can insulate your crawl space yourself, but it’s risky unless the space is dry, accessible, and you understand proper materials and methods. DIY attempts often skip critical steps like air sealing or moisture control, which can lead to mold, rot, or insulation failure—resulting in costly redos.
What’s the difference between open-cell and closed-cell spray foam in a crawl space?
The main difference between open-cell and closed-cell spray foam in a crawl space is moisture resistance. Closed-cell foam is dense, water-resistant, and doubles as an air and vapor barrier—ideal for Connecticut’s damp conditions. Open-cell is cheaper but absorbs moisture, making it unsuitable for below-grade use.
Will insulating my crawl space help with humidity in the rest of the house?
Absolutely. A poorly sealed crawl space acts like a moisture engine, pumping damp air into your home’s living areas—especially if you’ve got hardwood floors or HVAC ducts running overhead. A properly insulated and sealed crawl helps control indoor humidity, improves air quality, and even protects your flooring from warping or cupping.
Conclusion: Choosing the Right Insulation for Your Crawl Space
So, what’s the best crawl space insulation?
That depends on your setup. But the right choice will block moisture, seal air leaks, and actually last.
We’ll help you choose the right material for your home—not just the most expensive one.
At Nealon Insulation, we’ve been doing this since 1977. Crawl spaces, attics, walls—you name it. We don’t do shortcuts, and we don’t push products you don’t need. Just smart solutions that make your home feel better and cost less to run.
👉 Ready to fix your crawl space for good? Schedule your free inspection here. We’ll crawl it, quote it, and fix it like it’s our own.

What Is the Best Insulation for Walls?
Your walls are doing more than just holding up your roof. They’re the front line in your battle for comfort, efficiency, and quiet. So let’s make sure they’re pulling their weight.
If your home’s walls are hollow, poorly insulated, or stuffed with 1970s-era fiberglass, it’s time for an upgrade. But with all the choices—spray foam, fiberglass, cellulose, mineral wool—how do you know which one actually works best?
Short answer: it depends on your home, your goals, and your budget. Long answer? You’re about to find out.
Welcome to your guide to the best insulation for walls, brought to you by a team that’s been insulating homes across Connecticut since bell bottoms were cool the first time.
Why Wall Insulation Matters More Than You Think
Most people don’t think about the insulation behind their walls—until they feel a draft, get slapped with a sky-high energy bill, or hear every step their kids take in the next room.
Wall insulation plays a critical role in:
- Regulating temperature between rooms and across floors
- Lowering heating and cooling bills
- Reducing noise from outside or within the house
- Blocking moisture and air leaks that lead to mold and rot
In older Connecticut homes especially, exterior walls are often under-insulated—or not insulated at all. That means you're paying to heat or cool the outdoors, and probably not enjoying the comfort you should indoors.
Know Your Options: Common Types of Wall Insulation
Let’s break down the top players when it comes to wall insulation. Each one has its pros and cons—and the right one depends on your goals.
1. Fiberglass Batts (The Budget Classic)
Cheap, fast, and available at every big box store. Fiberglass batts are great for open wall cavities and new construction, but they can leave gaps and don't stop air movement well.
Good for: Budget jobs, open framing, simple installs
Not ideal for: Air sealing or older homes with weird wall layouts
🔗 Discover more about fiberglass insulation
2. Dense-Packed Cellulose (The Retrofit Hero)
Cellulose is made from recycled paper, but don’t let that fool you—it’s a beast at filling wall cavities, sealing air leaks, and dampening sound. We often use it to insulate existing walls without tearing them open.
Good for: Older Connecticut homes, energy upgrades, air sealing
Not ideal for: Places with high moisture exposure unless paired with proper vapor barriers
🔗 Learn more about cellulose insulation
Here's How the Dense Pack Cellulose Works
3. Spray Foam (The Premium Performer)
Closed-cell spray foam gives you high R-value, strong air sealing, and moisture resistance—all in one shot. It’s more expensive, but it performs like a champ and adds structural strength.
Good for: Cold climates, tight spaces, moisture-prone areas
Not ideal for: Tight budgets or retrofits in finished walls
🔗 Explore spray foam insulation
How to Choose the Best Insulation for Your Walls
Here’s what really matters when deciding:
- Age of your home: Old homes? Cellulose is often the MVP.
- Wall access: Open walls = more options. Closed walls = think dense-pack.
- Moisture risk: Go with closed-cell spray foam or mineral wool in damp spots.
- Noise issues: Use mineral wool for quiet, or cellulose for a solid balance.
- Budget: Fiberglass wins on price, spray foam wins on performance.
When Should You Insulate or Re-Insulate Your Walls?
There’s no universal timer, but here are 5 moments when wall insulation becomes a smart move:
- Your walls feel cold in winter or hot in summer
- You’re renovating, replacing siding, or opening up walls
- Your energy bills have climbed for no obvious reason
- You hear outside noise clearly from inside
- Your home was built before the 1980s (when insulation wasn’t required)
🔗 See more wall insulation services for Connecticut homeowners
7 Big Benefits of Proper Wall Insulation
- Lower Energy Bills: Cut heating and cooling costs by 15–25%.
- More Consistent Temps: No more hot rooms upstairs or freezing spots in the corner.
- Noise Reduction: Stop hearing your neighbors—or your teenager’s stereo.
- Improved Air Quality: Proper insulation helps block dust, allergens, and outdoor pollutants.
- Moisture Control: Avoid condensation, mold, and wood rot.
- Increased Comfort: A well-insulated home simply feels better.
- Higher Resale Value: Buyers love efficient, well-sealed homes.
FAQs: Wall Insulation in Connecticut
Can you insulate existing exterior walls without removing drywall?
Yes, you can insulate your walls without removing drywall. Nealon Insulation installs dense-packed cellulose or injection foam through small exterior holes, which are patched after. This method upgrades comfort and efficiency without damaging your home’s interior.
What’s the recommended R-value for walls in Connecticut?
The recommended R-value for walls in Connecticut is R-13 to R-21. Older homes with 2x4 walls typically reach R-13 to R-15, while newer homes with 2x6 framing can achieve R-21. Dense-packed cellulose can help improve performance by sealing air gaps, especially in drafty or under-insulated walls.
Does insulating my walls add resale value to my home?
Yes, insulating your walls can increase resale value by boosting energy efficiency and comfort. Buyers appreciate lower utility bills and consistent room temperatures. In older Connecticut homes, upgraded insulation with documented R-values or savings can be a strong selling point.
How do I know what’s currently inside my walls?
To know what’s inside your walls, professionals inspect behind outlet covers or drill small test holes to view or sample insulation. Tools like borescopes or core samplers reveal whether insulation exists and what type it is. This quick, non-invasive check helps determine if upgrades are needed without damaging your walls.
Final Take: Wall Insulation That Works As Hard As You Do
Your walls can be a money pit or a comfort fortress—it depends on what’s inside them. If your energy bills are climbing, rooms feel drafty, or your home’s just not holding temperature, wall insulation might be the missing piece.
And don’t worry—you don’t need to have it all figured out. That’s our job.
At Nealon Insulation, we’ve been helping homeowners across Connecticut insulate smarter for nearly 50 years. From dense-packed cellulose in old beach homes to spray foam in new builds, we know how to match the right solution to your space, your needs, and your budget.
👉 Get your free wall insulation assessment today and let’s make those walls work for you.

How to Vac Out an Attic Full of Insulation
Ever wonder what's lurking above your ceiling? If your attic's packed with old, dusty insulation, you’re not alone—and clearing it out might be one of the best upgrades you can make for your home.
Whether you’re dealing with water damage, pest mess, or just outdated materials, vacuuming out attic insulation is a smart first step toward better energy efficiency and cleaner air. But it’s not as simple as dragging out a shop vac and diving in. This guide breaks it down the Nealon way—clear, safe, and practical for Connecticut homeowners.
Let’s walk through what it takes to do the job right—and when it’s time to call in a pro.
Full write up below the video.
Why Homeowners in CT Remove Attic Insulation
Attic insulation doesn’t last forever—and in Connecticut, our cold winters and humid summers don’t help. Over time, insulation can break down, get damp, or even turn into a home for pests. If you've noticed rising energy bills or musty odors, your attic might be the culprit.
Here are a few common reasons homeowners in CT decide to remove their attic insulation:
- Moisture damage: Leaky roofs or high humidity can soak insulation, making it useless.
- Rodents or pests: Mice, squirrels, and even bats can nest in insulation, leaving behind droppings and odor.
- Mold and mildew: Once mold gets into insulation, it spreads fast and needs to go.
- Upgrading efficiency: Older homes often have outdated insulation that doesn’t meet modern energy codes.
Understanding the Attic Insulation Removal Process
Removing insulation might sound simple, but there’s a right way to do it—especially if you want to avoid making a mess or breathing in harmful particles.
The process starts with an inspection to figure out what type of insulation you’re dealing with. In many CT homes, you'll find either blown-in cellulose, fiberglass batts, or older vermiculite (which can contain asbestos and needs special handling).
There are two main ways to remove insulation:
- Manual removal: This involves physically pulling out batts or scooping up loose fill.
- Vacuum removal: A powerful vacuum system sucks the insulation into large bags. It’s cleaner and faster—especially for blown-in types.
Tools and Equipment Needed for Vacuum Removal of Insulation
Vacuuming out attic insulation requires more than your average shop vac. Here’s what the pros use—and what you’ll need if you’re thinking of doing it yourself.
Equipment Checklist:
- High-powered insulation vacuum (HEPA-rated)
- Flexible vacuum hoses
- Insulation collection bags
- Respirator mask, goggles, gloves, and disposable suit
- Duct tape and plastic sheeting
Having the right gear keeps your home clean and your lungs safe.
Step-by-Step Guide to Vacuuming Out Attic Insulation
1. Prep the Area
Seal off access points, lay down plastic sheeting, and ensure good lighting.
2. Gear Up
Suit up in safety gear and double-check all vacuum components.
3. Start the Vacuum
Work from the back of the attic toward the access point in overlapping passes.
4. Final Cleanup
Vacuum or sweep remaining debris. Bag it all up and dispose of it safely.
When to Call a Pro Instead
Vacuuming insulation sounds easy—until you're halfway through with a clog in your hose and a dust cloud in your house. Consider calling a pro if:
- The attic has rodent or mold contamination
- Insulation may contain asbestos
- The space is tight or steep
- You lack the proper equipment
Professionals make the process faster, safer, and often more cost-effective. Check out our attic insulation services to see what we can do for your space.
FAQs: Vacuuming Out Attic Insulation
Is it safe to vacuum out attic insulation myself?
Yes, it's safe to vacuum out attic insulation yourself if you use proper protection—respirator, goggles, gloves, and disposable coveralls. Seal off the house, ventilate the area, and work slowly. For vermiculite or contaminated insulation, hire a professional.
What type of vacuum do I need to remove attic insulation?
You need a commercial-grade HEPA vacuum to remove attic insulation. Standard shop vacs can’t handle the fine dust—especially from cellulose—and will clog quickly. A HEPA vacuum ensures proper filtration and safe cleanup.
How long does it take?
Removing attic insulation takes 6–15 hours for a DIY job and 4–6 hours for professionals on a typical 1,500 sq ft attic. Pros work faster using commercial equipment and efficient cleanup methods.
Any DIY tips from homeowners?
Yes—DIY insulation removal goes smoother with two people. Bags fill quickly, so have extras ready. Use duct tape to secure hose connections and patch tears. Stay organized and take safety precautions throughout the job.
What mistakes should I avoid?
Avoid common insulation removal mistakes: don’t skip safety gear, never step between joists, and plan for proper disposal. These errors can lead to injury, home damage, or hazardous exposure. Preparation and caution are key.
Conclusion
Tackling attic insulation removal on your own can save money, but it’s no small job. Between the dust, the equipment, and the tight spaces, it pays to know what you're getting into. And if there’s any sign of damage, pests, or questionable materials, don’t take chances—get a pro.
At Nealon Insulation, we handle every step from removal to replacement using high-efficiency materials that keep your home warmer in winter and cooler in summer. If your attic’s ready for a fresh start, check out our attic insulation services to see how we can help.
👉 Ready to line up insulation that actually performs? Contact Nealon Insulation for a walkthrough or quote.
Let's Work Together
Ready to transform your home into an energy-efficient haven? Schedule your free energy assessment today and experience the Nealon difference for yourself.